Rea-Sixty User Manual
Native REAPER ↔ SSL UF8 / UC1 / UF1 driver
Documents v0.6.7. This is the same file that ships inside the extension under Settings → Manual.
Introduction
What Rea-Sixty is
Rea-Sixty is a REAPER extension that drives the SSL UF8, UC1 and UF1 control surfaces directly from REAPER. It replaces SSL 360° on the host side. One extension file installs into REAPER’s UserPlugins directory; SSL 360° no longer needs to run, the surface is no longer behind a virtual MIDI port, and the per-track SSL plug-in that SSL 360° requires for track colours is no longer needed.
What goes out on the USB wire is the same byte protocol SSL 360° uses, re-emitted by REAPER. No SSL binaries, firmware, or trademarks are redistributed.
What you need
- REAPER on macOS (Apple Silicon or Intel), Windows (x64), or Linux (x86_64). Tested against REAPER 6 and 7 through 7.75.
- An SSL UF8, UC1 or UF1 plugged in over USB-C. Any combination works, and so does a single surface on its own.
- ReaImGui (install via ReaPack from Extensions → ReaPack → Browse packages → ReaImGui). Without ReaImGui the Settings window does not open, but hardware control still works.
- SSL 360° must not be running. It claims the vendor interface of every SSL surface exclusively. If it is running when REAPER starts, the surface will not appear. The error goes to the log file, and to REAPER’s Console only when Console output is ticked in Settings → About.
Runtime dependencies (libusb, hidapi) ship inside the platform archives; no separate install needed.
Versioning
This manual documents Rea-Sixty v0.6.7. Earlier manuals (anything dated before 2026-09-06) are superseded.
Each release also carries a codename, shown on the About tab below the version. The codename has no functional role — just makes the release easier to refer to in conversation.
Installation
Via ReaPack (recommended)
In REAPER:
- Extensions → ReaPack → Manage repositories → Import/export → Import repositories
- Paste:
https://github.com/acklin83/reaper-scripts/raw/main/index.xml - Browse packages → filter
Rea-Sixty→ Install - Restart REAPER
- Preferences → Control/OSC/Web → Add → Rea-Sixty
First-run setup buttons live in Settings → About:
- Windows: Install UF8/UC1/UF1 WinUSB driver (one UAC prompt)
- Linux: Install Linux udev rule (one pkexec prompt)
- macOS: no setup needed; IOKit already grants libusb access to the device class
Manual install
Download from https://github.com/acklin83/Rea-Sixty/releases:
- Mac:
rea-sixty-mac-v<version>.zip— three Apple-notarised dylibs. Unzip into~/Library/Application Support/REAPER/UserPlugins/. - Windows:
rea-sixty-win-v<version>.zip— three DLLs. Unzip into%APPDATA%\REAPER\UserPlugins\. - Linux:
rea-sixty-linux-v<version>.tar.gz—reaper_rea-sixty.soplus the two bundled libraries (libusb-1.0.so.0,libhidapi-hidraw.so.0), the udev rule, and INSTALL.txt. Unpack all three files together into~/.config/REAPER/UserPlugins/— the plugin loads the libraries from its own folder, so noapt installis needed. Then apply the udev rule (or use the Install Linux udev rule button in Settings → About).
The Stream Deck Companion plugin (com.reasixty.companion.streamDeckPlugin) is attached to each release separately — it is not part of the ReaPack package. Download it and double-click it; the Stream Deck app installs it.
Enabling the surface
After install, restart REAPER, then:
Preferences → Control/OSC/Web → Add → Rea-Sixty
No MIDI device assignment needed — the extension claims the surfaces over USB on its own.
Uninstall
- Via ReaPack: Browse packages → right-click Rea-Sixty → Uninstall.
- Manual: delete
reaper_rea-sixty.{dylib,dll,so}plus the two runtime libraries (libusb,libhidapi/hidapi) from REAPER’s UserPlugins directory. Remove the Control Surface entry under Preferences → Control/OSC/Web.
Concepts
A handful of terms appear throughout the manual.
Focused track
The track REAPER considers “selected first” — GetSelectedTrack(nullptr, 0). UC1 follows it by default; the SSL Channel Strip / Bus Compressor section reads the focused track’s plug-in.
FX vs Instance
- FX = any audio effect on a REAPER track.
- Instance = the surface-mapped subset only:
- SSL Channel Strip 2 + 4K B/E/G variants
- Harrison 32Classic Channel Strip (32C)
- SSL Bus Compressor 2
- SSL 360° Link
- Combo plug-ins of the above
- User-mapped plug-ins from the FX Learn catalog: Channel Strip or Bus Compressor domain, or UF8-only with
uf8Modeset
Every Instance is an FX. Most FX are not Instances.
The distinction matters for two pairs of cycle actions:
- FX Cycle walks every FX on the track.
- Instance Cycle walks only Instances on the track.
Six action names follow the same rule (per-surface × per-scope × per-cycle-kind). See the Cycle actions section under Native actions.
FX-Cursor
A per-track pointer at the last FX a cycle landed on (the index the next cycle step proceeds from). Persistent across mode changes. When a cycle lands on a learned Instance, the cursor also updates the per-domain Instance index so SSL Strip Mode / UF8 Plug-in Mode follow.
Plug-in identity
When you rename an FX instance in REAPER’s FX chain (“Townhouse Comp” instead of the factory name), Rea-Sixty uses the rename everywhere the colour-bar would otherwise show the factory short name. Internally the rename is resolved by FX-GUID, so reordering or chunk-replacing the FX preserves the binding to the identity.
Domain
The Instance domain (ChannelStrip, BusComp, or None for UF8-only user maps). Drives which UC1 section refreshes when the Instance cursor moves.
Selection Modes
Each strip’s SEL button is hijacked by the active Selection Mode. Toggle modes via the dedicated buttons on the UF8 (mapped through Bindings) or via the per-mode builtin actions.
The modes are global, so a UF1 follows REC and REC + MON too. AUTO and the cycle modes leave its SEL on track selection. On the UF1 the mode retargets its single SEL, and the channel it acts on is the one the fader side is showing: dial the channel encoder to the track you want, then press SEL.
NORM
The default — SEL selects the track in REAPER, and Shift + SEL adds it to the selection. V-Pots default to Pan. No automatic colour-bar overrides on the upper LCD.
REC
Each strip’s SEL toggles arm. V-Pots stay on Pan unless REC + RME integration is on and its V-Pot gain toggle is ticked (next mode).
On the UF1, SEL toggles arm for the channel on the fader, and the SEL LED turns red: bright when the channel is armed, dim when it is not. Track selection is invisible while the mode runs, which is the point: what you need to see when you are arming is what is armed. Anything you have bound to SEL yourself (a double press, a long press) still fires.
REC + MON
Each strip’s SEL toggles arm + monitor. Otherwise like REC. Same on the UF1.
REC + RME (TotalReaper integration)
A sub-mode of REC / REC+MON. When Settings → Modes → REC → “Enable RME / TotalReaper integration” is on and TotalReaper is installed:
- V-Pot rotation = preamp gain ±1 dB (per the V-Pot rotation → Preamp gain toggle)
- V-Pot push / Cut / Solo = configurable TotalReaper actions (48V toggle, pad toggle, phase invert, AutoLevel toggle). Polarity is a UC1 assignment; the UF8 half has three pickers, not four.
- Shift+V-Pot rotation = change input channel (per the V-Pot rotation + Shift → Change input channel toggle)
- The strip’s colour bar shows the input name (“Mic 1”, “Line 3”) instead of the CS variant label
The UC1 and the UF1 get the same thing on their own controls, with their own assignments in Settings, so you can opt one surface in without the other. On the UC1 it is Encoder 2, Cut, Solo and Polarity. On the UF1 it is the V-Pot above the fader (rotation and push), Cut and Solo, all acting on the channel the fader side is showing. Out of the box the UF1 has 48V on the push, pad on Cut and phase on Solo, with its rotation already on gain. The UC1 also has 48V on the Encoder 2 push and pad on Cut, but puts phase on its POLARITY key, leaves Solo unassigned and starts with its rotation toggles off, and the UF8’s three pickers all start on None.
Every surface reads out the same way, because a UF8 strip and the UF1 channel are the same channel strip: 48V Pd Ph on the left of the value line, the preamp gain on the right, the V-Pot readout bar under it riding the gain from 0 to +75 dB, and the channel-strip type cell naming the hardware input (“MA 5”, “An 1”) in place of the plug-in name. A track TotalReaper has said nothing about keeps its normal readout rather than showing a made-up 0.0 dB.
While REC + RME is engaged, the UF1’s Cut and Solo LEDs show the TotalMix state they are switching, not the track’s mute and solo. With the Extender on they keep working on the channel the fader side shows, including in a send view: a send has no preamp, so the preamp actions win there.
AUTO
The strip’s SEL steps the track’s automation mode, one REAPER mode per press, wrapping at the end: Trim/Read → Read → Touch → Write → Latch → Latch Preview → back to the start. The V-Pots are not taken over — since 2026-06-24 they keep doing whatever they were doing.
When Settings → Modes → AUTO → “Show only tracks armed for automation writing (hide Trim / Read)” is on, tracks set to Trim or Read disappear from the surface so only writing-armed tracks remain visible.
Leaving AUTO restores the previously-visible track list and refocuses the surface on the selected track.
If a Selection Set is active and Settings → Modes → AUTO → “Selection-Set Auto-Mode” is set to a value other than None, recalling a selset in AUTO mode auto-arms the set’s tracks to that automation mode. Leaving AUTO reverts those tracks to Trim/Read.
FX Cycle (V-Pot Sel-Mode)
Each strip’s V-Pot rotation walks every FX on the strip’s track. Push opens the active FX’s floating window. The strip’s colour bar shows the FX-cursor’s current FX name.
Instance Cycle (V-Pot Sel-Mode)
Each strip’s V-Pot rotation walks only Instances (CS / BC / UF8-Mode-learned) on the strip’s track. Push opens the active Instance’s floating GUI. No-op when the strip’s track has fewer than 1 Instance.
When the cycle lands on a learned Instance the per-domain Instance index updates so SSL Strip Mode + UF8 Plug-in Mode + the UC1 sections follow.
Channel Encoder modes
The large notched CHANNEL encoder (in the right-hand panel, pushable, with the cursor pad well below it rather than around it) runs one of sixteen modes. Switch with the corresponding Encoder Mode → … action on a surface key, or from REAPER’s own action list, where each mode has a Rea-Sixty: UF8 Encoder → … action for a keyboard shortcut, a foot switch or a Stream Deck tile. Either route shows the live mode as a ticked action. The current mode persists across REAPER restarts.
Tapping the mode that is already live returns the encoder to Channel Select, which is what SSL 360° does. Channel Select itself does not toggle away.
Hold the encoder’s push and turn to pick a mode on the surface. While you hold it, the scribble strips list the modes around the current one: the current mode sits on strip 4 with its top soft key lit, and each detent moves one mode on. Let go and the encoder stays in that mode. Which modes the ring offers, and in what order, is set under PUSH in Settings → Bindings → UF8: tick a mode to include it, move it with ▲ / ▼. All sixteen are in from the factory. The mode keys and actions above reach every mode, ticked or not.
The push fires when you let go, and only if you did not turn. Held past half a second and let go without turning, it does nothing: that is a mode pick called off. The push has no long press.
The cursor pad and the push have their own bindings in every encoder mode. In Settings → Bindings → UF8 the five pad keys and PUSH show the bindings of the mode the UF8 is in, and the Encoder mode drop-down above the editor switches the mode, on the surface too. Out of the box every mode carries the bindings these six keys had before, so nothing changes until you give a mode its own.
| Mode | Rotation acts on | Notes |
|---|---|---|
| Channel Select | Move REAPER track selection ± | Default mode. Strips re-bank to keep selection visible. |
| Nudge | Playhead nudge | Step size is Rea-Sixty’s own, under Settings → Modes → Nudge: an amount plus a unit, one grid step by default |
| Mousewheel | Synthesised scroll-wheel under the mouse cursor | Use to scroll plug-in windows or Project Browser |
| Markers | Step prev / next marker | Seeks with playback following, it does not stop the transport |
| Bank by 1 | Shift the surface 1 strip left/right | Sub-strip precision |
| Last Touched Param | Step the last-touched REAPER param ± | Fine increments |
| Instance Cycle | Walk Instances on the focused track | Same behaviour as the V-Pot Sel-Mode Instance Cycle, focused-track scope. The UF1’s header shortens it to Inst Cycl. |
| FX Cycle | Walk every FX on the focused track | Focused-track scope |
| Instance Cycle (across tracks) | Walk Instances on the focused track, then cross to the next track | One detent per track boundary; lands on the neighbour’s first (fwd) / last (back) Instance. Empty neighbour is still selected (dead detent). Hard-stops at the project edge, no within-track wrap. |
| FX Cycle (across tracks) | Walk every FX on the focused track, then cross to the next track | Same cross-track behaviour as above, for all FX. SSL 360°-native feel. |
| FX Move (in chain) | Move the active FX up / down inside the focused track’s chain | Within-chain only, hard-stop at both ends. |
| Selset Cycle | Step through populated Selection Set slots (off → 1 → 2 … → off) | Skips empty slots |
| CS Cycle (Favourites) | Step the active Channel Strip through the CS favourite slots | Carries values across the swap, or restores each favourite’s own settings (see chapter Favourites). Empty slots are skipped; wrapping follows Wrap Plug-in Cycle. |
| BC Cycle (Favourites) | The same for the Bus Compressor | Uses the BC favourite slots and the BC copy/own setting. |
| Favourite Cycle (Focused Domain) | Whichever of the two the focused parameter belongs to | Falls back to the domain you last touched. Saves binding both cycles when one encoder should follow whatever is under your hand. |
| Lanes | The edit cursor, as Nudge | Shift + rotation plays the next lane of the selected track, or, on a track with a comp lane, gives the comp area under the edit cursor the next take. The cursor pad and the push become the Lanes keys. See chapter Fixed lanes. |
Shift + rotation is the encoder’s Shift binding, which factory-defaults to Instance Cycle, not to Bank by 1. Rebind it in Settings → Bindings → Channel Encoder like any other slot.
The encoder also drives SEL-Mode cycle when Settings → Modes → FX / Cycle → “UF8 Channel Encoder” is ticked AND a cycle-kind Selection Mode is engaged. In that override the encoder steps the active Selection-Mode cycle instead of its normal mode.
Nav Mode (Markers + Regions)
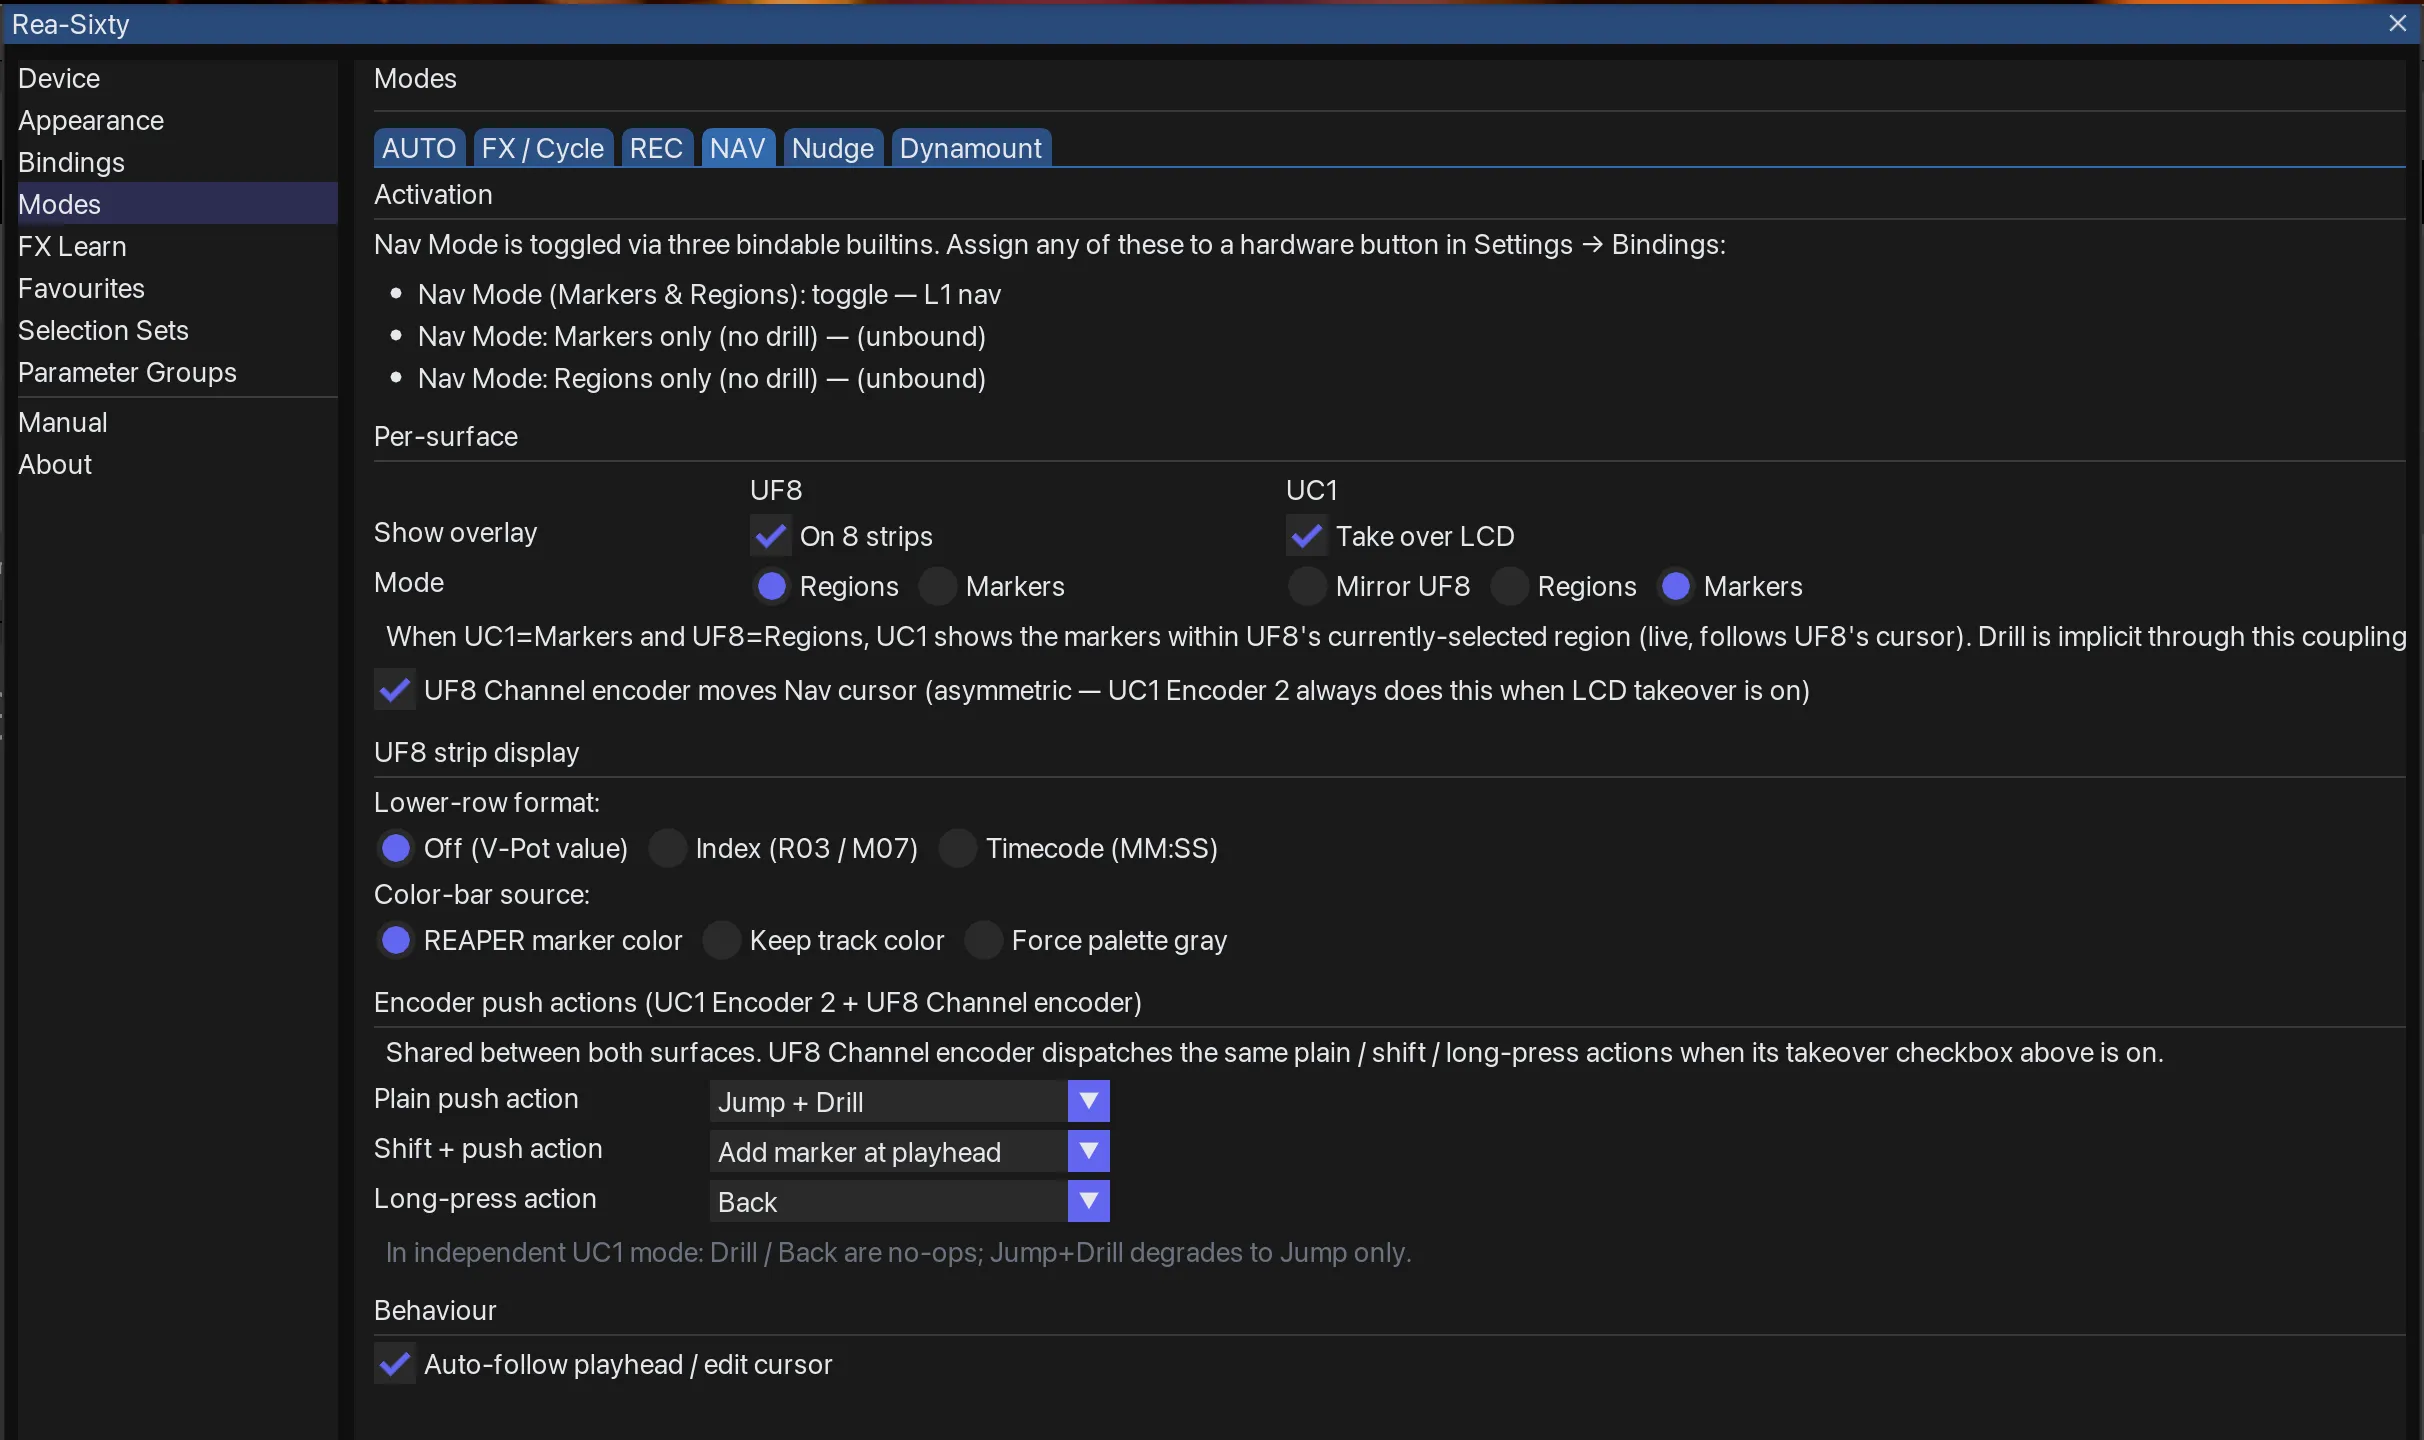
Modes → NAV — marker and region navigation, the per-surface overlay and the encoder push actions.
Nav Mode is a surface overlay, separate from the Selection Modes, that turns your surfaces into a live marker and region jump panel: eight strips on the UF8, the central LCD on the UC1, the four display soft-keys on the UF1. Each surface decides for itself whether it joins in. Nav Mode can be active alongside any Selection Mode, and toggling it does not change the active Selection Mode.
Engaging Nav Mode
Three bindable builtins:
- Nav Mode (Markers & Regions): toggle — toggle on / off, opens the default view (set in Settings → Modes → NAV).
- Nav Mode: Markers only (no drill) — toggle on / off, locks the view to MarkersAll (no drill into regions).
- Nav Mode: Regions only (no drill) — toggle on / off, locks the view to Regions (region presses jump only, no drill).
Bind any of these to a UF8 / UC1 / UF1 button in Settings → Bindings. The same button toggles Nav Mode off again.
Three views
- Regions — each strip is one REAPER region. Top-soft-key press jumps the transport to that region’s start (and, by default, drills into its markers).
- MarkersInRegion — markers inside the region the playhead is in. With Auto-Follow on, auto-rolls into the next region when the playhead crosses out.
- MarkersAll — flat list of every marker in the project.
Which view a surface opens on is set per surface in Settings → Modes → NAV, see the next chapter. The old single Default view setting, with its Last used option, went away on 2026-05-28.
What the UF8 strips show
Per strip while Nav Mode is active:
- Top-soft-key — press = jump (and, in Regions view, optionally drill). LED colour = the region / marker’s REAPER colour (or grey if Colour-bar source: Force palette grey is set).
- Colour-bar label (the channel-strip type cell) — the marker / region name. One without a name of its own reads
Region 3/Marker 7, using the number REAPER shows in the ruler, so an unnamed entry is still an entry rather than a blank strip. The UC1’s carousel and the region readout use the same fallback. - Scribble strip lower row — configurable: Off (V-Pot value preserved) / Index (
R003,M007) / Timecode (MM:SS). - Colour bar — the marker / region’s colour (or palette grey, per setting).
Two settings per surface
The NAV pane in Settings, under Modes, asks each surface the same two questions, and they are independent of each other.
Shows says what the surface displays while Nav Mode is on.
Offleaves the surface in its normal view.Mirror UF8follows the UF8’s list.Regionsis every region, whatever the UF8 is doing.Markersis every marker in the project, whatever the UF8 is doing.Markers in regionis the markers inside the region the UF8’s cursor is on, and falls back to every marker while the UF8 is not showing regions.
The UF8 is the view authority, so it has no Mirror, and it has no Markers in region either: its own view moves there when you drill.
Encoder drives Nav says whether that surface’s encoder steers. On, rotation moves the cursor and the push fires that surface’s three actions. Off, Nav Mode does not touch the encoder at all: rotation keeps doing whatever Encoder Mode you have selected, and the push keeps its binding.
Because the two are separate, a surface can show the list without steering it, or steer it without its display changing.
Each surface also has its own set of three push actions (plain, shift, long-press). They used to be one set shared by all, which could not be right, because Drill works on the UF8 and does nothing on a surface with a list of its own.
A list of its own costs the drill. On a surface set to Regions, Markers or Markers in region, Drill and Back do nothing and Jump + Drill collapses to Jump only. There is nothing to drill into inside a list that is already filtered to one kind, and the pane says so under the action table.
Nav Mode on the UF8
The eight strips, as described above, plus:
- Top soft-key: jump. In Regions view it follows the Region press setting.
- Bank Left / Bank Right and Page Left / Page Right: both page the strips eight at a time.
- Quick 1: back to Regions. Hard-coded, so it works whether or not the encoder is handed over. It does nothing under a view lock, or when you are already in Regions.
- Quick 2: switch to the flat MarkersAll view, with the same lock gating.
- CHANNEL encoder, when Encoder drives Nav is on: rotation moves the cursor one item per detent, and the push fires the UF8’s three actions.
All of that except the encoder rotation applies only while the UF8’s Shows is something other than Off. The rotation follows Encoder drives Nav alone. With it Off the surface is out of Nav Mode entirely and every one of those keys does its normal job.
Nav Mode on the UC1
The central LCD becomes a marker carousel showing previous, current and next. Encoder 2 steers it when Encoder drives Nav is on: rotation moves the cursor, the push fires the UC1’s three actions.
The coupling. Set the UC1 to Markers in region and the UF8 to Regions, and the UC1 shows the markers inside whichever region the UF8’s cursor sits on, following it as you turn. That coupling replaces drilling, and while it is on, drilling stands down everywhere so it cannot pull the region away from under the UC1. Until September 2026 it was what plain Markers did whenever the UF8 happened to be showing regions, which meant one entry with two meanings. Your old setting was carried over to the new entry, so nothing changed under you.
Nav Mode on the UF1
- The four display soft-keys carry four entries, with the one under the cursor lit. Press one to jump, and the name flashes on the time field. Seven-segment digits have no K, M, V, W or X, so a name using those letters reads only approximately there.
- Bank Left / Bank Right move the window four at a time.
- The CHANNEL encoder steers when Encoder drives Nav is on: rotation moves the cursor, the push fires the UF1’s three actions. Off, the push keeps its binding, which from the factory shows the focused plug-in’s GUI.
Mirror means the same list, not the same window. The UF1 can sit on entries 9 to 12 while the UF8 shows 1 to 8. The cursor is shared, since that is what the push and the auto-follow act on. Only the window is per surface, and each surface’s window follows the cursor when it moves out of view.
Its own list is genuinely its own. Set to Regions, Markers or Markers in region, the UF1 builds and pages its own list with its own cursor, on the same three rules as the UC1.
Nav Mode takes the soft-key row and nothing else, so the rest of the UF1 screen keeps painting. Holding MODE still gets you the encoder-mode picker (with Encoder drives Nav on, the rotation moves the Nav cursor instead), and the preset browser still takes the screen when you open it. The markers come back when you leave either.
Auto-Follow
Settings → Modes → NAV → Auto-follow playhead / edit cursor (checkbox).
When on, the cursor strip tracks whichever marker / region the playhead is on. In MarkersInRegion view, the overlay auto-rolls into the next region when the playhead crosses out (only after the playhead was first observed inside the current filter region — suppresses the snap-back when you drill manually during playback).
Moving the cursor by hand, on any surface whose encoder is driving Nav, pins it and pauses auto-follow until the playhead catches up, or until you commit (push), exit Nav Mode, drill, or change view.
Region-press behaviour
Settings → Modes → NAV → Region press (UF8 top-soft-key):
- Jump + Drill (default) — press a region’s top-soft-key → transport jumps to region start AND the overlay drills into that region’s markers.
- Jump only — transport jumps; overlay stays on the Regions view.
- Drill only — overlay drills; transport stays put.
RegionsOnly view-lock always suppresses Drill regardless of this setting.
And so does a surface set to Markers in region. That surface is scoped to the region the UF8’s cursor is on, so drilling would move the UF8 out of the region list and leave it with nothing to scope to. In that setup the coupling is the drill: you move over the regions on the UF8, the other surface shows what is inside. One rule, and every path that drills obeys it, the top-soft-key press and the encoder push alike.
UF8 hardware
The UF8 has no transport keys and no jog wheel. The layout below mirrors SSL’s published reference (User Guide Rev 11, p.14-17).
Strips (×8)
Per strip, from top to bottom:
| Control | Function (NORM Selection Mode) | Notes |
|---|---|---|
| Top soft-key | SSL Soft-Key for this strip in the current PAGE bank | Default action SSL Soft-Key (current bank, slot 0..7). Rebindable. |
| Colour TFT (scribble strip) | Upper zone = track name / mode-dependent. Lower zone = parameter readout. Track-colour bar at the bottom. | Hijacked by Plug-in Modes for parameter / FX names. |
| V-Pot rotation | Pan | Re-maps per Selection Mode (REC + RME → preamp gain, once V-Pot rotation → Preamp gain ±1 dB is ticked; FX Cycle / Instance Cycle → walk FX/Instances). In Pan and in Touch mode, each turn writes a point into the track’s pan envelope at the play position, and the value then stays until the envelope’s next point, as a plug-in parameter on a V-Pot does. |
| V-Pot push | Centre Pan | In FX Cycle / Instance Cycle Sel-Modes → open the active FX’s GUI. |
SOLO | Solo | Yellow, the class colour. The track-colour setting in Appearance → Surface display drives the SEL LED, not this one. |
CUT | Mute | |
SEL | Selection-Mode dependent | NORM = exclusive select; REC = arm; REC+MON = arm + monitor; AUTO = cycle automation mode. Long-press fires Spill (folder / VCA) by default: in Folder Mode it opens or closes a folder, in VCA Mode it spills a VCA lead. Long press and double press are yours to rebind in Settings → Bindings. |
| Capacitive touch (fader) | Drives REAPER’s “touch” automation | Alt/Option held during touch → snap back on release (Settings → Behaviour → Keyboard). |
| 100 mm motorised fader | Track volume | 14-bit MCU pitch-bend, two 7-bit halves, 0 to 0x3FFF. |
Above the strips: 8 Top Soft-Keys + bank selectors
A row of 8 buttons above the V-Pots = Top Soft-Keys 1..8. By default each one focuses the SSL plug-in parameter at its strip position within the current PAGE bank (SSL 360° factory behaviour). Rebindable per-button.
In the right-hand panel: 6 small bank-selector buttons — V-POT + 1 / 2 / 3 / 4 / 5. Each picks one of the 6 soft-key pages, in either domain. The bus comp’s plug-in fills only the first two; the other four are ordinary user banks. Default action Select soft-key bank (param 0..5).
Right of the strips: CHANNEL encoder + cursor pad
A single block:
- Large notched CHANNEL encoder (push-button rotary). Rotation drives the active Channel Encoder mode (see chapter Channel Encoder modes). Push: see CHANNEL encoder push below.
- Cursor pad — 5 buttons (4 arrows + central circle), in the right-hand panel below the BANK row. They do not surround the encoder.
- Default behaviour: zoom via the Zoom in vertically / Zoom out vertically / Zoom out horizontally / Zoom in horizontally / Zoom to fit project actions (REAPER actions 40111 / 40112 / 1011 / 1012 / 40295).
- Each Channel Encoder mode has its own five bindings for the pad, filled with the ones above until you change them (see chapter Channel Encoder modes).
- SSL’s reference UG also documents a “Cursor-Transport” mode (press-and-hold CHANNEL encoder to enter; ↓=Stop ↑=Play ←=Rew →=FF centre=Rec). Rea-Sixty leaves these as the standard zoom bindings — rebind them to transport actions via Settings → Bindings if you want SSL’s behaviour.
- NAV / NUDGE / FOCUS mode buttons (around the encoder; ButtonId entries
Nav,Nudge,EncFocus). NAV carries Nav Mode (Markers & Regions): toggle, NUDGE carries Encoder Mode → Nudge, FOCUS carries Encoder Mode → Last Touched Param. They shipped unbound between 2026-05-19 and 2026-09-02. - CHANNEL encoder push (
ChannelPush) — Plug-in: toggle focused GUI, the same thing the UC1’s Encoder-2 push and the UF1’s encoder push do. Also unbound until 2026-09-02. It fires on release, with its own binding per encoder mode; held while you turn the encoder, it picks the mode instead.
Top left of the unit, beside the LAYER keys: Q1 / Q2 / Q3 (“Quick” user keys). Factory bindings — Q1 = Soft-Key Set 8 (SSL Channel Strip), Q2 = Soft-Key Set 9 (SSL Bus Comp), Q3 = Soft-Key Set 1, the first of your own.
Top of the right-hand panel, above the encoder: NORM / REC / AUTO
Three buttons (Selection Mode block), each carrying the mode its silk-screen names: Selection Mode → NORM (SEL Button), Selection Mode → REC + MON (SEL Button) and Selection Mode → AUTO (V-Pot). REC gets REC + MON rather than plain REC, because arm plus monitor is the one you reach for. Rebind to any other Selection Mode action, including FX Cycle and Instance Cycle, via Settings → Bindings. They shipped unbound between 2026-05-14 and 2026-09-02.
Left panel: AUTOMATION row
Six buttons — Read / Write / Touch / Latch / Trim / Off. Default actions Automation: Read, Automation: Write, Automation: Touch, Automation: Latch, Automation: Trim, Automation: Off / Trim (set the automation mode of every selected track).
Left panel: PLUGIN / CHANNEL, PAGE and the SEND/PLUGIN grid
| Button | Default |
|---|---|
PLUGIN | Toggles SSL Strip Mode (Toggle SSL Strip Mode). With Shift held: Toggle UF8 Plug-in Mode. |
CHANNEL | Home (clear routing toggles) — clear send / receive routing toggles so V-Pots / faders return to track volume + pan. |
BANK ← / BANK → | Scroll ±8 strips. In UF8 Plug-in Mode → flip between fader-banks A / B (for 16-strip plug-ins). In a “of focused track” routing view → page the send / receive list by 8 (see Send and Receive views). |
PAGE ← / PAGE → | Step the SSL Soft-Key PAGE bank prev / next, six pages in either domain. |
SEND / PLUGIN 1..8 | 8 buttons. Default Send N ↦ all tracks, with Shift Receive N ↦ all tracks, onto the faders. Each toggles the matching send / receive view. |
FLIP / PAN / FINE
Three buttons, and not together: FLIP sits in the left panel, PAN and FINE at the top of the right one.
| Key | Default action |
|---|---|
FLIP | Toggle FLIP (fader ↔ V-Pot) — swap fader and V-Pot values for the active mode. |
PAN | Toggle V-Pots → Pan — force V-Pots to Pan regardless of the active Selection Mode. Escape hatch from cycle / REC / AUTO modes. It carried the Nav-Mode toggle between Phase 2.8 and 2026-09-02, while the NAV key itself was unbound. |
FINE | Modifier: Shift / Fine (double-click latches) (the SSL “FINE” = “Shift” key). Double-click latches it on; press again to unlatch. With Settings → Devices → V-Pot / encoder feel → Shift activates Fine mode on, holding this also drops V-Pot / encoder step size to ×0.25 (faders unaffected). |
Layer keys
LAYER 1 / 2 / 3 — three SSL DAW layers. All three are bindable and all three sit in the surface schema, so clicking one switches the layer and selects the key for editing, and the live ring follows whichever layer the hardware is on. All three LEDs light. Layer 3’s was dark until September 2026, and the reason was ours: that LED answers to a different frame family than Layer 1 and 2, and everything we sent it was in the family it ignores.
360° key
Default action Open / Close Rea-Sixty Settings — opens / closes the Rea-Sixty Settings window.
Foot-switch jacks
FS1 / FS2 on the back (1/4” TS, normally-closed momentary). No factory bindings — assign via Settings → Bindings (ButtonId Foot1 / Foot2).
What the UF8 does NOT have
For clarity (Rev 11 reference, p.14-17):
- No dedicated
Play / Stop / Record / Loopkeys. Transport-on-cursor-pad is a press-and-hold-CHANNEL feature; Rea-Sixty leaves the cursor pad on zoom by default. - No jog wheel. The CHANNEL encoder is the only large rotary.
- No master fader.
- No HUI/MCU display lane apart from the 8 strip scribble LCDs.
UC1 hardware
The UC1 mirrors the SSL Channel Strip 2 + Bus Compressor 2 controls on a dedicated unit, plus a central control panel for navigation. When UC1 is plugged in alongside UF8, it auto-engages on the focused REAPER track and follows the focused Instance.
The UC1 has no hardware mode-switch — the Channel Strip and Bus Compressor sections are always live, each driving whichever CS or BC Instance is currently in focus on the focused track.
Channel Strip section — left side (EQ + Filters, 12 pots)
Top to bottom on the left half:
- LPF / HPF — two filter pots (low-pass + high-pass frequency).
- HF — Gain + Freq (2 pots).
- HMF — Gain + Freq + Q (3 pots).
- LMF — Gain + Freq + Q (3 pots).
- LF — Gain + Freq (2 pots).
Plus the EQ-section buttons: HF Bell (HF shape), EQ Type (E vs G EQ curve), EQ In (EQ section bypass), LF Bell (LF shape).
Channel Strip section — right side (Dynamics + Channel, 7 pots + 12 buttons)
- Compressor: Threshold + Ratio + Release (3 pots).
- Gate / Expander: Threshold + Range + Hold + Release (4 pots).
Buttons:
- Fast Att Comp — fast attack on the compressor.
- Peak — peak detection.
- Dyn In — Dynamics section bypass.
- Expand — switch the gate into expander mode.
- Fast Att Gate — fast attack on the gate.
Channel section (lowest row of buttons):
- Polarity (phase invert)
- SC Listen (side-chain monitor)
- Solo Clear
- Solo / Cut (track operations — routed to REAPER’s track ops)
- Channel In (channel input enable)
- Fine (FINE / Shift modifier on UC1)
Channel Strip top row (2 pots)
- Input Trim (CS input gain)
- Channel Fader Level / Output Gain (CS fader stage)
When SSL Strip Mode is engaged on the UF8, the Channel Fader Level parameter is what the UF8 motorised faders drive.
The Output Gain pot can be flipped to drive REAPER’s track volume fader instead of the CS Fader Level parameter — see Native actions → Surface-state toggles → Toggle UC1 Out-Gain (Mapped ↔ REAPER Fader). Handy when the track has no SSL channel strip but you still want a hardware volume pot; the LED ring and readout follow the track fader while engaged. When the UC1 is focused on the Master track and there is no Channel Strip on it, the pot drives the Master fader automatically — no toggle needed (see Master track).
Bus Compressor section (7 pots + 1 button)
- Threshold / Ratio / Attack / Release / Make-Up / Mix / SC HPF — 7 pots across the top centre.
- Bus Comp In — single button enabling the BC section.
The BC controls drive the BC Instance on the BC anchor track — the track UC1 has currently pinned for Bus-Comp display. Encoder 2 (the Secondary encoder right of the central screen) scrolls the anchor between BC-bearing tracks.
The mechanical BC VU meter is driven from REAPER via the PreSonus standard GainReduction_dB host-side hook. Rest position = bottom of scale; the needle swings up through GR magnitude.
Central control panel (between CS and BC)
A column of buttons + the central LCD + the two encoders:
- Back / Confirm — navigate the on-screen menus (Routing / Presets / etc.). From the main screen, Back opens the EXT FUNCS menu — a hidden list of channel-strip parameters that don’t have a dedicated pot. Scroll it with the secondary encoder; push the encoder to switch from scrolling to adjusting the selected parameter. For SSL channel-strip plug-ins the list is the fixed SSL set; for user-mapped (non-SSL) channel strips it’s whatever you curate (see FX Learn pane → UC1 EXT FUNCS list).
- Routing — opens the Routing menu on the LCD.
- Presets — opens the Presets menu for the instance the Channel Strip / Bus Compressor selection on that screen points at. An SSL plug-in lists SSL’s own library in its folders, the Harrison 32C its own in Harrison’s; anything else lists REAPER’s presets for it, your own and the factory list. Browsing loads nothing; Confirm does.
- 360° — default Open / Close Rea-Sixty Settings (bindable on its own UC1 entry so it can diverge from the UF8 360° key).
- Magnifier — no factory action; bindable.
CHANNEL encoder (left of the central LCD)
The large rotary on the central control panel. ButtonId Uc1Encoder1 in the bindings system.
- Rotation — Encoder: scroll tracks by default (step REAPER track selection ±, with UC1 focused-track and CS-domain focus following along). Rebindable in Settings → Bindings → UC1 (ROTATE tile under ENCODER 1) — Shift = Encoder: cycle plug-in instance by default; Cmd / Ctrl free.
- When Settings → Modes → FX / Cycle → “UC1 Encoder 1 (CHANNEL)” is ticked AND a cycle-kind Selection Mode is engaged, rotation steps the active Selection-Mode cycle instead, regardless of the binding.
Secondary encoder (right of the central LCD)
ButtonId Uc1Encoder2 in the bindings system; SSL calls it the “Secondary” or “BC” encoder.
- Rotation — Encoder: scroll BC anchor track by default (scroll the BC anchor between BC-bearing tracks). Rebindable, including to Encoder: cycle plug-in instance or Encoder: cycle FX (all on focused track).
- Push — Plug-in: toggle focused GUI by default (toggle floating window of the cursor instance from the most recent cycle). Rebindable.
- Cycle-Control mask includes “UC1 Encoder 2 (BC)” — same SEL-Mode override mechanism as above when ticked + a cycle-kind Selection Mode active.
Central LCD zones
Three addressable zones:
- Channel-Strip readout (zone 0x03) — last-touched CS parameter name + value, e.g. “HF Gain +3.0 dB”. Fades after a few seconds.
- Bus-Comp readout (zone 0x05) — last-touched BC parameter name + value.
- Central main (zone 0x0F) — multi-overlay area. Shows: track-name header + focused Instance variant (default), or the prev / curr / next Instance-carousel triple (after an Instance / FX Cycle just fired), or the BC compressor mode / status, or the Nav-Mode markers/regions carousel. Overlays are mutually exclusive; the most recent claim wins.
Brightness
Two sliders of five steps under Settings → Devices → Brightness, LEDs and LCDs, and both apply to every attached surface: there is one LED level and one display level, not a pair per device. Six Brightness … actions (LEDs +/-, LCDs +/-, Both +/-) drive them from a hardware button.
The same pane carries Sleep, which takes every surface dark after a set number of idle minutes and brings it back on the first thing you touch. Off out of the box.
UC1 GR Calibration
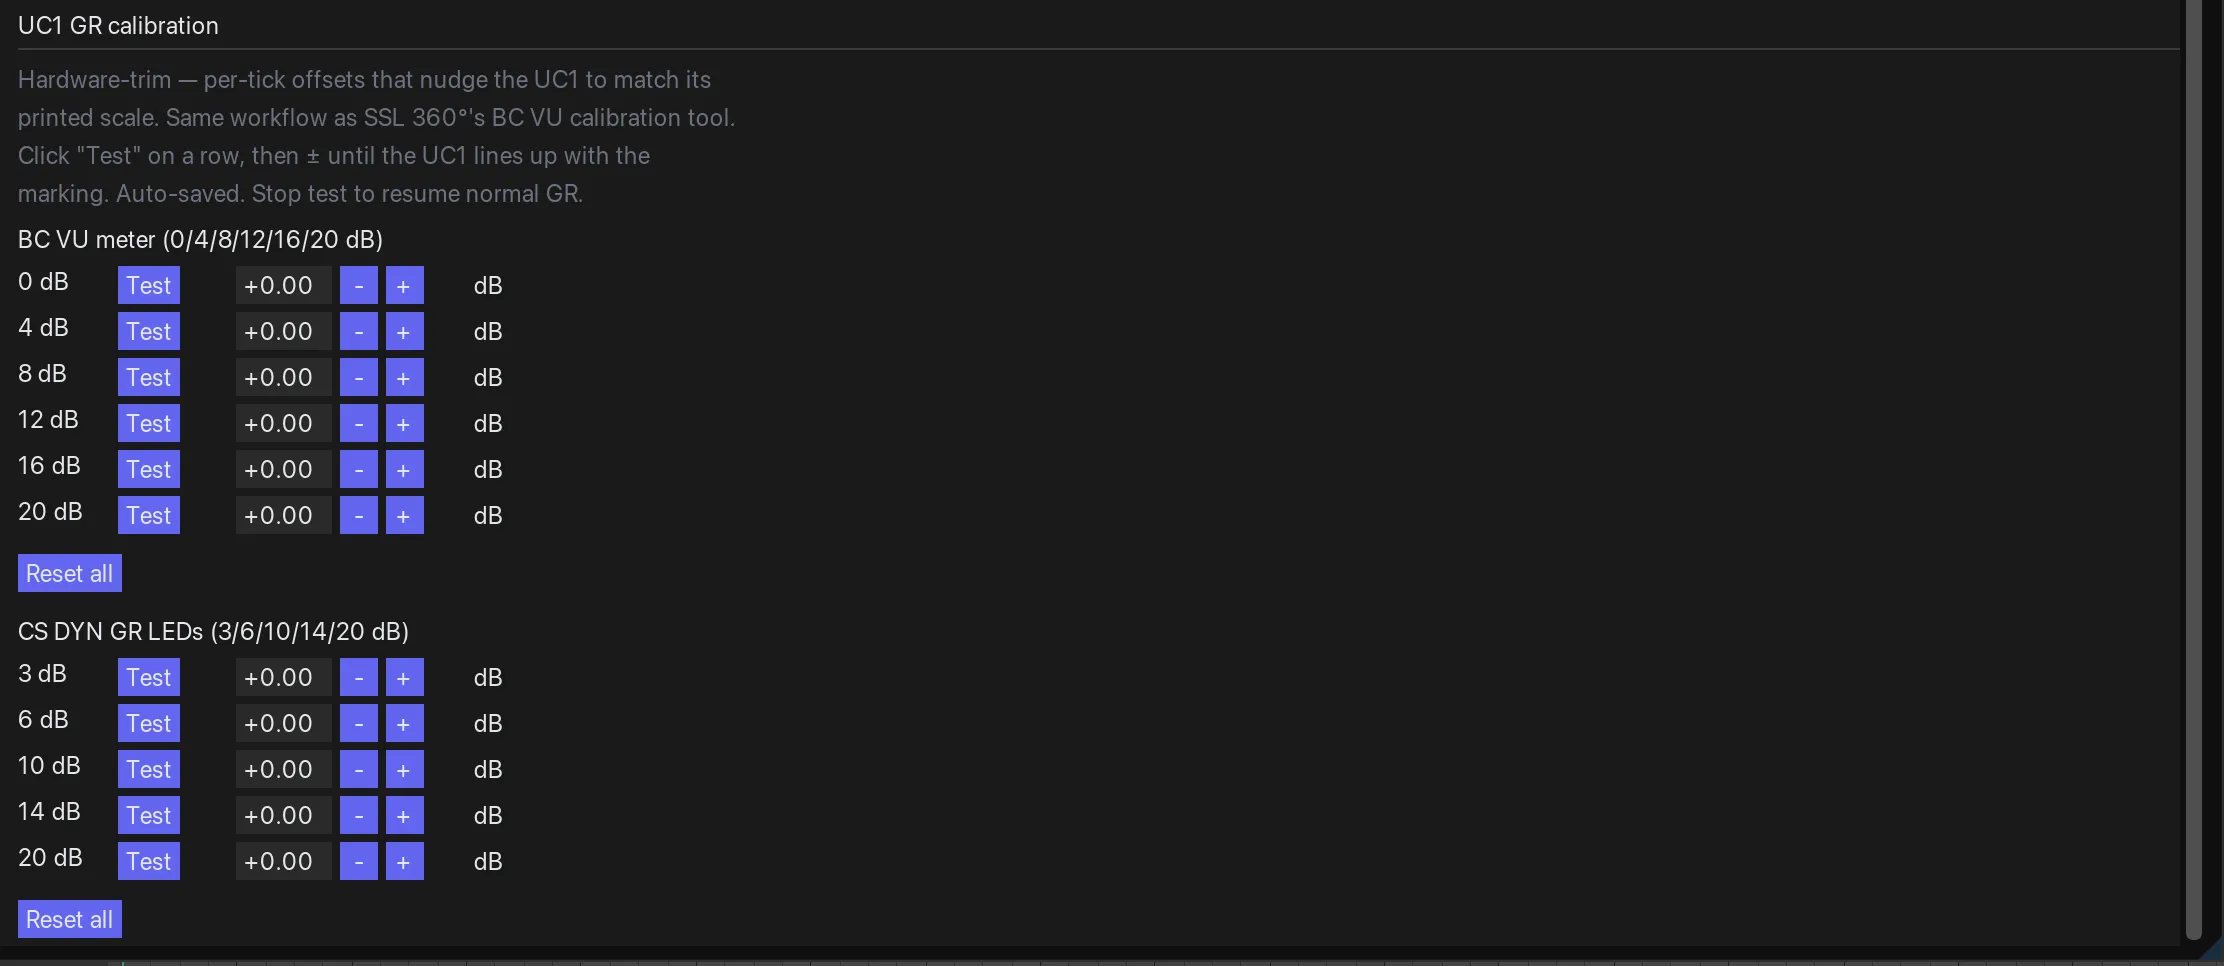
Devices → UC1 GR calibration — a correction offset per printed tick, for the BC VU motor and the CS Dynamics GR LEDs.
If the UC1’s mechanical VU meter or the CS Dynamics GR LEDs drift from their printed scale, a per-tick offset table at the very bottom of Settings → Devices corrects each printed dB tick individually. The workflow mirrors SSL 360°‘s own BC VU calibration tool — click Test next to a tick, then + / - until the UC1 lines up with the printed marking. Auto-saved per-tick. Stop test resumes normal GR.
UF1 hardware
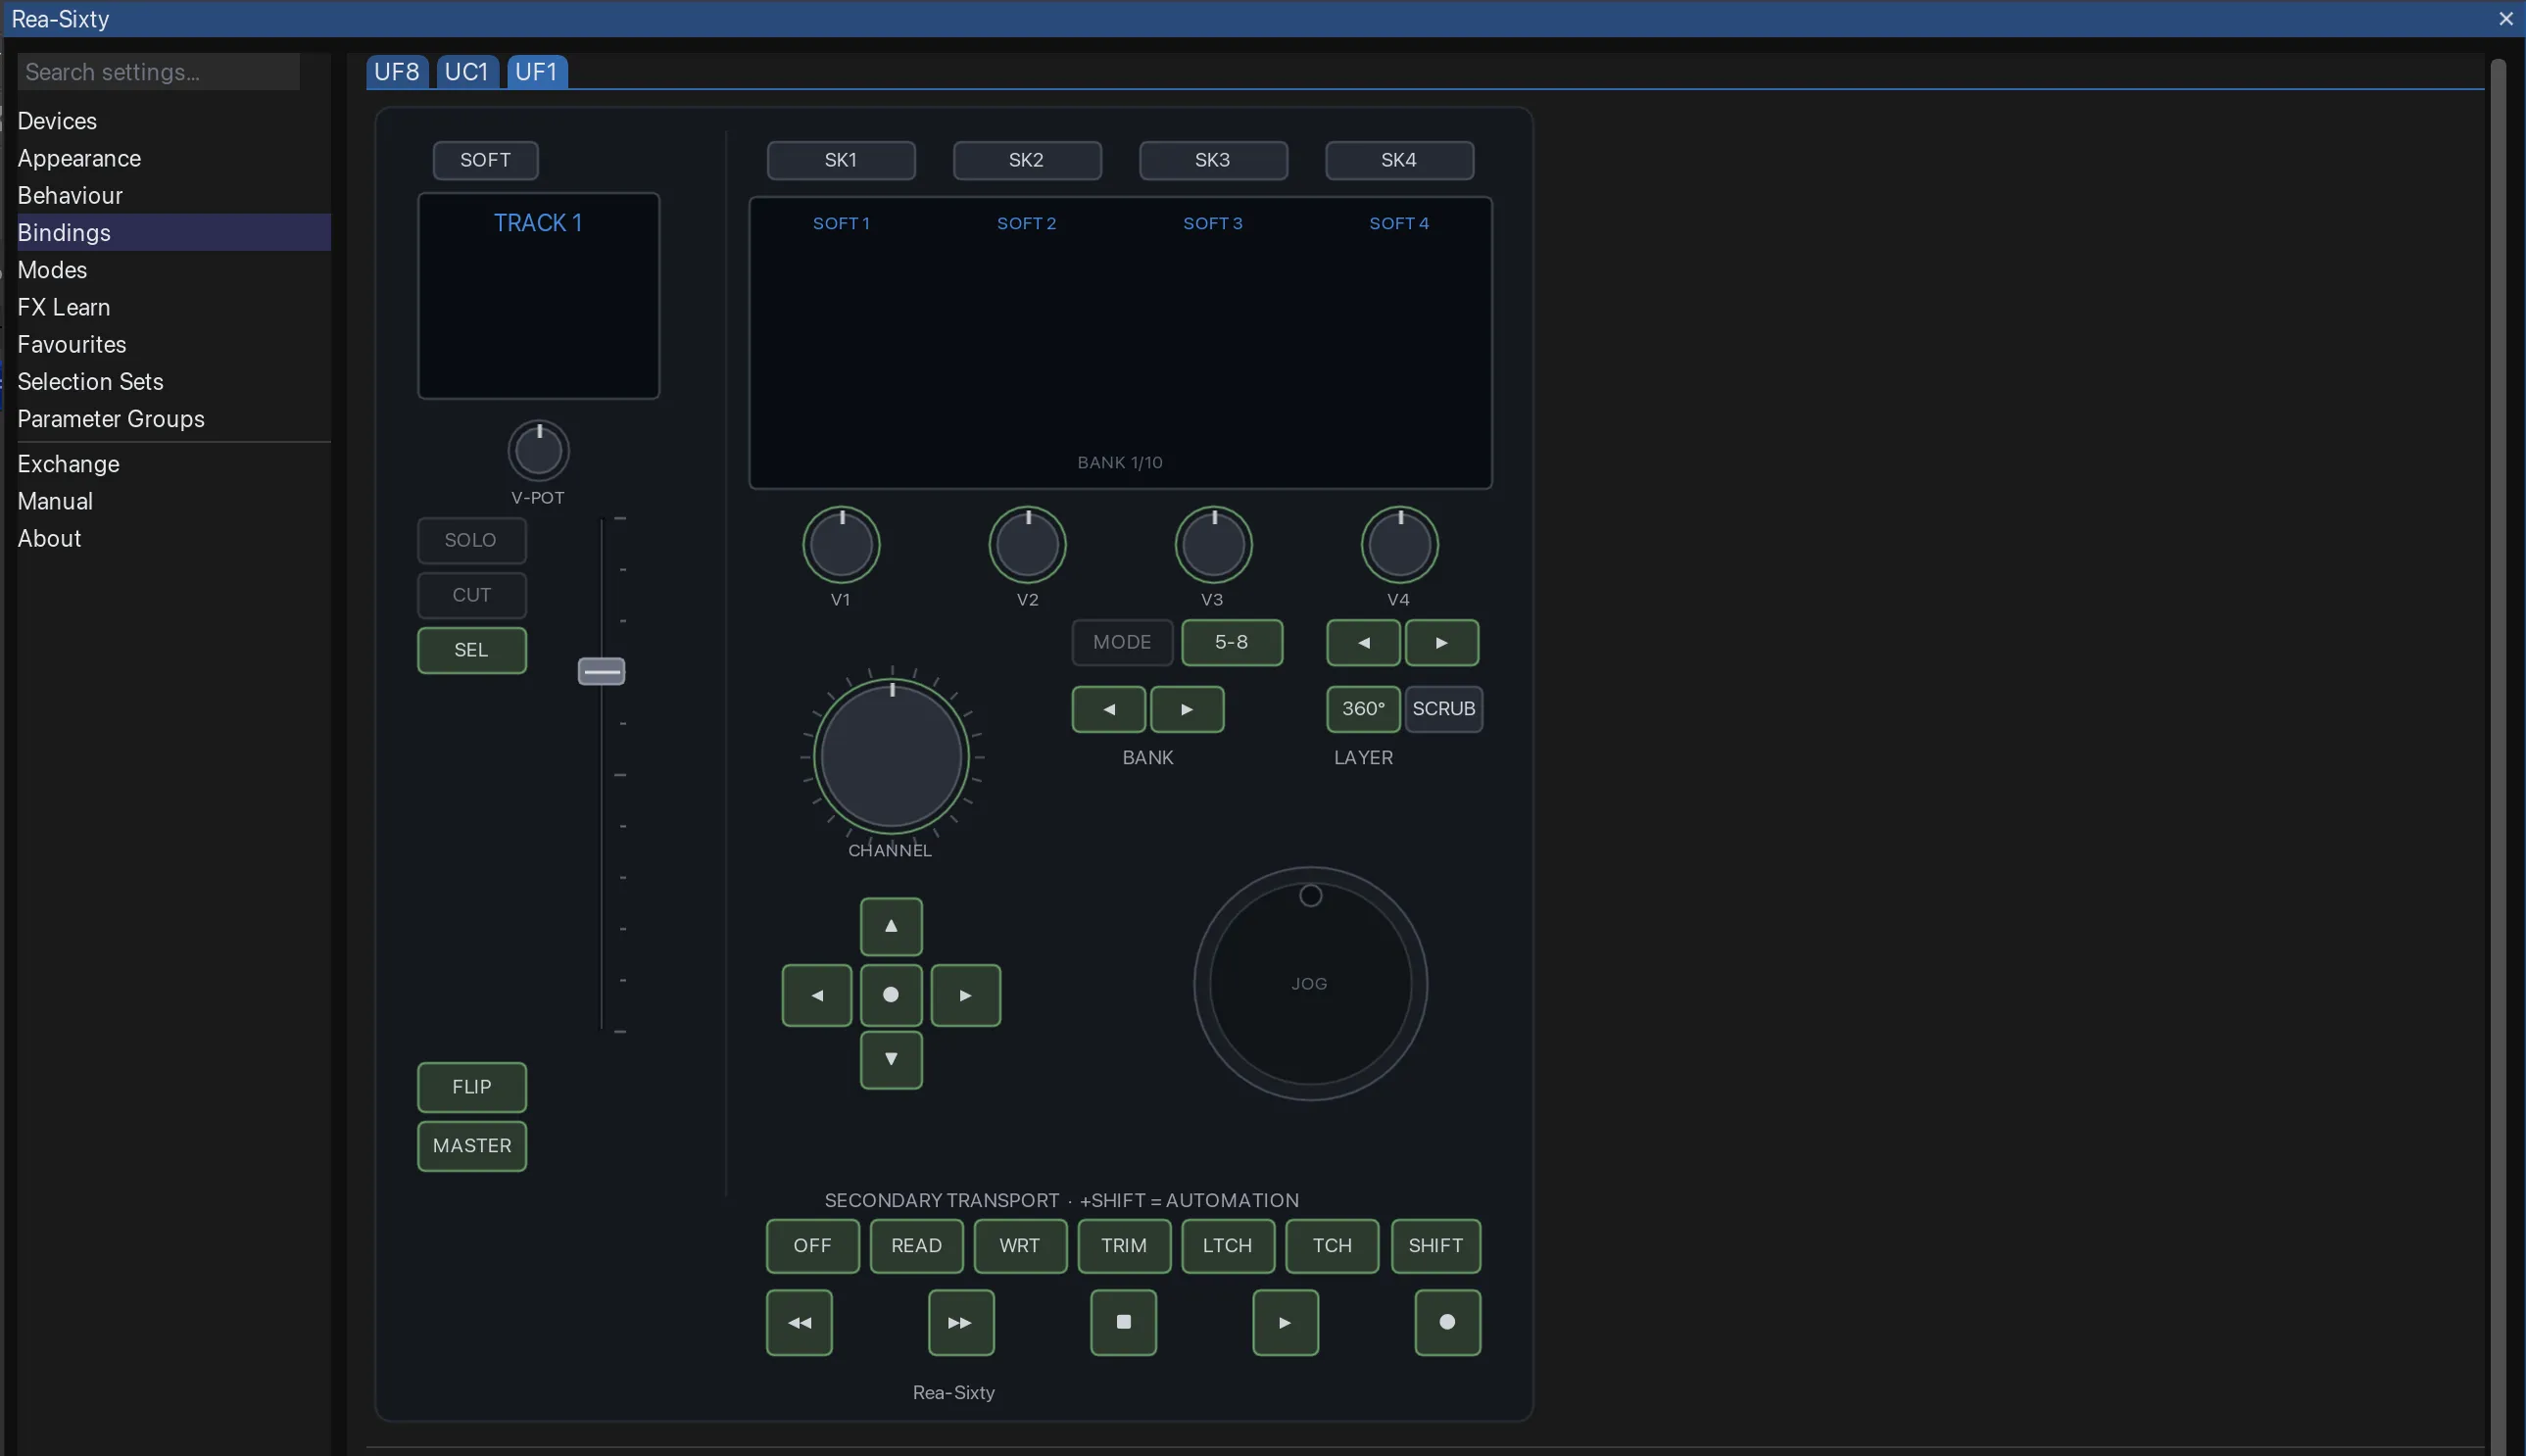
Every UF1 control is a binding target — the schematic in Settings doubles as the picker.
One channel, a colour screen and a jog wheel. The UF1 is not a small UF8: its screen is host-driven, so what the keys do depends on which view is up, and almost every key is rebindable in Settings → Bindings → UF1.
Two keys are deliberately not rebindable: MODE and SCRUB. Both are held
modifiers that open a picker, so a binding on them would have nothing to fire.
Both are greyed out in the schematic, and hovering one says what it does instead.
SOLO and CUT are also fixed: they act on the UF1’s channel through REAPER’s
own solo/mute, and Rea-Sixty does not reinvent those. SEL is a hybrid: a single
press always selects the UF1’s channel exclusively (hold Shift to extend the
selection instead), and the key also runs through the binding system, so a
double-press or a modifier gesture can fire an action on top.
Views
MODE is a hold: keep it down and the four display soft-keys become a view
picker. Press one while holding to switch, release to close.
Soft-key while MODE is held | View |
|---|---|
| SK1 | Plugin — the channel strip: EQ graph, section soft-keys, four V-Pots |
| SK2 | DAW: the four V-Pots ride four track volumes, and the four soft-keys fire your own soft-key bank |
| SK3 | Meter — the metering screens |
| SK4 | Sends — the channel layout showing the send group |
While MODE is held the CHANNEL encoder does a second job: it steps the
Encoder Mode through the ring you configured, and the header cell that
normally reads REAPER shows the live mode name as you turn. So one held key gives you both pickers — soft-keys for the
view, encoder for the encoder mode. Which modes appear in the ring, and in what
order, is set in Settings → Bindings → UF1. On the firmware that comes with SSL
360 2.1.12 the screen also lists the ring while MODE is held: the live mode on
top, highlighted, the next two below it, scrolling as you turn.
The view survives until you change it. Everything below is described per view, because the same physical key does different work in each.
Four keys carry a binding per view. 5-8, the two page arrows and the
SOFT key above the channel do a different job in each view, so each of them
holds four bindings: one per view, edited with the View picker at the top of
the binding editor (it switches the UF1 too, so what you edit is what you are
looking at). A view you leave empty changes nothing — the key then fires the
binding it has everywhere else, which is why every configuration written before
this existed behaves exactly as it did. Put something into a view and that view
owns the key: out of the box every view holds a copy of the key’s own binding, and two of them differ, both on 5-8. In Sends
view it pages on the plain press and flips Sends / Receives on Shift; in
Plugin view, where that key has no job of its own, Shift opens the preset
browser — which in that view lists the channel strip on the focused track.
And the four display soft-keys belong to the view outright. They are where your own
UF1 soft-key banks live, and they carry them in DAW view alone: in Plugin and
Sends view the surface owns those four keys (the channel strip’s section toggles,
the send modes) and in Meter view they are the meter’s own. That is also why they
are not editable as ordinary bindings — their assignments sit in the ten UF1
banks, not in the layer map. Everything else you bind on the UF1 fires in every
view: transport, the secondary row, FLIP, MASTER, SEL, the nav cross, the bank
arrows, 360°, the CHANNEL encoder’s rotation and push and the two foot-switches. A few of those change JOB with the
view (5-8 pages the send window in Sends view and toggles the channel group in
DAW view), and the four V-Pots are not bindable at all — they always belong to
the mode that is showing.
TotalMix (RME). With ORC installed, SHIFT + MODE offers a second page with
RME: the UF1 then drives RME TotalMix FX instead of REAPER, with ORC’s settings.
ORC’s manual describes that view control by control:
https://acklin83.github.io/ORC/. Without ORC the page does not appear.
A transport key that has a TotalMix action in ORC runs it here as well, and its lamp shows it in
ORC’s colours; a transport key ORC leaves free stays REAPER’s, lamp included.
The channel (all views)
These are the controls down the left of the panel, and they all address the same channel: the one the fader is moving. With the Extender on that is the UF1’s slot in the bank rather than the selected track, so the strip and the keys beside it always agree.
| Control | Function |
|---|---|
| Fader | Volume of the UF1’s channel. Touch-sensitive, drives touch automation. |
| V-Pot above the fader | Pan by default, or whatever the Sticky Pot is pinned to. Push sends the pinned parameter to its middle (a pin set as a toggle flips instead); the pin itself stays. While Get next touched Parameter is armed the same push clears that track’s pin, and with no pin at all it centres Pan. In REC + RME it rides the preamp gain, Shift + turn changes the input channel, and the push fires its assigned action instead. |
SOLO / CUT | Solo / mute the channel. Fixed, not rebindable. In REC + RME they fire their assigned TotalReaper actions instead, and their lamps show those states. |
SEL | Select the channel exclusively; Shift + SEL extends the selection. Double-press opens the FX chain by default, long-press fires Spill (folder / VCA) on the selected track. Both are yours to rebind. In REC / REC + MON it arms the channel instead, and its lamp turns red to show the arm state. |
SOFT (above the fader display) | Focus Chan: one press puts the channel the UF1 is showing into the Focus Set and engages the pin; press again to take the channel back out of the set. While the channel is in the set, the background behind the key’s label lights up on the channel display. Factory default since v0.5; it shipped unbound before that. Rebindable like every other key, and an assignment you had already made is kept — the backlight follows whatever you bind, as long as that action has an on/off state. |
FLIP | Swap the fader and V-Pot assignments. Factory default, rebindable. In Plugin view the fader takes the parameter of the V-Pot you last turned or pushed, so you can reach for a control on the encoder and then move it on 100 mm of travel; the V-Pot above the fader rides Volume meanwhile. A Sticky-Pot pin, SSL Strip Mode and the send faders all keep their claim on the fader, and with the Extender running FLIP stays on Pan (the fader and the screen would otherwise be looking at two different tracks). |
MASTER | Put the Master bus on the channel. Factory default, rebindable. |
CHANNEL encoder | Step the UF1’s channel through the track list. The ROTATION carries its own modifier slots, like the UF8’s: Plain dispatches by the UF1’s encoder mode, Shift is Instance Cycle whatever mode is selected. Both are factory defaults and rebindable in Settings → Bindings → UF1 (the ROTATE tile beside the dial). Push opens the focused plug-in’s GUI, and is its own binding. |
Plugin view
The channel strip of the plug-in on the focused track. When the plug-in is an SSL channel strip or the Harrison 32C — or a third-party plug-in you have taught through FX Learn — the EQ curve is drawn on the screen and the four V-Pots carry that page’s parameters.
| Control | Function |
|---|---|
| SK1-SK4 | The channel-strip section toggles for the current page (EQ In, HF Type, …). A blank slot does nothing. An engaged toggle lights its key and highlights it on screen. The highlight matters when the Bus-Comp GR meter is using the four key LEDs: the LEDs are then showing gain reduction, and the highlight is what still tells you which sections are in. |
| SK4, page 1 | PLUG-IN, the SSL Strip Mode toggle, on a native SSL strip and on a learned channel strip alike, so the key is in the same place whatever the track is carrying. On a learned strip the packed parameters step one key along to make room, and a strip with its own UF1 map gets the key written into that map the first time this version reads it, shifting what sat on soft-key 4 and after. You get the key when the plug-in is learned as a Channel Strip and has a Fader Level slot mapped, since that is the parameter Strip Mode hands the fader; without it there would be nothing for the mode to drive. It is an ordinary slot, so move it or clear it in FX Learn like any other. |
| V1-V4 | The current page’s four parameters. |
◄ ► (page arrows) | Step the strip page: eight on Channel Strip 2 and 360 Link, ten on the 4K B, E and G and the 32C, two on a bus compressor. |
5-8 | Nothing on a plain press; Shift + 5-8 opens the preset browser. |
BANK ◄ ► | Move the selection eight tracks left / right. |
Quick-key 1 (bottom row) | Clear every solo in the project (REAPER’s Unsolo all tracks). Factory default; rebindable. The SOLO ACTIVE indication above it lights by itself whenever anything is soloed — that part is the UF1’s own wording and is not ours to change. |
Quick-key 2 (bottom row) | Toggle Fine resolution — the channel V-Pots in Channel view, the meter V-Pots in Meter view. The FINE CTRL readout next to it follows the toggle. Factory default, and rebindable — but think twice: the UF1 prints FINE CTRL 2 over that key itself, and that text is drawn by the device, so anything else you put there will be labelled wrongly by the hardware. |
| V-Pot push (V1-V4) | Reset that parameter to its default. |
Presets in this view
The preset browser is one browser, and which plug-in it lists follows the view: in Meter view the pinned Meter instance, everywhere else the Channel Strip on the focused track.
Where the presets come from depends on the plug-in, and the browser picks for you.
For an SSL plug-in it reads SSL’s own on-disk library, the same one the UC1
browses, because those plug-ins expose no presets to REAPER’s list at all. The
Harrison 32C works the same way, with its library in Harrison’s own folder. For
every other plug-in it reads REAPER’s own preset library: your saved presets
plus the factory list, from the .ini files REAPER keeps beside each plug-in.
Either way the names are read off disk and nothing is loaded until you press, so
browsing stays free.
The four keys under the display are all channel-strip toggles here, so the browser
sits on Shift + 5-8, which is where it ships: that key has no job of its own in
this view. UF1 Presets (Hardware Modes) is in the picker as well, for a key of
your choosing. While it is open, SK3 is Navigate Back and V4 scrolls, with a
push to load.
Meter view
| Control | Function |
|---|---|
| SK1 | Meter Screen Selector — cycles Overview → Analogue → RTA. A Meter Pro adds Loudness as a fourth screen; a plain Meter never streams that data, so it is not offered. |
| SK2 | Reset — clears the peak hold. |
| SK3 | Fine — finer V-Pot resolution. In the preset browser it is Navigate Back instead. Not on the Loudness screen, where SK3 is Play. |
| SK4 | Presets — open / close the preset browser for the pinned Meter instance. Leaving the Meter view closes it again. |
| V4 | In the preset browser, scroll to highlight. Push V4 loads the highlighted preset — browsing never loads on its own. |
◄ ► | Page the meter V-Pots. |
Quick-key 2 | Toggle Fine, same as SK3. |
DAW view
Like Plugin view, except that the four V-Pots ride the volume of four tracks from the selected one on (push for unity, 5-8 for the next four), ◄ ► step the soft-key banks, and the four display soft-keys fire the current
UF1 soft-key bank instead of the channel-strip sections. Banks are built in
Settings → Bindings → UF1; a bank slot can also be a dynamic bank, in which
case the key behaves like a UF8 FX key — plain press, +Shift, +Cmd,
+Ctrl and long-press each do something different.
Each bank slot carries its own label, action and LED colours. Where the action can be on or off, the slot also has a Behavior: Toggle (each press switches) or Press (on while held).
Every bank also holds two sets of keys: Plain and Shift. Hold the UF1’s SHIFT key and the four keys show their Shift set, labels and all, and fire it; release and you are back on Plain. In the editor the Plain / Shift switch in the corner of the bank matrix picks which set you are looking at. Press SHIFT once to jump to the Shift set and press it again to come back to Plain, the same gesture the FX-Learn editor uses. Releasing never moves it, so you can edit the set you jumped to with the mouse. A set you left empty shows empty on the surface, it does not fall back to the Plain label. While the Bindings pane is open the surface follows the Plain / Shift switch rather than the key you are holding, so the four keys show and fire the set you are editing.
There is no Cmd or Ctrl set, deliberately. The surface has exactly one modifier key, so those two could only come from the computer keyboard, where they already drive the FX-Learn modifier layers.
A bank can carry a name of its own, typed by double-clicking its column header in the bank matrix, one per set. It is what the UF1’s time display announces when you switch to that bank, unless you turn that off in Settings → Behaviour → UF1. A bank with no name of its own announces what kind of dynamic bank it is, or else its number, and clearing the name puts that back.
The time field is ten seven-segment cells, so it spells rather than prints, and
K M V W X have no shape on seven segments — they fall back to the nearest one
they do have, which is why a bank called Mix Keys arrives as MIH KEYS. The
UF1 itself is the preview: while you are typing in the name field the time
display shows the name, so you are reading the real cells in the real font rather
than a drawing of them, and every approximation is simply there. Leave the field and
the clock comes back on its own. With no UF1 attached the editor draws the ten
cells under the bank matrix instead, so offline editing is not guesswork. It is also why the built-in names read EFFECTS rather
than FX and an unnamed bank reads SOFT 3 rather than BANK 3.
Soft-key labels are capped at 13 characters and V-Pot labels at 11; both are abbreviated rather than truncated, so every word stays readable.
Sends / Receives view
The channel layout showing the focused track’s sends — or its receives —
four at a time. The header counts the groups, so 2/3 means you are on the
second block of four, and the type cell on the channel display reads SENDS or
RECEIVES so the two are never confused on a track that feeds and takes from the
same places.
In the send list, hardware outputs sit alongside the track sends, in the order REAPER’s own send list shows them. A receive is named after the track it comes from.
| Control | Function |
|---|---|
5-8 | Page to the next block of four. |
Shift + 5-8 | Flip between Sends and Receives. The window jumps back to the first group, because the two lists are rarely the same length. Also available as its own action, UF1: Sends / Receives view, if you would rather put it on another key. |
| Control | Function |
|---|---|
| V1-V4 | The level of each send in the group. An empty slot is blank and inert. |
| Shift + V1-V4 | Pan that send instead. The readout and the bar follow the key, so what you see is what the knob is moving. Centre has the same virtual notch as every other pan. |
| V-Pot push | Reset that send to unity. Shift + push centres its pan instead. Both record like a move, so they land in the envelope rather than beside it. |
| SK1-SK4 | The send mode of the send above it. Each press steps through REAPER’s three settings in the order its send window lists them: POST (post-fader, post-pan) → PRE FADER (post-FX) → PRE FX. |
| Shift + SK1-SK4 | Mute that send. The key then reads MUTED until you unmute it, because a silenced send you cannot see is worse than one you have to look for. |
The names are REAPER’s own, so the key and the send window always agree. PRE FX
is the tap ahead of the track’s insert chain — the one headphone feeds and
sidechains usually want.
Secondary transport row
OFF READ WRT TRIM LTCH TCH and SHIFT along the bottom, with the
primary transport (◄◄ ►► ■ ► ●) below. SHIFT is the UF1’s Shift
modifier, and the primary transport ships bound to REAPER’s own transport actions.
The six silk labels are not decoration: hold SHIFT and each of those keys sets
the focused track’s automation mode, in the order the silk reads. That is the
factory default and it is why the UF1 needs no separate AUTO mode. The key lights
for the mode the track is in.
Their plain presses are mostly yours. Two are spoken for, because the device
prints its own caption over them: key 1 clears every solo (the SOLO CLR
caption above it, and its SOLO ACTIVE lamp lights on its own), and key 2
toggles Fine (the FINE CTRL 2 caption). CYCLE and CLICK carry repeat and
metronome. Everything here is rebindable.
Foot-switch jacks
Two on the back, the same 1/4” momentary switches the UF8 takes, and bindable the
same way: FOOT 1 / FOOT 2 on the UF1 tab in Settings → Bindings (ButtonId
uf1_foot_1 / uf1_foot_2). No factory assignment, and each one carries the full
set of slots, so plain, Shift, Cmd, Ctrl and a long press can be five
different actions on one pedal.
Extender — the UF1 as a 9th fader
Off by default. Turn it on and the UF1’s fader joins the UF8’s bank as one continuous nine-wide strip: Side Right (default) puts the UF1 at strip 9 with the UF8 on 1-8, Left puts it at strip 1 with the UF8 on 2-9. Banking moves all nine together.
The split runs down the middle of the panel. The left half joins the bank: the fader, the level meter, the small display above it, SOLO, CUT, SEL, the V-Pot above the fader and the soft-key above the channel all address the track the fader is moving, so nothing on that side can name one track and act on another. The right half stays on the selected track, the way the UC1 behaves: the colour screen, the four V-Pots, the four display soft-keys and the EQ graph. You can therefore keep working on one channel’s plug-in while the fader rides a different track in the bank.
When the bank is not full, the ninth slot has no track in it. The left half then shows an empty channel: blank display, dark SOLO, CUT and SEL, and a fader that is parked and does nothing, the same as the empty strips beside it on the UF8. The right half carries on with the selected track.
Pressing SEL selects the track the fader is on, which brings the right half over to it as well.
MASTER outranks the Extender: engage it and both halves show the master track. Turn it off and the Extender is back as it was.
Extender and the Focus-Set pin are mutually exclusive: switching either on clears the other, and releasing the pin puts the Extender back the way you left it.
Settings → Bindings → UF1.
Pin Set — parking the UF1 on a Focus Set
Pin Set is a clutch. With it engaged, the UF1 parks on one member of the
Focus Set and its CHANNEL encoder scrolls through the members — independently
of the REAPER selection and of where the UF8 is banked. Let go and the UF1 goes
back to following the selection.
Two settings shape it, both in Settings → Bindings → UF1:
| Setting | Effect |
|---|---|
| Focus Set scope | Both (default) — the members pin the UF8’s head and the UF1 parks on them. UF1 only — the UF1 parks the set, the UF8 banks untouched. UF8 only — the members pin the UF8 head, the UF1 keeps following the selection. |
| UF8 sends follow the UF1 Focus Set track | On by default. The UF8’s sends of the focused track view follows the member the UF1 is parked on rather than the last-touched track, so sends automation writes to the channel the UF1 is showing. Only bites with a UF1 present and Pin Set engaged. |
Nav cross and jog wheel
The five-key cross (up / left / centre / right / down) and the jog wheel belong to Jog Mode — its own chapter, next.
Jog Mode
The jog wheel does not have one job. It has an object, and the object decides
what turning the wheel means. SCRUB is a hold: keep it down and turn the jog to
pick the object.
| Object | Jog turns |
|---|---|
| Playhead | Moves the play cursor. Default one quarter of a grid step per count, landing on those quarter steps. |
| Scrub | Audible scrub, 0.5 s per count. |
| Items | Moves the selected item(s). Default one quarter of a grid step per count. |
| Envelope | Moves the selected envelope points in value. Hold Ctrl and they move in time, one quarter of a grid step per count. |
| Razor | Moves the razor edit — which edge, see below. |
| Fades | Changes a fade length, 10 ms per count. Where there is a neighbour it is the crossfade. See Fades below. |
| Lanes | Moves the edit cursor, at the Playhead object’s step. With SHIFT it plays the next lane of the selected track, or, on a track with a comp lane, gives the comp area under the edit cursor the next take. See the chapter Fixed lanes. |
The arrow cross selects, the jog moves. That split is the whole idea: you never have to let go of the wheel to change what you are working on.
What the cross does in each object
The cross is not one thing either — it follows the object, exactly like the wheel.
| Object | ← → | ↑ ↓ | centre |
|---|---|---|---|
| Playhead | Zoom out / in horizontally. | Zoom in / out vertically. | Zoom to fit the project. |
| Scrub | As Playhead. | As Playhead. | As Playhead. |
| Items | Select the previous / next item on the track. | Select the item on the track above / below. | Hold it and the wheel drags the selected items as one move; release drops them. Press and let go without turning and it zooms to the selected items instead, press again to come back. |
| Envelope | Select the previous / next point. Once the play cursor has moved, the next arrow starts from where the cursor now is rather than from the point that was selected before it moved, so nudging the playhead and reaching for an arrow lands where you are looking. | Switch envelope lane. | Toggle what the jog edits: the selected points or the playhead. No zoom here, nudging the cursor while shaping an envelope is worth more. Shift + centre inserts a point at the cursor. |
| Razor | Aim at the left / right edge. | Aim at the top / bottom edge. | Hold it to take the whole area and drag its content. See Razor below. |
| Fades, aiming | Aim at the fade-in / fade-out. | Next / previous fade type. | Switch the cross over to walking the items. |
| Fades, walking | Select the previous / next item on the track. | Select the item on the track above / below. | Switch the cross back to aiming. |
| Lanes | Edit cursor to the previous / next comp-area or item edge. SHIFT + ← loops two seconds around the nearest cut, SHIFT + → is A/B. | Play the lane above / below. SHIFT: the comp area under the edit cursor takes the lane above / below. | Tap: play the comp lane. Hold it and the wheel paints into the comp; see Fixed lanes. SHIFT: Comp here. |
Playhead and Scrub carry the plain zoom cross, the same five REAPER zoom actions the UF8’s cursor pad uses (40111 / 40112 / 1011 / 1012 / 40295): with no editing object engaged there is nothing on screen for the cross to select, so it does what the cross on the other surface does.
In Items, SHIFT on any of the four arrows adds to the selection instead
of replacing it, and in Envelope the same goes for ← → on points, so you
can walk a run of items or points onto the wheel. The Envelope centre carries REAPER’s Envelope: Insert new point at current position (do not remove nearby points) (40106) in its Shift slot. That is not a hidden check
inside the key: each of those keys carries the (add) twin of its own action in
its Shift slot, where you can see it and change it. A Shift slot you leave empty
falls back to the plain action, which is why the keys without one are unaffected
by the modifier.
The cross keys light to show the Razor target you have aimed at.
Items can take the fader. Under Settings → Bindings → UF1 → JOG WHEEL, tick Fader = Item Volume on the Items row. With the jog on Items, the UF1 fader then sets the volume of every selected item: the first one follows the fader, the others change by the same number of dB, so the differences between them stay. The motor follows the first item. With no item selected the fader stays where it is and the channel display reads no item.
Everything in that table is a factory default, not a fixed rule. Each cross key holds its own binding per object, so the same physical key can do seven different things and you decide all seven. Click a cross key in Settings → Bindings → UF1 and pick the object at the top of the editor: the picker follows the surface, and changing it there changes the wheel’s object too, so what you edit is always what you are holding. The Shift row is a binding as well, which is where the add-to-selection defaults above live; leave it empty and the key falls back to its plain action.
The ticks beside each object in that picker are the same ones on the jog wheel’s own page. An object you untick is skipped by the wheel’s picker, so its cross bindings are unreachable until you tick it back on. They are kept, not lost.
The order is yours too. On the jog wheel’s page each object has a ▲ and a ▼
beside its tick, and the picker walks that order, exactly the way the channel
encoder’s own ring works. Put the two objects you live in next to each other and
the wheel is one notch away from either.
Seeing the ring while you turn it
Both pickers are rings, and until now you scrolled them blind: the surface named
the object you were on and said nothing about what was coming. Hold MODE or
SCRUB and the on-screen banner turns into that ring instead: the live one
marked, its neighbours above and below, wrapping round the ends because a ring is
what it is. Let go and it disappears. On the firmware that comes with SSL 360
2.1.12 the UF1’s own screen lists the ring too while you hold: the live one on
top, highlighted, the next two below it.
It is the same little window the mode banner uses, so it sits where you put that and takes its colours and font from the same right-click menu. Ring neighbours there decides how many you see either side. A ring short enough to fit is simply shown whole.
The spot you drag it to is where the live one stays. The ring opens upward and downward around it, so adding neighbours grows the list in both directions rather than pushing what you are looking at further down the screen.
Three modifiers stack on the jog:
- Shift — fine. Divides the step (default ÷4).
- Cmd — copy instead of move. In Fades it means move instead of resize, and wherever the wheel is on the play cursor it pulls a time selection.
- Ctrl — cross axis. In Items, that means moving track by track rather than in time; the vertical axis is discrete, so it steps one track at a time. In Fades it takes the fade curve rather than its length.
Pulling a time selection
Wherever the wheel is driving the play cursor, hold Cmd and turn: the first click drops an anchor where the cursor is and every one after it drags the other end, so a time selection grows out of the wheel. That is Playhead mode, and Envelope once its centre key has handed the wheel to the playhead, because there the wheel is on the cursor too. Scrub is not included: it moves the cursor through REAPER’s scrub engine rather than by setting it, so the anchor would not be reliable. Let Cmd go and the selection stays. Press again and a new one starts from wherever you are. Turn back onto the anchor and it collapses, which is how you clear one without reaching for anything.
The far end is the cursor, so it snaps to the step if Grid is the step unit you have set, and Shift still divides the step: Shift and Cmd together pull finely.
Razor
Razor mode aims at one of five targets: the whole razor area, or its left, right, top or bottom edge. The centre key of the nav cross is a held gesture — press and hold it and the whole razor area drags its content as one continuous move; release commits. Holding it grabs the content once at the start, so the razor cannot sweep up material it is dragging across.
The picker speed, the fine divisor and the step per object live in Settings, Bindings, UF1, on the jog wheel’s page. Razor has no step setting there: its wheel keeps the factory quarter of a grid step.
Fades
The wheel changes a fade length. Which fade is decided by the edge you are aiming at and by what is next to it, and by nothing else.
Aim at the fade-in and you are on the item’s left edge, at the fade-out and you are on its right. The wheel runs the other way round on the fade-out, because the two fades are mirror images: one turn does the same thing to both ends of the item, rather than the same thing to both numbers. Moving with Cmd and bending with Ctrl are not mirrored, so time keeps running the same way whichever end you are on. If another item touches or overlaps that edge, the fade there is the crossfade with it, and the wheel dials the crossfade: the overlap grows and shrinks around the seam, both items keep their audio where it is, and two items that merely butt together become a real crossfade the moment you turn the wheel up. If there is nothing at that edge, or a gap, the wheel works the item’s own fade.
That is why there is no separate crossfade target to aim at. The only thing ever unclear about one was which neighbour, and the side you are aiming at answers it.
↑ and ↓ step the fade type. These are REAPER’s own seven, in REAPER’s own
order — the same ones its Item: Set fade-in shape to type N actions set. Type
1 is linear; on a crossfade type 1 is linear equal-gain and type 2 is equal-power.
Both halves of a crossfade always take the same type, which is what REAPER does
too. The list wraps, so ↑ from 7 lands back on 1.
Hold Cmd and the wheel moves instead of changing anything. At a crossfade the seam travels and the crossfade keeps its length, so you can slide a cut without re-dialling it, and neither side’s audio moves. At a plain fade the item edge travels and the fade keeps its length, so it goes along.
Hold Ctrl and the wheel takes the fade curve instead of the length.
Growing stops where the material stops. A crossfade cannot be pulled longer than the recording behind the two items, and nothing is looped or stretched to fake it — the wheel simply reaches the end and stays there.
The wheel works on every selected item. With nothing selected it takes the item
under the edit cursor on the selected track, so walking with SEL and reaching
for the wheel needs no extra click. With neither, nothing happens.
The centre key hands the cross over to walking the items and back, the same
way Envelope’s centre switches what the wheel edits. Walking, the four arrows do
exactly what they do in Items, SHIFT included, so a whole track’s fades are one
gesture: walk, aim, turn, walk on.
The view follows
Fades is the one object where the wheel works at a scale you cannot see from across the room, so the arrange view comes along: whenever you change what you are on — the other edge, another item, a track above or below — the view frames that fade, with the fade taking up about a third of the width so you keep your bearings. Walking to another track scrolls it into view as well. Turning the wheel does not re-frame; the picture only moves again when a growing fade would otherwise run out of it, so dialling a length stays still to look at.
There is a floor on how close it goes, because a 5 ms crossfade blown up to fill a third of the screen tells you nothing about where you are. Half a second by default, and it is a number you can set.
When you leave the object, or switch the following off, the view you came from is put back.
This is on out of the box. Turn it off in Settings → Bindings → UF1, on the jog wheel’s own page, or put Fades: follow the fade with the view on a key.
On the same page sits Show REAPER’s crossfade editor, off by default. With it on, REAPER’s own crossfade window comes up whenever the edge you are aiming at has a neighbour, which is what makes that fade a crossfade, and goes away again when you aim at a plain fade. It shows the crossfade of the selected items, so it fills when you are working from a selection and stays empty when you are working from the edit cursor. A window you had open yourself is never closed by this: only the one it opened goes when you leave the mode or switch the option off. It is on a key as well, as Fades: show REAPER’s crossfade editor.
Fixed lanes
REAPER’s fixed item lanes put several takes of a track on top of each other: one lane per take, a comp lane that collects the best parts. Rea-Sixty lets you work through them from the surface, with the transport running: hear one take after the other, put the one that sits into the comp, paint a stretch of a take into the comp with the wheel, cut between takes while the song plays, change a part of the comp later.
It works on the selected track: the one you last touched, if it is selected, otherwise the first selected track. Needs REAPER 7.12 or newer. On a track without fixed lanes the Lanes keys do nothing.
Where it lives
- UF1: jog object Lanes (
SCRUBheld + jog, or UF1 Jog Mode: Lanes). The jog moves the edit cursor as in Playhead and withSHIFTchanges the lane, the nav cross carries the Lanes keys, and the time field shows the name of the lane you now hear (or LANE 3 for a lane without a name of its own). - UF8: encoder mode Lanes (push held + turn, or Encoder Mode → Lanes). The encoder moves the edit cursor as in Nudge and with
SHIFTchanges the lane, the cursor pad carries the same keys as the UF1’s cross, and the push is A/B: back to the comp or whatever played before. - The UF1’s own encoder can run Lanes too. It is unticked in its ring from the factory, because the jog does it there; tick it under the UF1’s push in Settings → Bindings → UF1.
| Key | Does | With SHIFT |
|---|---|---|
| jog / encoder | Move the edit cursor | Without a comp lane: play the next lane, alone. With one: the comp area under the edit cursor takes the next take, the comp keeps playing |
↑ / ↓ | Play the lane above / below, alone | The comp area under the edit cursor takes the lane above / below |
← / → | Edit cursor to the previous / next comp-area or item edge | ← loops around the nearest cut, → is A/B |
| centre | Tap: play the comp lane. Hold and turn: paint | Comp here |
All of them are bindings like any other cross key, per jog object on the UF1 and per encoder mode on the UF8.
The Lanes bank
On the UF8 it comes by itself: while the encoder is in Lanes, the eight soft keys are the Lanes bank, whatever bank you had engaged, and leaving the mode brings that bank back. Switch this off under Settings → Behaviour → Fixed lanes. Elsewhere, and on the UF1, give a soft-key bank the dynamic kind Lanes (right-click its cell in the matrix, Dynamic bank). Key 1 is lane 1 of the selected track, key 2 lane 2, and so on: eight keys on the UF8, four on the UF1. A key reads the lane’s name, or Lane 3 for one without a name of its own; the comp lane reads Comp. Lit is a lane that plays, dim one that is silent. Takes are white, the comp lane green.
- Push plays that lane alone, the same as
↑/↓onto it, without passing the lanes in between. SHIFT+ key: that lane joins the lanes that play, or leaves them. This is how you layer two takes from the surface.- Cmd + key: Comp here from that lane, without listening to it first.
On a track with a comp lane the comp plays all the time, and the keys change with it (not while live comping, where every lane change is a cut):
- Push a take: the comp area under the edit cursor now comes from that take, one undo step, and the comp keeps playing. Push
Compto hear the comp lane. SHIFT+ key: that take alone, as long as you holdSHIFT; let go and the comp plays again.- Cmd + key: Comp here from that take, as above.
- Lit is the take the comp area under the edit cursor comes from, or under the play position while the song plays, so you see where each part comes from as it goes by.
With more lanes than keys, the bank pages: on the UF8 with the control chosen under Page with below the matrix (the UF8 encoder, a UC1 encoder or BANK ◄ ►), on the UF1 with a long press on ◄ / ►. When you step to a lane on another page, the bank turns to that page. On a track without fixed lanes, key 1 reads Lanes on and turns them on for the track, as one undo step.
The bank shows the track the Lanes keys work on, the selected one, so it can differ from the track the other dynamic banks follow.
What the keys do
Stepping plays one lane at a time. The comp lane is passed over, so the wheel walks the takes. ↑ and ↓ light while there is a lane further that way. Switching lanes adds nothing to REAPER’s undo history.
A/B goes back to what played before the last change, the whole set of lanes. When several lanes played together and you step through single lanes to listen in, A/B brings the layered set back, however many steps it was. It also catches REAPER’s own switches while a Lanes mode is on: when REAPER plays a new take after a punch-in, A/B returns to what played before.
Comp here (SHIFT + centre) puts the lane you hear into the comp lane, over the time selection, or over the loop when there is none, or over the item of that lane under the edit cursor. It never takes from the comp lane: while the comp lane plays, it takes the take you last heard alone. Use it to start a comp; after that, painting and SHIFT + jog change the parts. Each Comp here is one undo step.
Moving a comp area to another lane with SHIFT + jog or encoder is one undo step for the whole turn, however many lanes you pass. SHIFT + ↑ / ↓ is one undo step per press.
Painting. Hold the centre and turn the jog (UF8: the encoder). The edit cursor moves silently, by the step of the jog object Playhead on the UF1 and of the encoder mode Playhead on the UF8; SHIFT makes the jog’s step finer. A razor at the height of the lane you hear shows the stretch you have run over, and turning back shortens it. The time field shows PAINT and the lane number. Let go, and that stretch goes into the comp from the lane you hear, as one undo step. Then REAPER plays the comp from a second before the stretch to a second after it, stops, and the edit cursor goes to where you let go. The lane you painted from plays again, so the next stroke takes from the same take. While the song is playing, nothing is played back after a stroke. Painting takes from a take: while the comp lane plays, step to a take first. To call a stroke off, turn back to where it started, or hold the centre and let go without turning; a long hold without a turn does nothing.
On the UF8, holding the push and letting go without turning does nothing in Lanes either, so a mode pick you change your mind about does not write the comp.
Live comping. Bind Lanes: live comping on / off to a key (a UF1 soft key, a UF8 key) and press it. The centre lights and the banner says Lanes • Live comping On. Press play. From then on every lane change with SHIFT + jog, SHIFT + encoder, ↑ / ↓ or a key of the Lanes bank is a cut; while live comping is on, SHIFT + jog changes the whole lane on a track with a comp lane too: the part since the last change goes into the comp at once, from the lane that played. The first change only marks where the first part starts. A lane that plays for less than half a second counts as passed on the way: turning from take 2 to take 5 goes over 3 and 4, and the part goes to take 5 from where you started turning. Stop ends the last part. Each cut is one undo step. With the loop running, the part that is open when the loop jumps back ends at the loop end, and the next pass writes only where you change lanes, so a pass without a change leaves the comp as it is. Switching live comping off, selecting another track or leaving the Lanes mode also ends the open part.
Looping a cut. SHIFT + ← loops two seconds centred on the cut nearest the edit cursor, the one it sits on after ← / →, switches repeat on and puts the edit cursor at the start of the loop; while the song plays, playback jumps there. SHIFT + ← again at the same cut switches the loop off and repeat back to how it was. A cut is a comp-area edge or an item edge of the lane you hear. Set the length under Settings → Bindings → UF1 with the jog on Lanes, Loop around the cut; the UF8 uses the same length.
Cuts land 20 ms before the point you chose, so the start of a word is not clipped, and can snap to the grid. Both are set under Settings → Behaviour → Fixed lanes.
Groups. When REAPER’s item grouping is on (the toolbar button), stepping, A/B and Comp here also act on every track that follows a media-edit group the selected track leads, on the same lane numbers. With grouping off they act on the selected track only.
Working with it
A lead vocal from six takes, line by line (UF1). Select the vocal track and put the jog on Lanes. Loop the first line the way you always do in REAPER and press play. Press ↓: take after take plays in the loop, and the time field names it. When one sits, press SHIFT + centre: that line goes into the comp. Tap the centre to hear the comp. → takes the edit cursor to the next edge, loop the next line and go on. A single word from another take: step to that take and paint over the word.
One spot of the comp, later. Put the edit cursor into the comp area you want to change and turn the jog with SHIFT held, or press SHIFT + ↑ or ↓: that area now comes from another take, and the comp keeps playing. With the loop running you hear it right away.
Versions of a part. A bass track with three whole versions on three lanes: turn the jog with SHIFT held or press ↑ / ↓ while the song plays, and SHIFT + → flips between the last two you heard.
A doubled part. Let two lanes play together in REAPER (Cmd-click the lane’s play button on the Mac, Ctrl-click on Windows). Press ↑ / ↓ to hear any single take alone; SHIFT + → brings the two back together.
Drums in a group. Kick, snare, overheads and room in one media-edit group that the snare leads, REAPER’s grouping on. Select the snare and press ↓: the whole kit switches to the next take together. A time selection over a fill and SHIFT + centre puts that fill into the comp on every drum track at once.
After a punch-in. When REAPER plays the new take afterwards, SHIFT + → returns to the comp you had.
One syllable from another take (UF1). Step with ↑ / ↓ to the take that has it. Turn the jog to put the edit cursor just before the syllable. Hold the centre and turn the jog slowly to the right: the razor grows over the syllable. Too far, turn back. Let go: the syllable is in the comp, and REAPER plays it with a second either side, then stops.
A guitar solo cut while it plays (UF1). Five takes of the solo on five lanes. Press your live comping key: live comping is on. Press play before the solo. At the start of the solo press take 2 on the Lanes bank (or step there with ↑ / ↓), at bar 5 take 5, for the last phrase take 1. Each change writes the part before it into the comp while the solo runs; stop writes the last one. Three cuts, three undo steps. To work on one spot, loop it and change lanes on every pass until it sits, then press the live comping key again to switch it off.
With the UF8 alone. Select the track, hold the push and turn to Lanes. The encoder moves the edit cursor and with SHIFT changes the take, the cursor pad is the cross from the table above, the push is A/B. Hold the centre and turn the encoder to paint. The eight soft keys show the lanes by name, the ones playing lit: press one to hear it, SHIFT + key to layer it, Cmd + key for Comp here from it.
Settings window
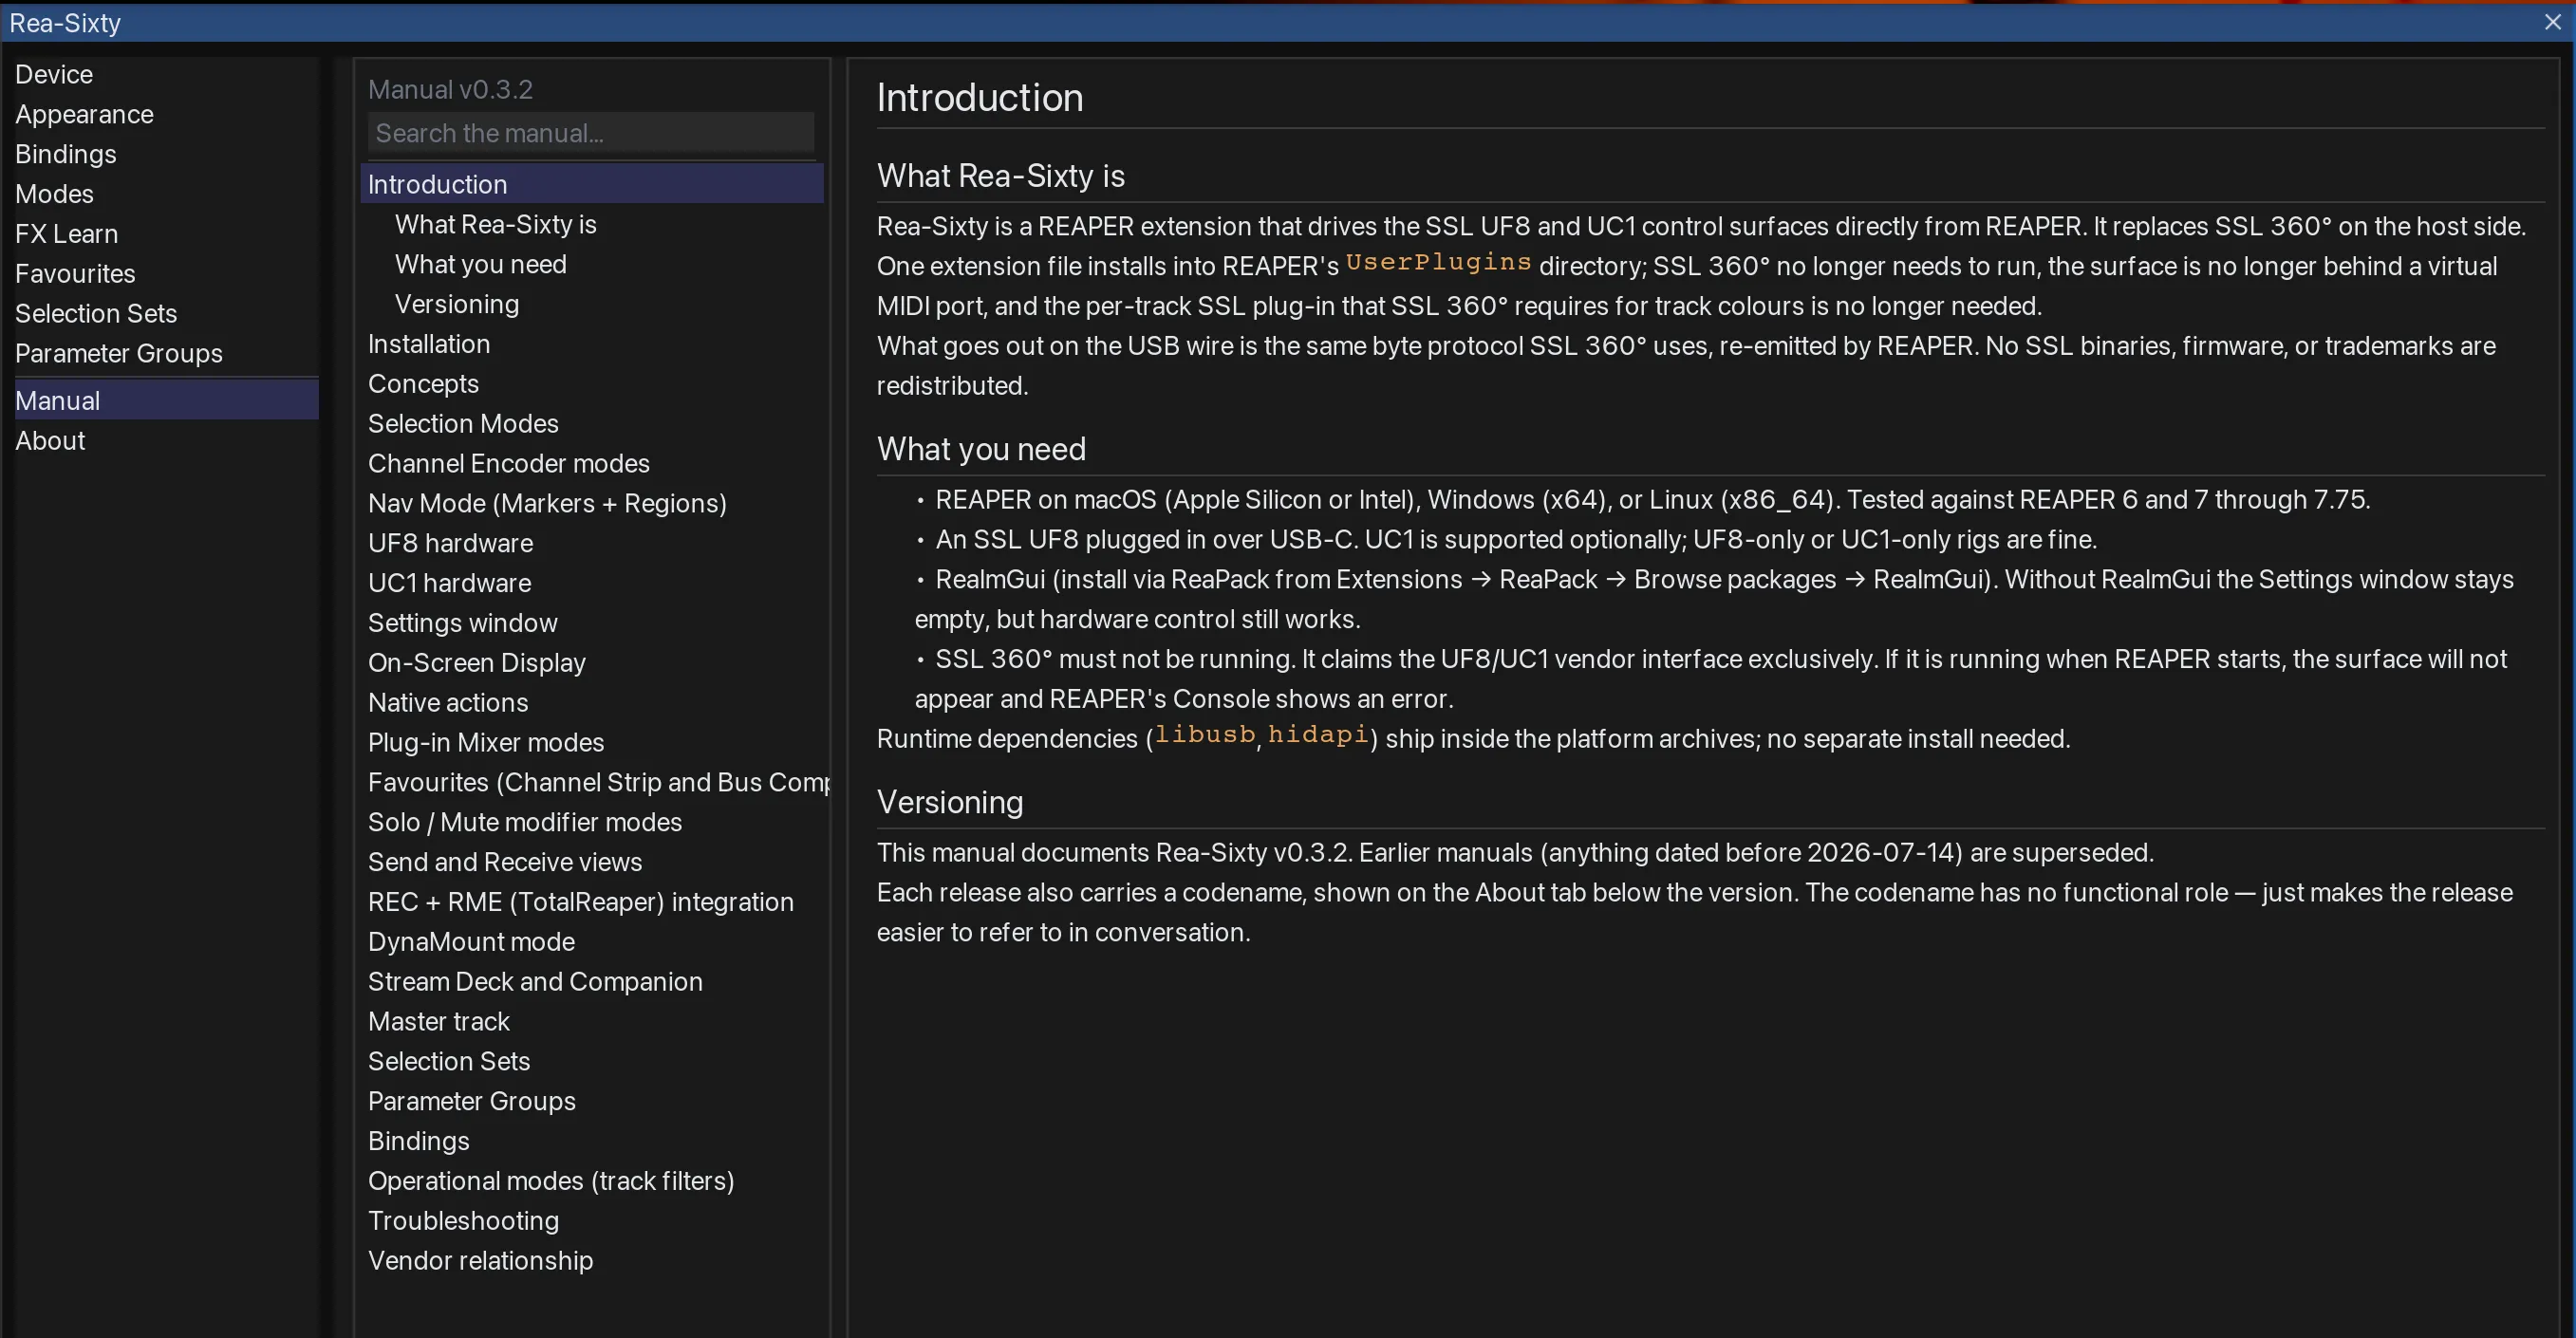
The manual you are reading, rendered inside the extension under Settings → Manual.
The Settings window is a dockable ReaImGui context. Open with the 360 key on the UF8 or UC1 (default) or REAPER’s action Rea-Sixty: Open / Close Rea-Sixty Settings (REASIXTY_TOGGLE_SETTINGS).
Thirteen sidebar tabs: Devices · Appearance · Behaviour · Bindings · Modes · FX Learn · Favourites · Selection Sets · Sticky Pot · Parameter Groups · Exchange · Manual · About.
The first three hold the general settings, split by what they touch: Devices is the hardware itself, Appearance is what you look at, Behaviour is what the surface does.
Search settings
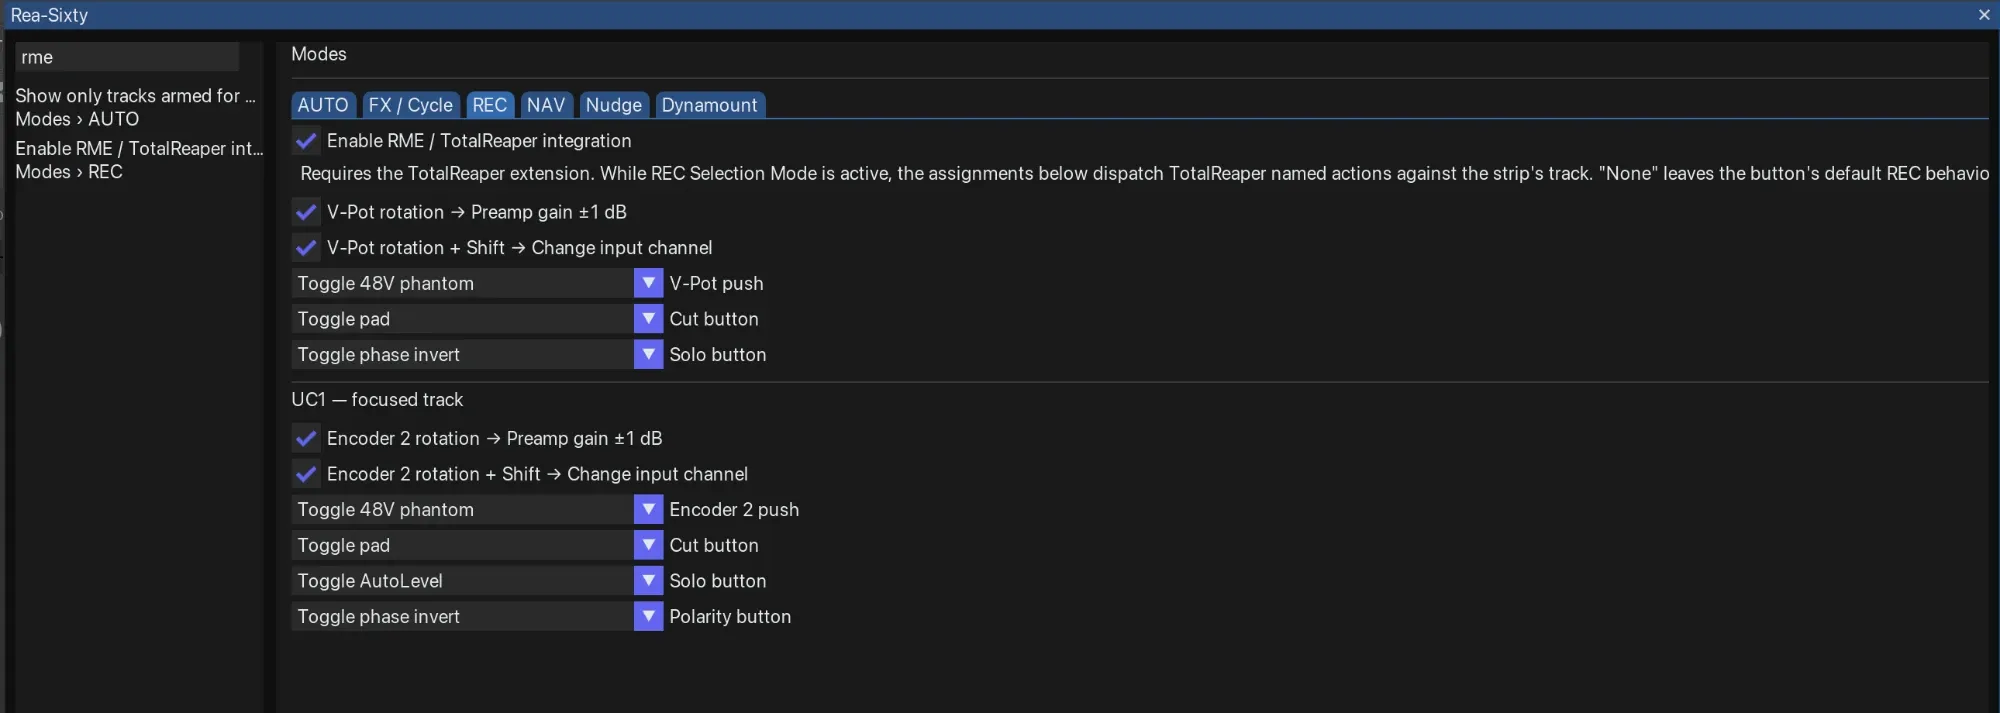
The rail search — every setting in every pane is indexed by its own label, and each hit names the pane it lives in, so "rme" lands on Modes → REC.
A filter field sits at the top of the sidebar, above the tab list. Leave it empty and the sidebar is the normal tab list. Type into it and the tab list is replaced by matching settings. A row is two lines: the setting’s own label, then Pane › Section underneath it.
- Matching is additive and case-insensitive — the query is split on spaces and a setting has to contain every word, in any order. “notch hold” and “hold notch” both find Notch hold.
- Words are matched against the whole trail, not just the setting’s name, so “devices meter” lists everything in Devices → Metering.
- Click a result to switch to its pane; the pane scrolls to the section that setting sits in.
- The sidebar is narrow, so each of the two lines is shortened on its own with an ellipsis. Hover a row to read it in full as a tooltip.
- Nothing matches → No matches.
The index goes past the first three panes: searching “focus set” finds the control inside Bindings, not only the pane. Some panes are indexed by heading only, and slot rows (Favourite slots, FX Learn maps, Selection Set slots) are not indexed. The query is not remembered between sessions.
Devices pane
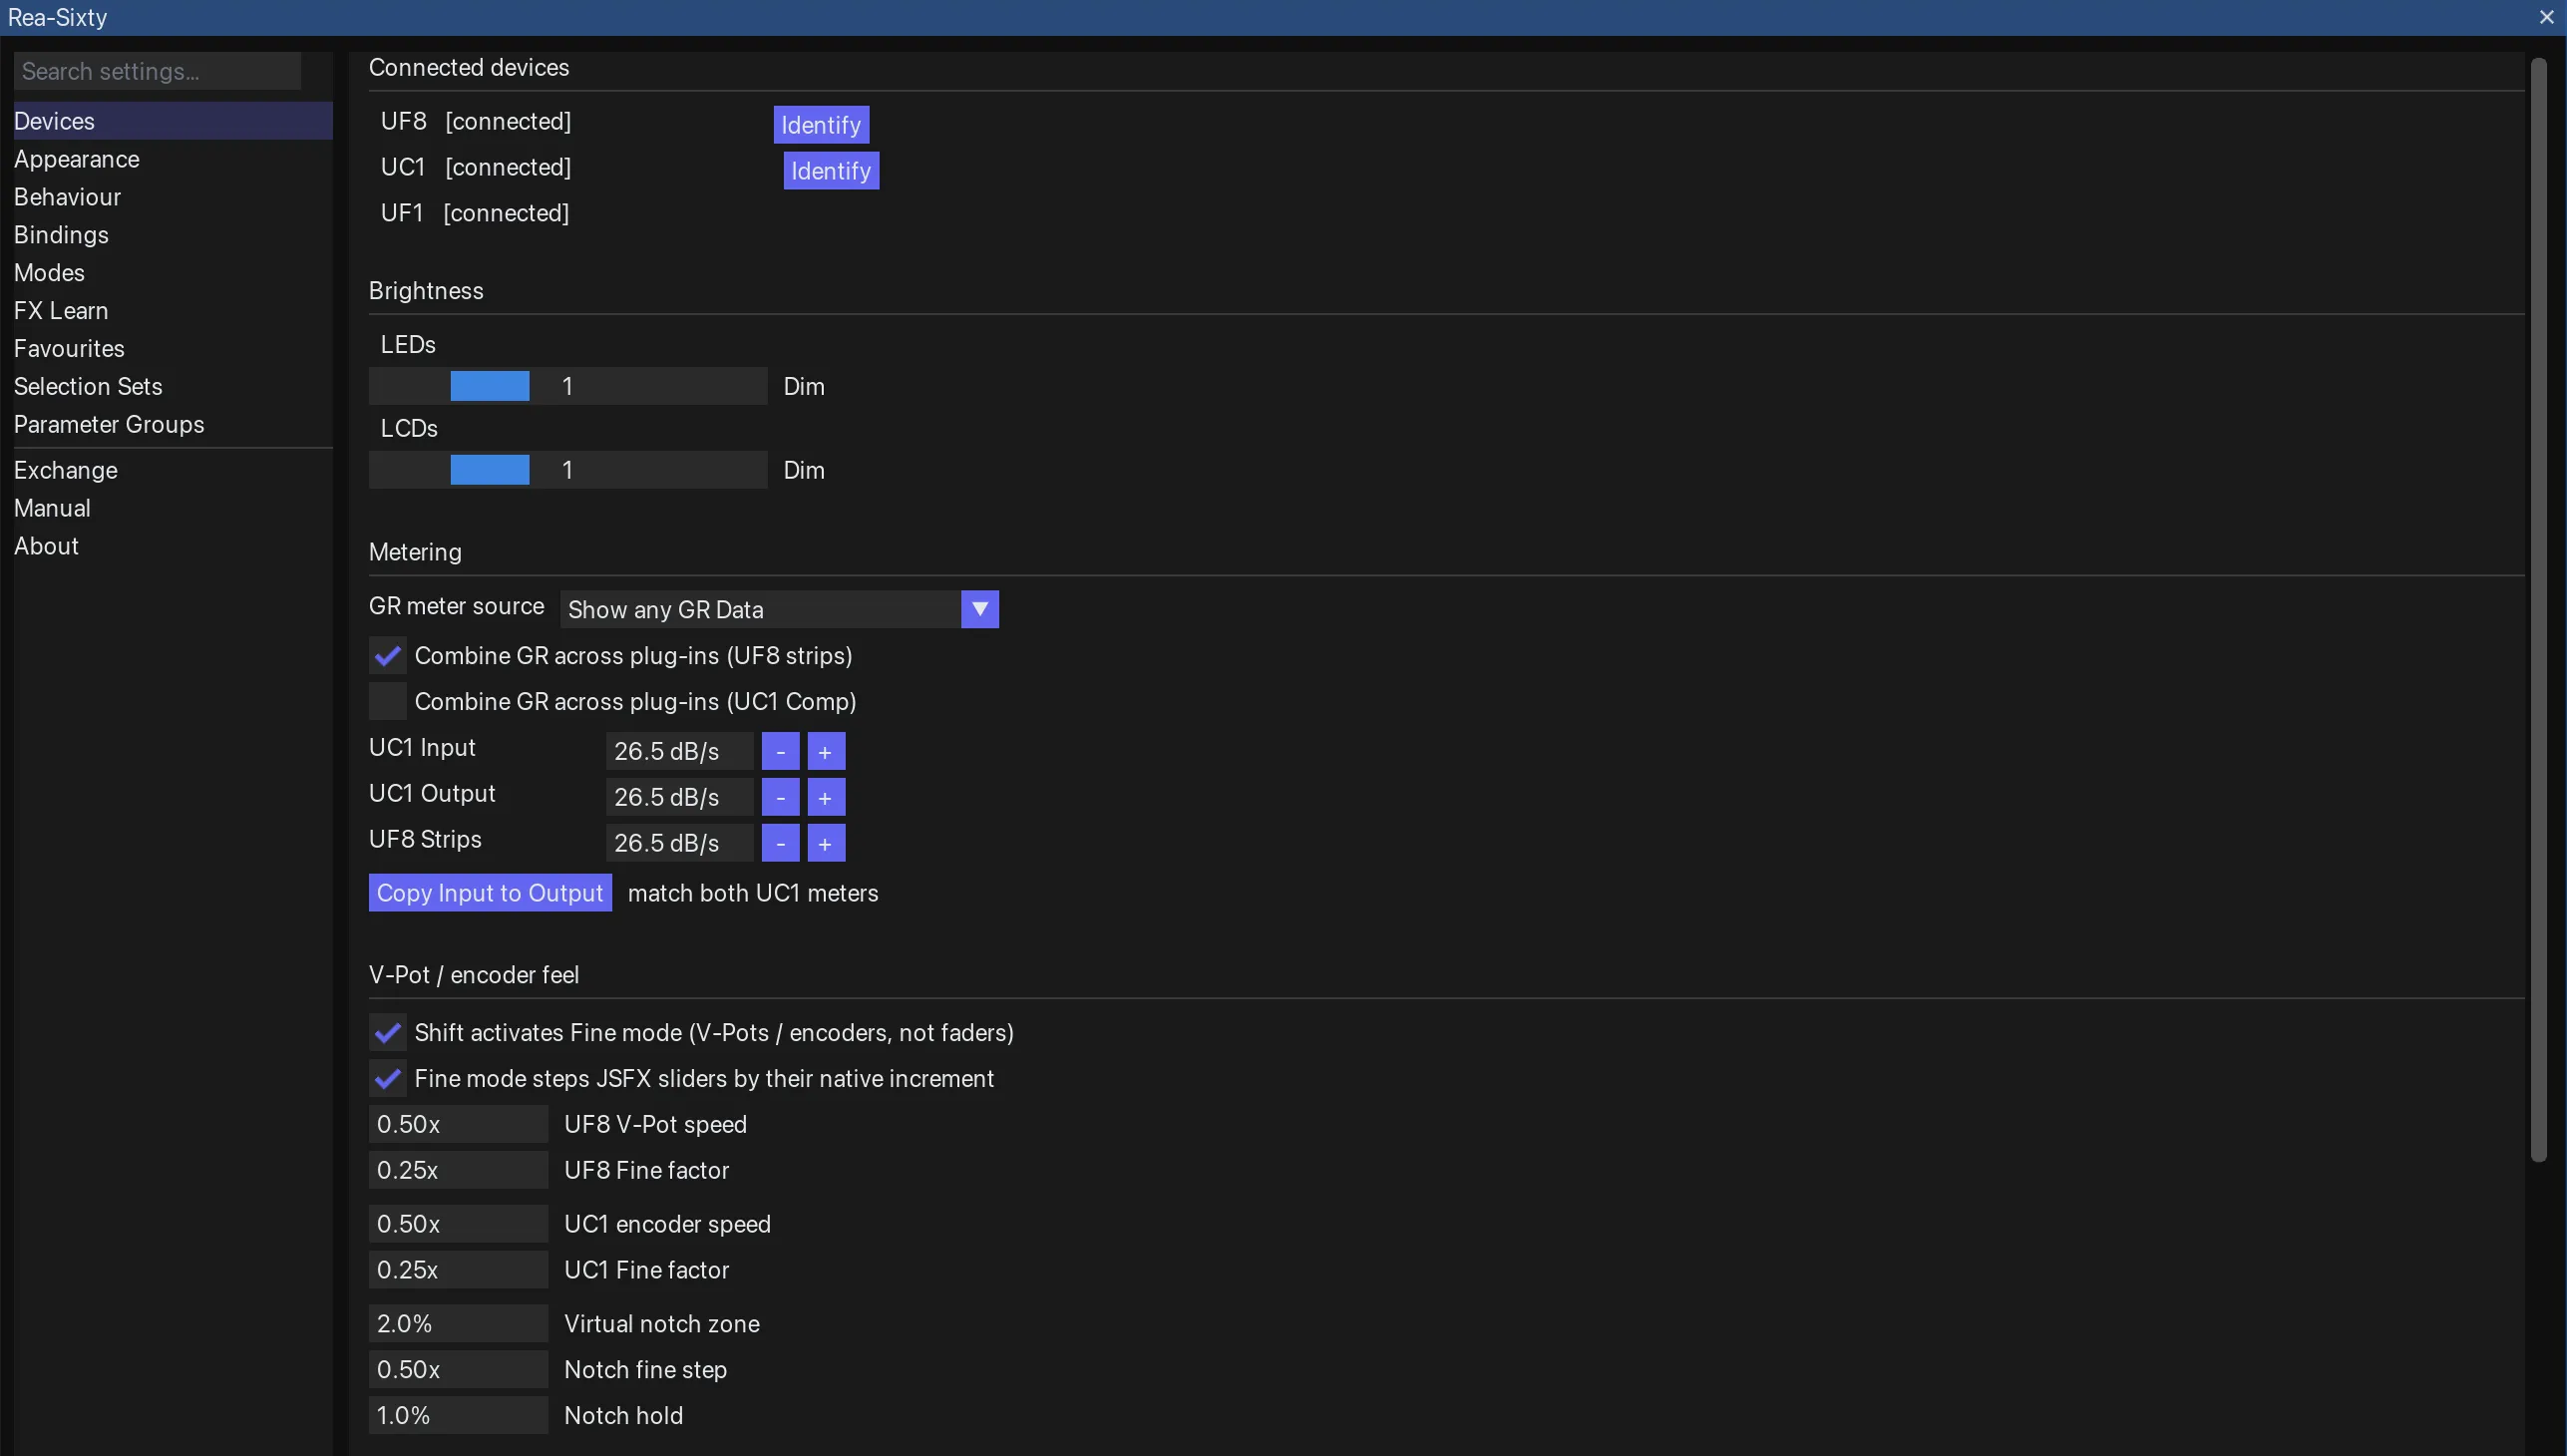
Devices pane — the connected surfaces, LED and LCD brightness, metering and the V-Pot feel. Serial numbers redacted.
The hardware: what is plugged in, how bright it is, how its meters fall, how its pots feel.
Connected devices
One line per device — UF8, UC1, UF1 — reading [connected] or [not connected], plus SN and the serial number when connected.
UF8 and UC1 each get an Identify button while connected: it flashes that unit’s LEDs and displays between Dark and Full at 4 Hz for two seconds, so you can tell which box is which in a multi-unit rig. The UF1 has no Identify button.
Rea-Sixty remembers which surfaces have been attached to this computer, and hides the settings for the ones that never have. With only a UF1 on the desk you do not see UC1 GR calibration, UF8 V-Pot feel, or the UF8 and UC1 halves of the REC block. The search box hides them too, so a search cannot land you on a control the page does not draw.
It remembers rather than checks: unplugging a surface for an afternoon leaves all of its settings where they were.
- Show settings for devices you don’t have brings everything back. It appears only while at least one of the three surfaces has never been connected to this machine.
- Forget devices that aren’t connected shrinks the list to whatever is plugged in right now. Use it when a surface leaves the studio for good. It appears only while the list holds something absent.
If no surface has ever been attached, everything is shown.
Brightness
Two 5-step sliders (Dark / Dim / Half / Bright / Full):
- LEDs — drives buttons + V-Pot rings + UC1 LEDs + the UF1’s LEDs
- LCDs — drives the UF8 LCD strips + UC1 LCD + UC1 status displays + the UF1’s colour screen
Set independently so you can crank the displays while keeping the LED ring dim, or vice versa. Six Brightness … actions (LEDs +/-, LCDs +/-, Both +/-) drive these from any button binding.
Sleep
Off out of the box. Switch on Sleep the surfaces when idle and set After to anything from 1 to 99 minutes, and every attached surface goes dark once that long has passed with nobody touching it.
Dark means the brightness goes to zero, not that the surface stops. Everything carries on behind the unlit panel, so waking shows the same picture it had before rather than redrawing it.
Playing and recording count as activity: nothing sleeps while the transport is rolling, and the countdown starts when you stop. Moving a fader by hand counts, and so does any key or knob, but a fader the motor moves does not, so selecting a track will not keep the surfaces awake.
Whatever you touch first only wakes them. That press, or that turn of a knob, does nothing else, so reaching for an unlit panel cannot solo a track you cannot see. The next press works normally.
Sleep the surfaces now is an action you can put on a key, for the moment before a take when three lit panels are the brightest thing in the room. Press it again, or touch anything, to bring them back.
Metering
Where the gain-reduction meters get their numbers:
| Control | Effect |
|---|---|
| GR meter source (combo) | Only Show Channel Strip GR — the GR meters are limited to SSL CS / mapped CS plug-ins. Show any GR Data (default) — falls back to any FX on the focused track exposing the PreSonus GainReduction_dB host extension (ReaComp, FabFilter, etc.). |
| Combine GR across plug-ins (UF8 strips) | With Show any GR Data selected, the UF8 CS-GR strip sums the gain reduction of every compressor on the channel instead of showing one source — in-series GR adds in dB, so the meter reads the channel’s total reduction. With Only Show Channel Strip GR selected it sums every mapped Channel Strip on the channel instead, for two strips in series. Off by default. |
| Combine GR across plug-ins (UC1 Comp) | The same, for the UC1’s Comp meter, but only with Show any GR Data selected; under Only Show Channel Strip GR it has no effect. Separate from the UF8 setting, so one surface can show the combined figure while the other shows the Channel Strip alone. Off by default. |
All level meters (UC1 Input + Output, UF8 strip bars) are peak-hold. The only adjustment is how fast each meter falls back after a peak, set per meter in dB per second:
| Control | Effect |
|---|---|
| UC1 Input | Fall rate of the UC1’s input-level meter. |
| UC1 Output | Fall rate of the UC1’s output-level meter. |
| UF8 Strips | Fall rate of the UF8 strip-bar level meters. |
| Copy Input to Output | Sets the UC1 Output fall rate to match UC1 Input. |
Default is 26.5 dB/s — REAPER’s own meter decay, so the UC1 input meter falls in lock-step with the output. Lower = slower decay (longer peak hold); higher = snappier. Entries are clamped to 1 – 200 dB/s.
V-Pot / encoder feel
| Toggle | Effect |
|---|---|
| Shift activates Fine mode (V-Pots / encoders, not faders) | When on, holding the Shift modifier (keyboard Shift, the UF8 FINE key or the UF1 SHIFT key) drops UF8 V-Pot and UC1 encoder step size by that surface’s Fine factor (default ×0.25, see below) for momentary fine resolution. The UF1’s own V-Pots ignore it; their Fine is Quick-Key 2. Faders are deliberately excluded (they already have Alt-drag for fine control). Stacks with the UC1 Fine toggle. Off by default. |
| Fine mode steps JSFX sliders by their native increment | Some JSFX sliders are long enough that even Fine mode cannot resolve a single value cleanly. With this on, Fine on a continuous JSFX slider steps by the slider’s own native increment — one detent = one step, a fast flick accelerates — which is the finest the plug-in supports. Continuous JSFX + Fine only; VST3 / AU and normal turns are unaffected. On by default. |
Below the two toggles, per-surface speed and 0 dB / centre-pan detent feel for all V-Pots and pots. Each field is a typeable value box (no slider). Faders are unaffected. Live — changes apply immediately, no reload.
| Field | Default | Effect |
|---|---|---|
| UF8 V-Pot speed | 1.00× | Linear multiplier on every UF8 V-Pot rotation delta. Higher = faster / coarser, lower = slower / finer. 1.00× = the historic feel. |
| UF8 Fine factor | 0.25× | How much the UF8 step shrinks while Fine is engaged (Shift / FINE / UC1 Fine). Lower = finer. |
| UC1 encoder speed | 1.00× | Same as UF8 V-Pot speed, for the UC1 pots / encoders. Independent so the two surfaces can be tuned separately. |
| UC1 Fine factor | 0.25× | UC1 equivalent of the UF8 Fine factor. |
| UF1 V-Pot speed | 1.00× | The UF1’s four channel V-Pots on a plug-in page and the V-Pot above the fader — whatever that one is driving (pan, a Sticky-Pot parameter, volume under FLIP, the 9th send’s pan as an Extender). Its own value since v0.5 — before that the UF1 borrowed the UF8’s, so tuning the UF8 silently retuned the UF1. On upgrade it is seeded from whatever your UF8 was set to, so nothing moves until you change it. |
| UF1 Fine factor | 0.25× | How much the UF1 step shrinks while its Fine is on. The UF1’s Fine is Quick-Key 2, the bottom 2 key — not the Shift / FINE the other two surfaces use. |
Effective step = base × per-control sensitivity (FX-Learn) × surface speed × (Fine factor while Fine held).
Speed accepts 0.01× to 2.00× on all three surfaces, low enough for crawling through long sweeps a single detent at a time. Fine factors accept 0.05× – 0.50×.
The same section also tunes the virtual notch — the SSL-style magnet that lands bipolar V-Pot params (EQ gains, trims, fader level, pan) on their neutral point (0 dB / centre):
| Field | Default | Effect |
|---|---|---|
| Virtual notch zone | 2.0 % | Catch band half-width around the neutral point (% of the param’s full range). Any inward move that lands inside snaps to centre; turning away from centre stays free. 0 % = no slow-approach snap (crossing the centre still snaps). Range 0 – 5 %. |
| Notch fine step | 0.50× | Step multiplier applied while the value sits within 2× the zone of centre — finer moves around 0 dB plus a more reliable catch. 1.00× = off. |
| Notch hold | 1.0 % | Soft-detent: once the value snaps to 0 dB it parks there and absorbs this much rotation before releasing — stops an endless encoder sailing past 0. 0 % = off (pure magnet, can overshoot). A mouse / automation move larger than the zone releases the hold. Range 0 – 10 %. |
Applies to UF8 V-Pots, UC1 pots and the UF1’s V-Pots. Unipolar params (frequency, Q, threshold) have no neutral point and get no notch.
UC1 GR calibration
Per-tick offset editor at the bottom of the pane, in two tables — BC VU meter (0/4/8/12/16/20 dB) for the mechanical VU, CS DYN GR LEDs (3/6/10/14/20 dB) for the Dynamics LEDs. Click Test on a row, then nudge that row’s dB box until the UC1 lines up with its printed marking. Auto-saved per tick. Reset all clears one table, Stop test resumes normal GR. See chapter UC1 hardware → UC1 GR Calibration.
Appearance pane
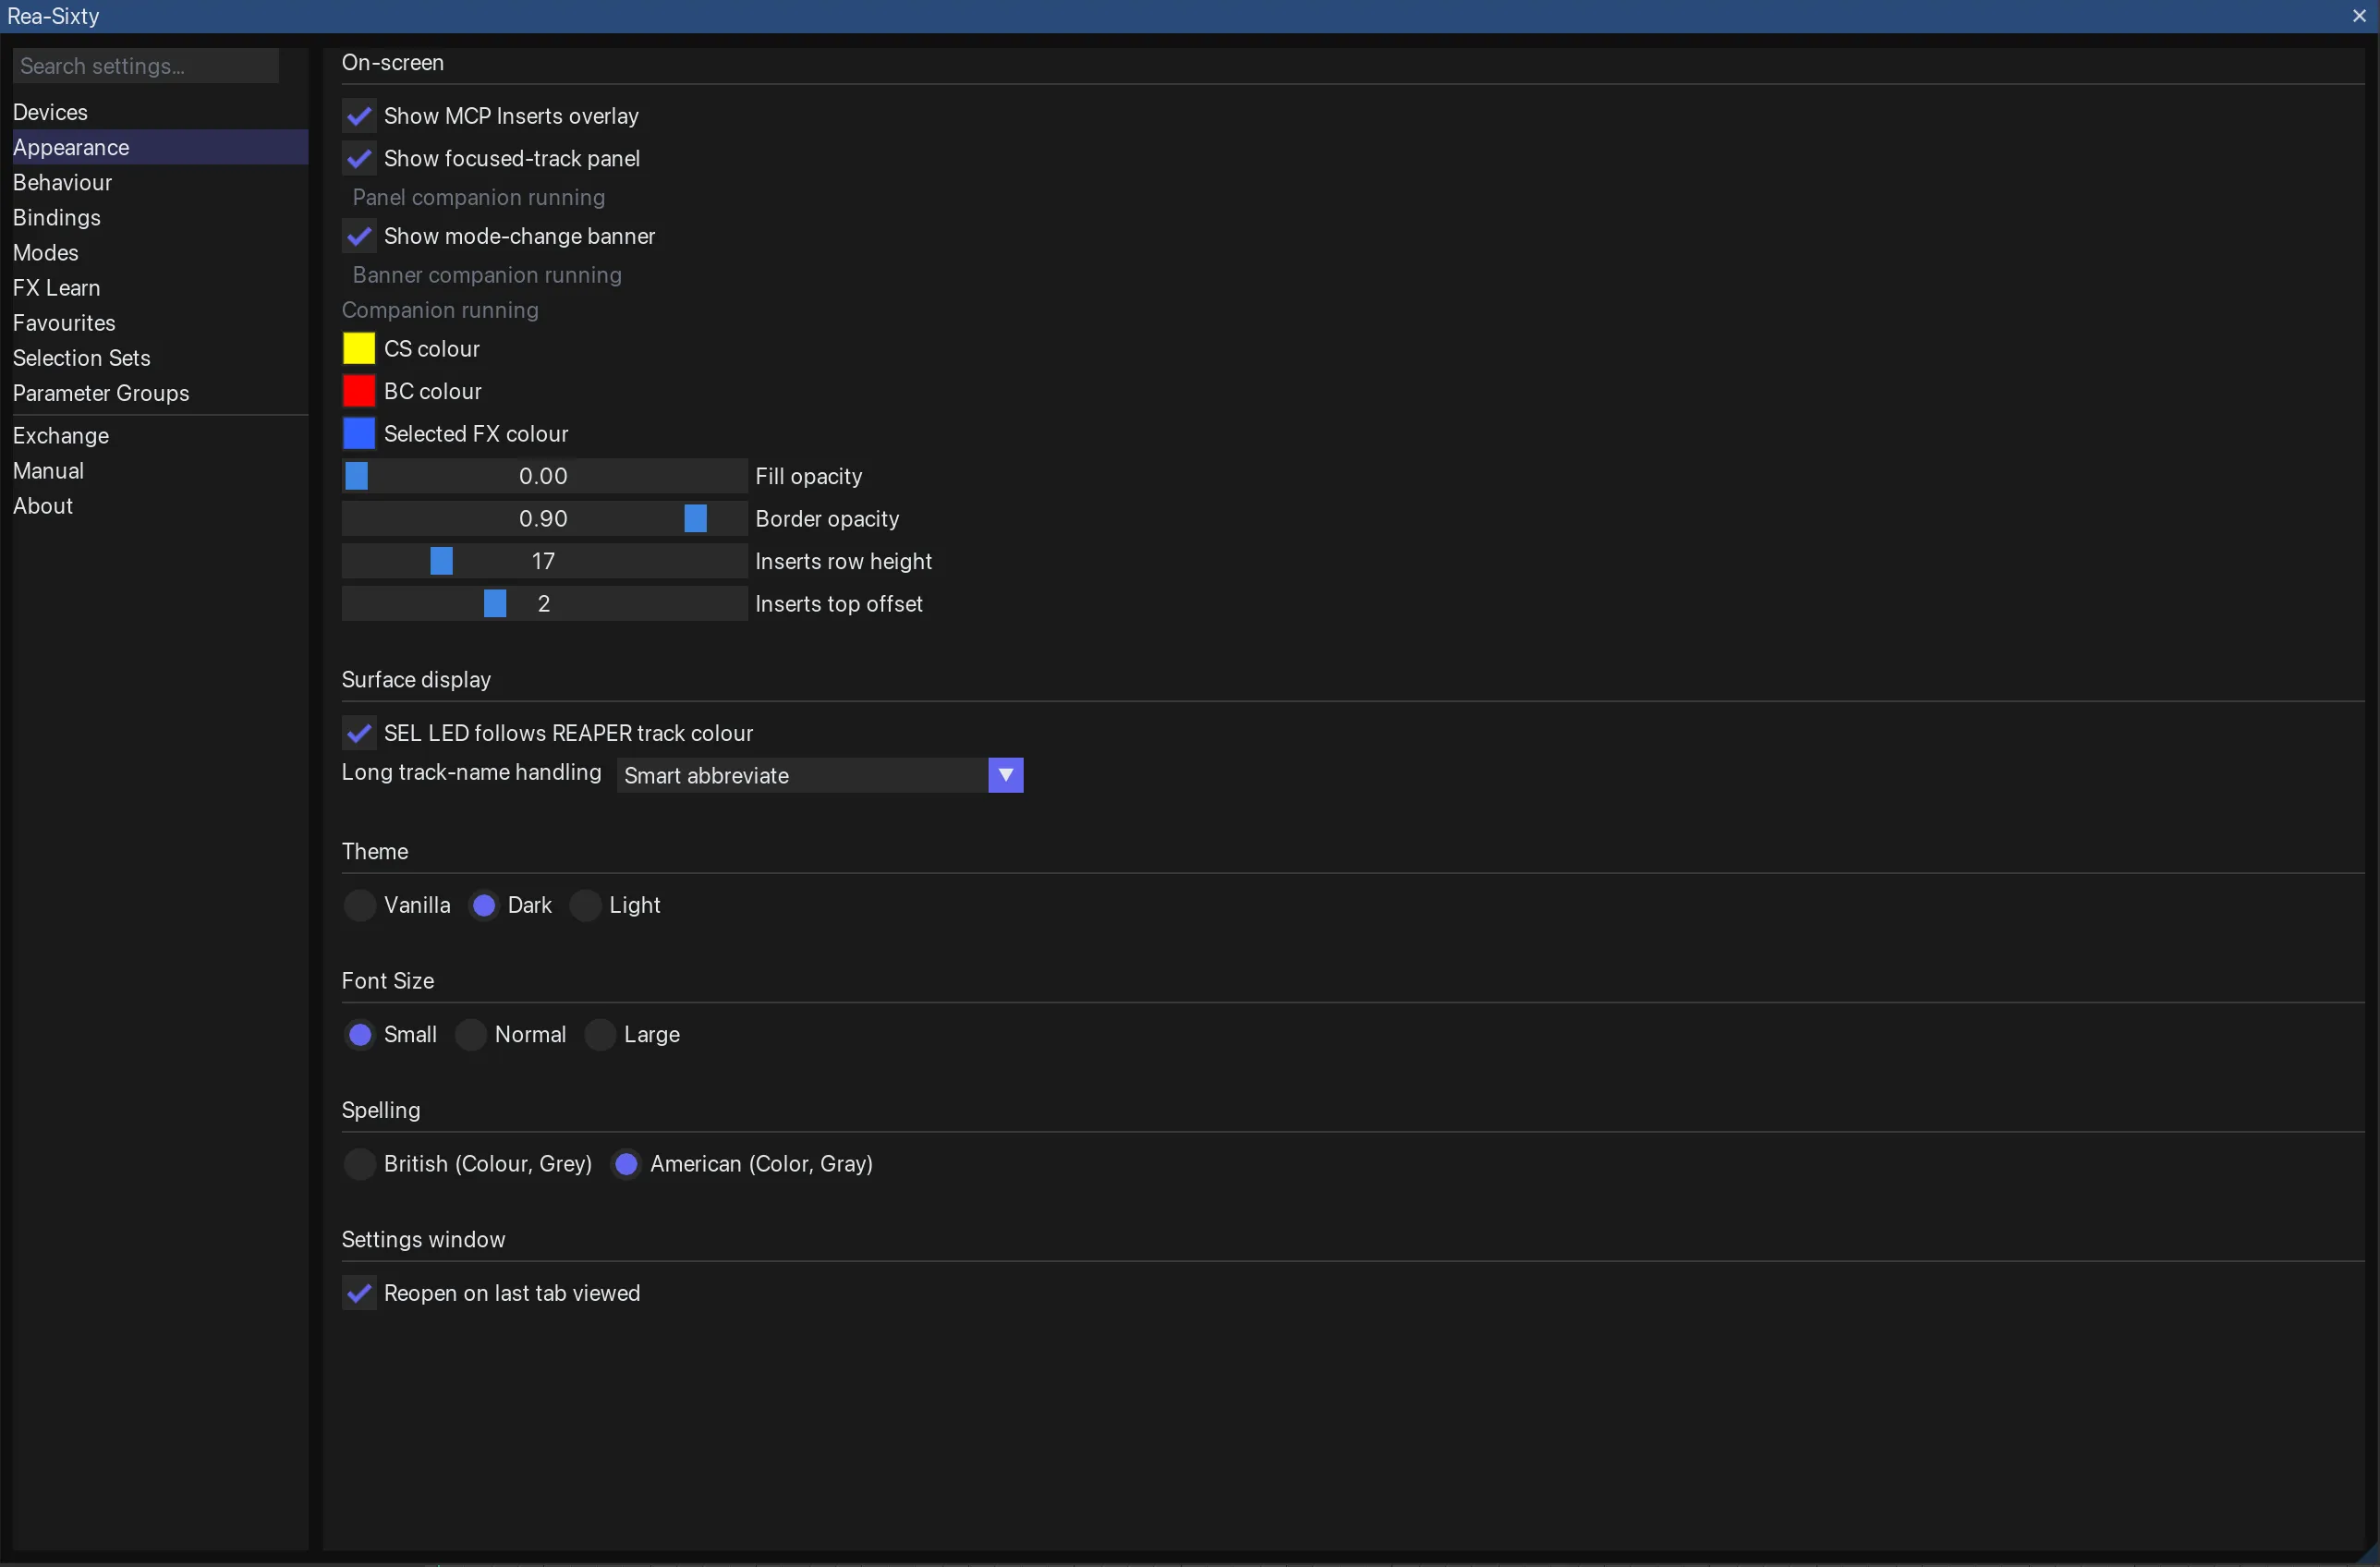
Appearance pane — the on-screen companions and their colours, the surface display options, then theme, font size and spelling.
On-screen
The optional helpers Rea-Sixty draws over REAPER’s own windows. Each is rendered by a companion script that auto-installs and auto-starts, and a status line under the toggle reports whether that companion is up yet. Full behaviour in chapter On-screen display.
| Toggle | Effect |
|---|---|
| Show MCP Inserts overlay | Highlights the active Channel Strip and Bus Comp plug-in on REAPER’s Mixer Inserts list. |
| Show focused-track panel | The frameless floating panel showing the surface-focused track, its CS / BC plug-ins, and the last-touched parameter per domain. |
| Show mode-change banner | Flashes the new Selection- / Channel-Encoder Mode on screen for ~2 s, then hides. Off by default. |
| Show UF8 soft-key bank names | Nested under the banner. Also flash the soft-key bank’s name when the UF8 switches bank, the way the UF1 writes it across its time display. Name the banks in Bindings, on the bank itself. On by default, and only visible while the banner is on. |
| Bank names follow Shift | A bank has two full sets, Plain and Shift, and each can carry its own name. On, the banner shows the set you are holding, so Shift announces that bank’s Shift set. Off, it stays on the Plain name however long you hold, which is what you want if you work with Shift down. Banner only — the focused-track panel’s bank menu always shows the set you are actually in. On by default. |
The colour and geometry rows appear only while the helper that uses them is switched on:
| Control | Shown while | Effect |
|---|---|---|
| CS colour | Overlay or panel on | Colour of the active Channel Strip marking. Default yellow. Shared by overlay and panel. |
| BC colour | Overlay or panel on | Colour of the active Bus Comp marking. Default red. Shared by overlay and panel. |
| Selected FX colour | Overlay on | Colour of the surface-focused plug-in that is neither CS nor BC. MCP overlay only. Default blue. |
| Fill opacity | Overlay on | 0.00 (default) = outline only … 1.00 = solid fill. |
| Border opacity | Overlay on | Opacity of the box outline. Default 0.90. |
| Inserts row height | Overlay on | 8 – 48 px, default 17. Fallback only: the overlay measures the real rows of the FX list and draws on those, so this slider does nothing unless that measurement fails. |
| Inserts top offset | Overlay on | -20 – 40 px, default 1. Fallback only, like the row height above. |
Surface display
| Control | Effect |
|---|---|
| SEL LED follows REAPER track colour | The SEL LED renders the track’s REAPER colour instead of monochrome. Off → SEL is white when selected. On by default. Applies to the UF8’s eight strips and to the UF1’s single SEL key alike; the UF1 ignored the setting until v0.5.6. |
| Colour bar names the send / receive source track | In send and receive modes the colour bar’s plug-in name is blanked — the strip is a route, not a plug-in chain. Turn this on and that zone reads S:<track> (send) or R:<track> (receive): the track the route belongs to. The scribble above already names the other end, so the pair reads “this send, of that track”. The zone is twelve characters, so the name gets ten, shortened by the Long track-name handling mode; unnamed tracks read CH <n>. Off by default — with a one-channel side-mixer the source track is never in doubt. |
| Long track-name handling (combo) | How track names longer than the 8-char scribble-strip slot are shortened. Truncate (default) keeps the first-8-chars cut (“Background Vocals” → “Backgrou”). Smart abbreviate drops separators, then vowels after the first letter of each token, then collapses repeated consonants, then proportionally distributes the remaining char budget across tokens (“Background Vocals” → “BckgrVcl”, “Drums Bus” → “DrumsBus”). Short all-caps tokens (DI / FX / EQ / …) survive untouched. Mode switch repaints all 8 strips immediately. |
Theme
Three-way radio:
- Vanilla (default) — ReaImGui’s built-in dark theme, no overlay.
- Dark — Rea-Sixty’s themed dark palette (blue-grey base + soft accents).
- Light — the Light counterpart for users on a light-mode REAPER setup.
Re-themes every Settings panel + the FX Learn schematic. Hardware-face colours (UF8 silk-screen mockups, UC1 schematic) stay constant.
Font Size
Three-way radio: Small / Normal / Large. Drives every Settings widget except the UF8 / UC1 / UF1 mockup schematic labels — those stay locked at 12 px so the schematics don’t reflow when the picker changes. Numeric inputs (GR-cal table, FX Learn binding column) scale with the font picker so layouts stay aligned across sizes.
Spelling
Two-way radio: British (Colour, Grey) / American (Color, Gray). Switches the spelling of every user-facing string that differs between the two (Settings labels, the focused-track panel’s right-click menu, etc.). British is the default.
Settings window
- Reopen on last tab viewed — when on, the Settings window reopens on whichever pane you last had open instead of the default. Persisted globally.
Behaviour pane
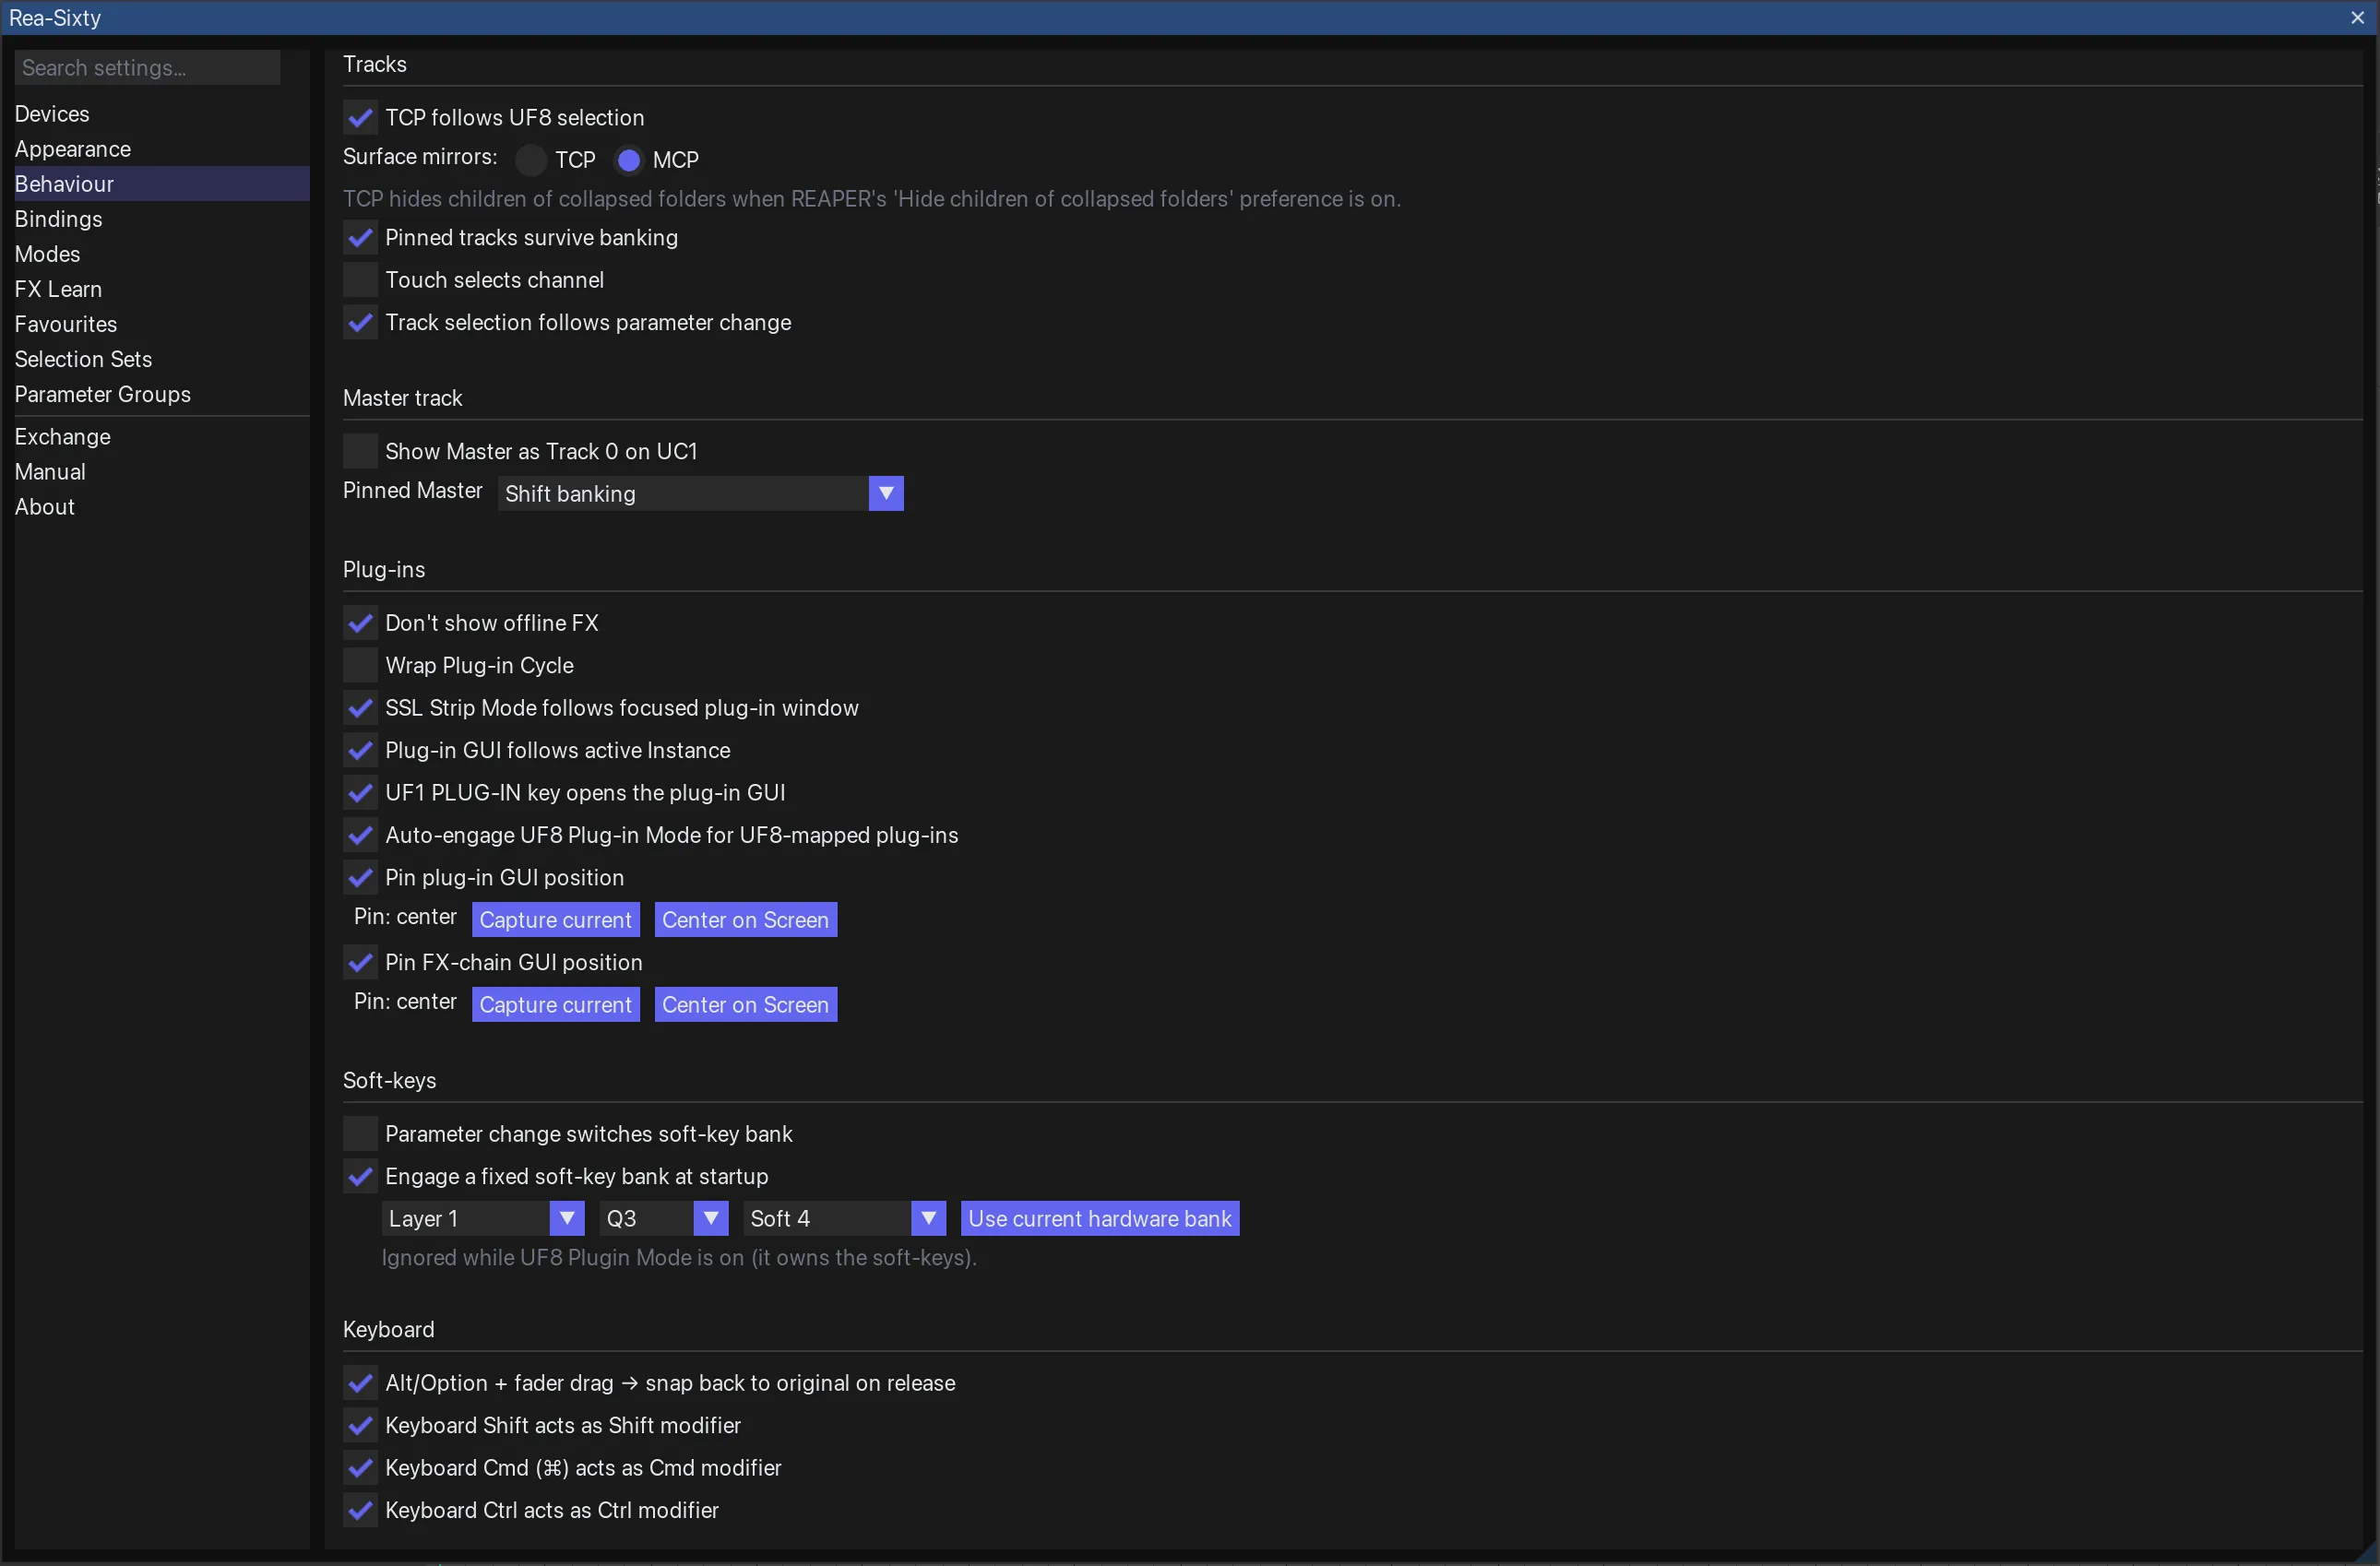
Behaviour pane — tracks, master track, plug-ins, soft-keys and the keyboard modifiers.
Tracks
| Toggle | Effect |
|---|---|
| TCP follows UF8 selection | UF8-triggered track selection scrolls REAPER’s arrange-view track panel (action 40913). MCP follow is always on. Off by default. |
| Surface mirrors: TCP / MCP (radio) | Which of REAPER’s two views the surface’s track list mirrors. TCP (default): the surface shows what the arrange view’s track panel shows. A track hidden in the TCP drops off the surface, and so do the children of a folder collapsed to hidden. Children collapsed to small stay on the surface, because the TCP still shows them. Which states the folder button steps through is set in REAPER under Preferences > Appearance > Track Control Panels > Folder collapse button cycles track heights. MCP: the surface follows the Mixer instead and hides whatever the Mixer hides, including the children of a folder collapsed in the Mixer. REAPER’s Mixer shows the folder button only after a right-click on an empty spot in the Mixer and Clickable icon for folder tracks to show/hide children. Also available as the bindable Surface mirrors: TCP and Surface mirrors: MCP actions. |
| Pinned tracks survive banking | On by default. Pinned tracks — Focus-Set members, plus REAPER’s own TCP pins while Surface mirrors is TCP — sit on the leftmost strips and stay there while everything else banks past them. Switches itself off when the pinned head would fill every usable strip, since there would be nothing left to bank. MCP has no pin concept, so the setting is inert in MCP mode. |
| VCA spill shows hidden tracks | On by default. A VCA spill (long-press SEL on a VCA lead) also brings the followers the mirrored view hides, in the TCP or the Mixer. Off → the spill shows only the followers the surface would show anyway. |
| Touch selects channel | Touching a UF8 fader exclusively selects that strip’s track. Off by default. |
| Track selection follows parameter change | A Channel Strip parameter edit on a non-selected track auto-selects that track. A Bus Comp edit never changes the selection; it only moves the UC1’s Bus Comp focus. Off → the UC1 stays on the currently selected track no matter which strip was just edited. Off by default. |
| Selection mode resets to Normal on startup | The active Selection Mode is remembered while you work, but comes back as NORM after a REAPER restart. On by default: a session that reopens with REC still engaged has its SEL keys arming tracks before you notice. Off → the mode is restored as it was. |
Master track
Surface-side handling of the REAPER Master bus. See Master track (own chapter) for the full behaviour.
| Control | Effect |
|---|---|
| Show Master as Track 0 on UC1 | The UC1 CHANNEL encoder can scroll left past track 1 onto the Master as a virtual “track 0”. UC1-only — the Master never appears on the UF8 strips through this toggle. Default off. |
| Pinned Master (combo) | How the Pin Master to UF8 Strip 1 / 8 actions lay the strip out. Replace strip (default) — the pinned strip becomes the Master and hides whatever track was banked there. Shift banking — the regular tracks bank over the remaining 7 strips so none is hidden (the bank step + clamp drop to 7 while a pin is live). |
Plug-ins
| Toggle | Effect |
|---|---|
| Don’t show offline FX | Cycle rings (FX Cycle, Instance Cycle, per-strip variants) and the UF8 colour-bar default cursor skip FX slots that are set offline. A track whose FX are all offline shows an empty colour bar rather than a placeholder. Off by default. |
| Wrap Plug-in Cycle | Default on (legacy behaviour) — cycle rings wrap from last FX back to first. When off, both ends of the FX chain hard-stop on every cycle path (Channel-Encoder FX/Instance Cycle, per-strip V-Pot FX/Instance Cycle), and the UC1 carousel shows no neighbour name past the first/last FX. |
| SSL Strip Mode follows focused plug-in window | While SSL Strip Mode or UF8 Plug-in Mode is already engaged, bringing a mapped plug-in window to the front re-points the surface at that instance. It does not engage the mode. Off by default. |
| Plug-in GUI follows active Instance | When an Instance Cycle / FX Cycle lands on a new target, an already-open floating plug-in GUI re-points to the new target. Off → the cycle moves the surface but leaves the window pinned to its current FX. On by default. |
| UF1 PLUG-IN key opens the plug-in GUI | Whether the UF1’s PLUG-IN soft-key on a native SSL strip page opens the plug-in’s GUI as well as claiming the surface. Off by default (surface only). An explicit UF1 map picks this per key instead (FX Learn → UF1 cell → Action); the built-in strip pages have no per-key storage, so they follow this one setting. |
| UF1 follows UF8 SSL Strip Mode | The two surfaces keep their own Strip Mode by default, so the UF1’s PLUG-IN key and the UF8’s Plug-in button do not disturb each other. Tick this and the UF8 leads: engaging or dropping SSL Strip Mode there takes the UF1 with it, including when UF8 Plug-in Mode pushes Strip Mode back out. It goes one way only, so the UF1’s own key stays a local override until the next toggle on the UF8, and pressing it can never drop the UF8 out of Plug-in Mode. The follower is always headless, whatever opened a plug-in window on the UF8 side. Off by default. |
| Auto-engage UF8 Plug-in Mode for UF8-mapped plug-ins | When SEL-Mode cycle V-Pot push OR a Plug-in: toggle focused GUI binding lands on a UF8-mapped plug-in, also engage UF8 Plug-in Mode with GUI. Off by default. |
| Pin plug-in GUI position | Every plug-in window Rea-Sixty subsequently opens snaps to a fixed position (size is left alone). Drag a window where you want it and click Capture current, or click Center on Screen for the middle of the display. The line above the buttons reads back the captured pin, or (none captured yet) — until something is captured the toggle does nothing. |
| Pin FX-chain GUI position | The same pattern for FX-chain windows, with its own captured position. Title matching looks for “FX:” on macOS. |
Soft-keys
| Control | Effect |
|---|---|
| Parameter change switches soft-key bank | On by default. A focused-parameter change switches the SSL soft-key bank to whichever bank holds that parameter. Off → the bank stays put when you touch a parameter. The UF8 parameter display follows the parameter either way. |
| Engage a fixed soft-key bank at startup | Off by default. Ticking it reveals three combos — Layer (1-3), Quick (Q1-Q3), Soft-key bank (V-POT / Soft 1-5) — and that user-Quick is engaged once on the first timer tick of every fresh REAPER session, instead of the plug-in-driven default. Use current hardware bank fills the three combos from whatever is engaged on the UF8 right now. Layer 1’s Q1 / Q2 are greyed out: they are the hardcoded SSL CS / BC focus and carry no user-Quick slots. Ignored while UF8 Plug-in Mode is on — that mode owns the soft-keys. |
UF1
| Control | Effect |
|---|---|
| Announce the soft-key bank on the time display | On by default. Switching the UF1’s soft-key bank flashes the bank’s name across the ten-cell time field for about a second, the same way a format change flashes BARS / TIME / SAMPLES, and the clock comes back by itself. Holding SHIFT counts as a switch, because a modifier set is a bank of its own; if that set simply takes Plain’s bank its name is the same one, and nothing flashes. A bank you named in Settings → Bindings → UF1 shows that name; a dynamic bank shows what kind it is (EFFECTS, GROUPS, COLOURS, FAVS, CS FAVS, BC FAVS, HUE, OBS); an unnamed static bank shows its number (SOFT 3). |
| Start the UF1 in a fixed view | Off by default, and the UF1 comes back up in the view you last left it in. Ticking it pins whichever view the UF1 is showing at that moment instead; the combo below changes it to Plug-in, DAW, Meter or Sends. Either way the view is applied once, on the first timer tick that sees the UF1, so plugging the device in mid-session engages it too. The last-used view is remembered globally, not per project: which view the surface shows belongs to the surface, not to the session you happen to open. |
Fixed lanes
| Control | Effect |
|---|---|
| Lane steps skip comp lanes | On by default. The jog, the encoder and ↑ / ↓ pass over the comp lane and walk the takes. |
| UF8 Lanes mode shows the Lanes bank | On by default. While the UF8 encoder is in Lanes, the eight soft keys are the Lanes bank; leaving the mode brings your bank back. Not in UF8 Plug-in Mode, which keeps the row. |
| Scrub while painting | Off by default: the cursor moves silently while you paint. On: painting sounds like a scrub. |
| Play the stroke after painting | On by default. After a stroke REAPER plays the comp around it, stops, and the edit cursor goes to where you let go. |
| Played before and after the stroke | How much of the comp plays on either side of a stroke. 1 s by default. |
| Snap cuts to the grid | Off by default. Painting and live comping cut on the nearest grid line. |
| Cut lead-in | Every cut lands this much earlier. 20 ms by default. |
Keyboard
| Toggle | Effect |
|---|---|
| Alt/Option + fader drag → snap back to original on release | Hold Alt/Option while moving a fader; release while still holding Alt → fader snaps back to its touch-on value. Mirrors REAPER’s mouse Alt-drag. Off by default. |
| Keyboard Shift acts as Shift modifier | When on (the default), holding Shift on the host keyboard counts as the Shift modifier for any binding’s Plain/Shift/Cmd/Ctrl modifier slot — in addition to the hardware Modifier: … bindings. |
| Keyboard Cmd (⌘) acts as Cmd modifier | Same, for Cmd on macOS; on Windows the Alt key drives this slot. On by default. |
| Keyboard Ctrl acts as Ctrl modifier | Same, for Ctrl (Control on macOS). On by default. |
The three FX-Learn modifier-layer switches used to sit here. They now live in FX Learn → Modifier layers.
Bindings pane
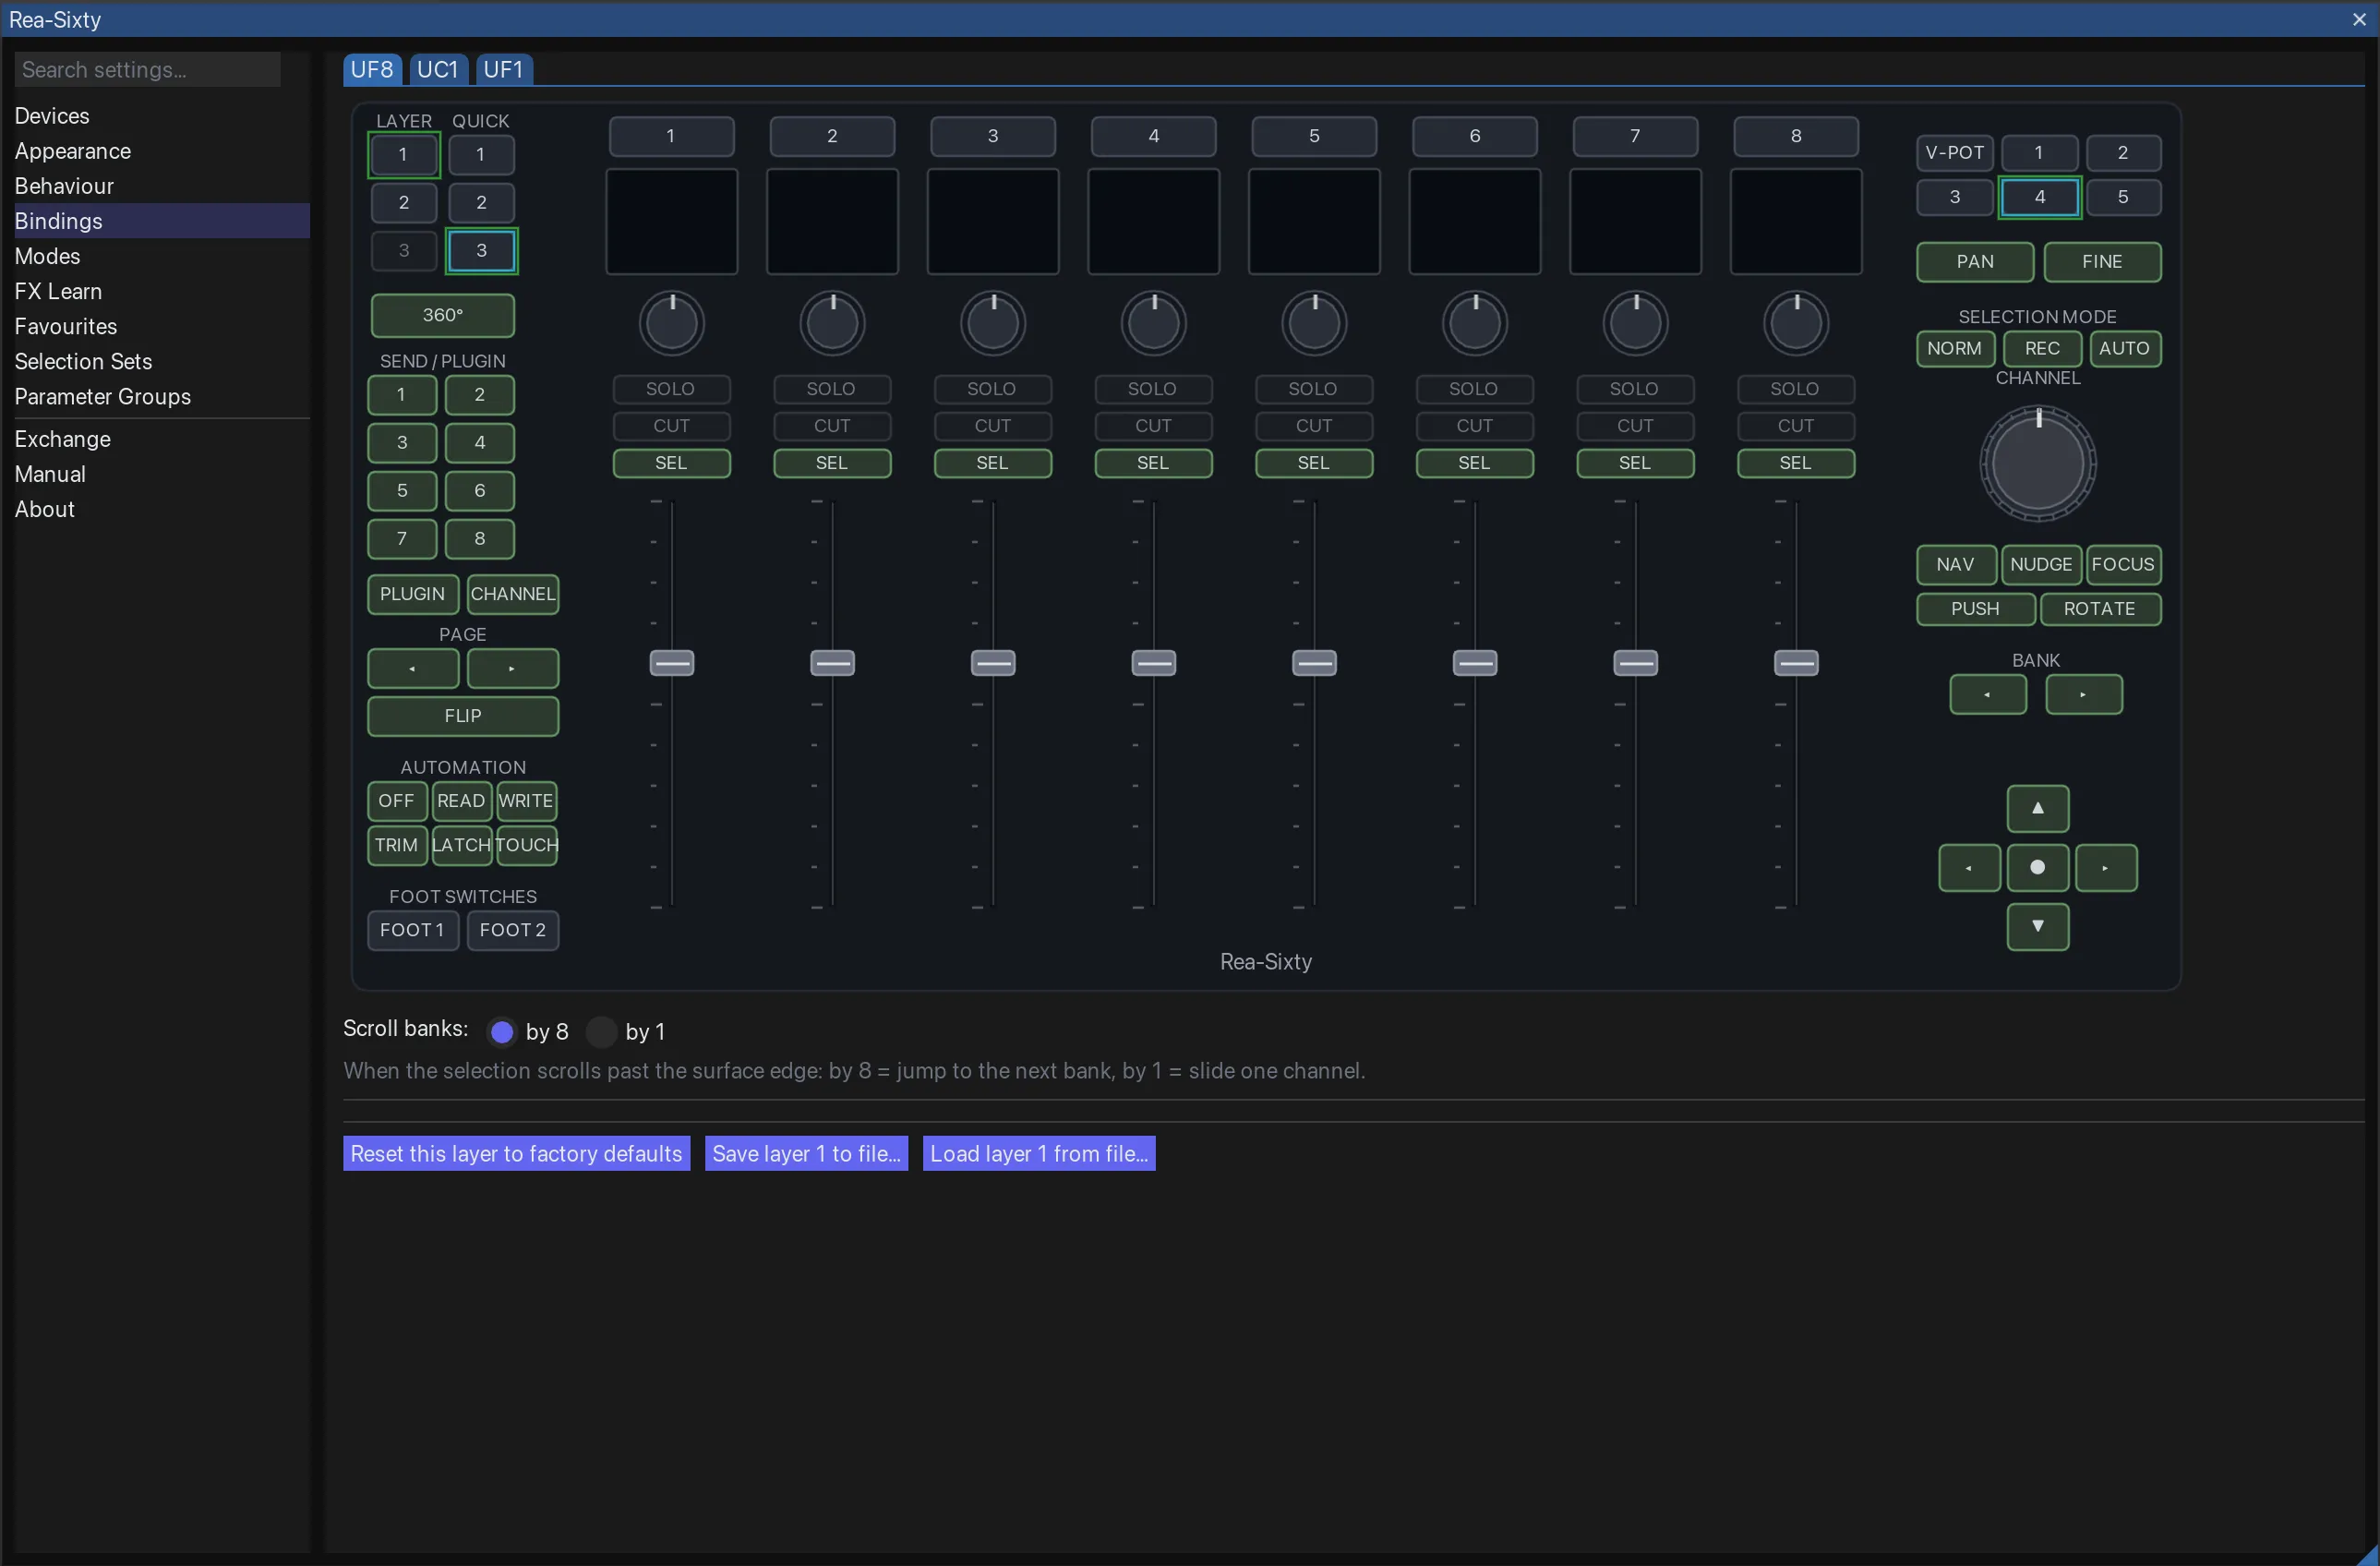
Bindings pane, UF8 — the surface mockup doubles as the picker; short press and long press are edited separately.
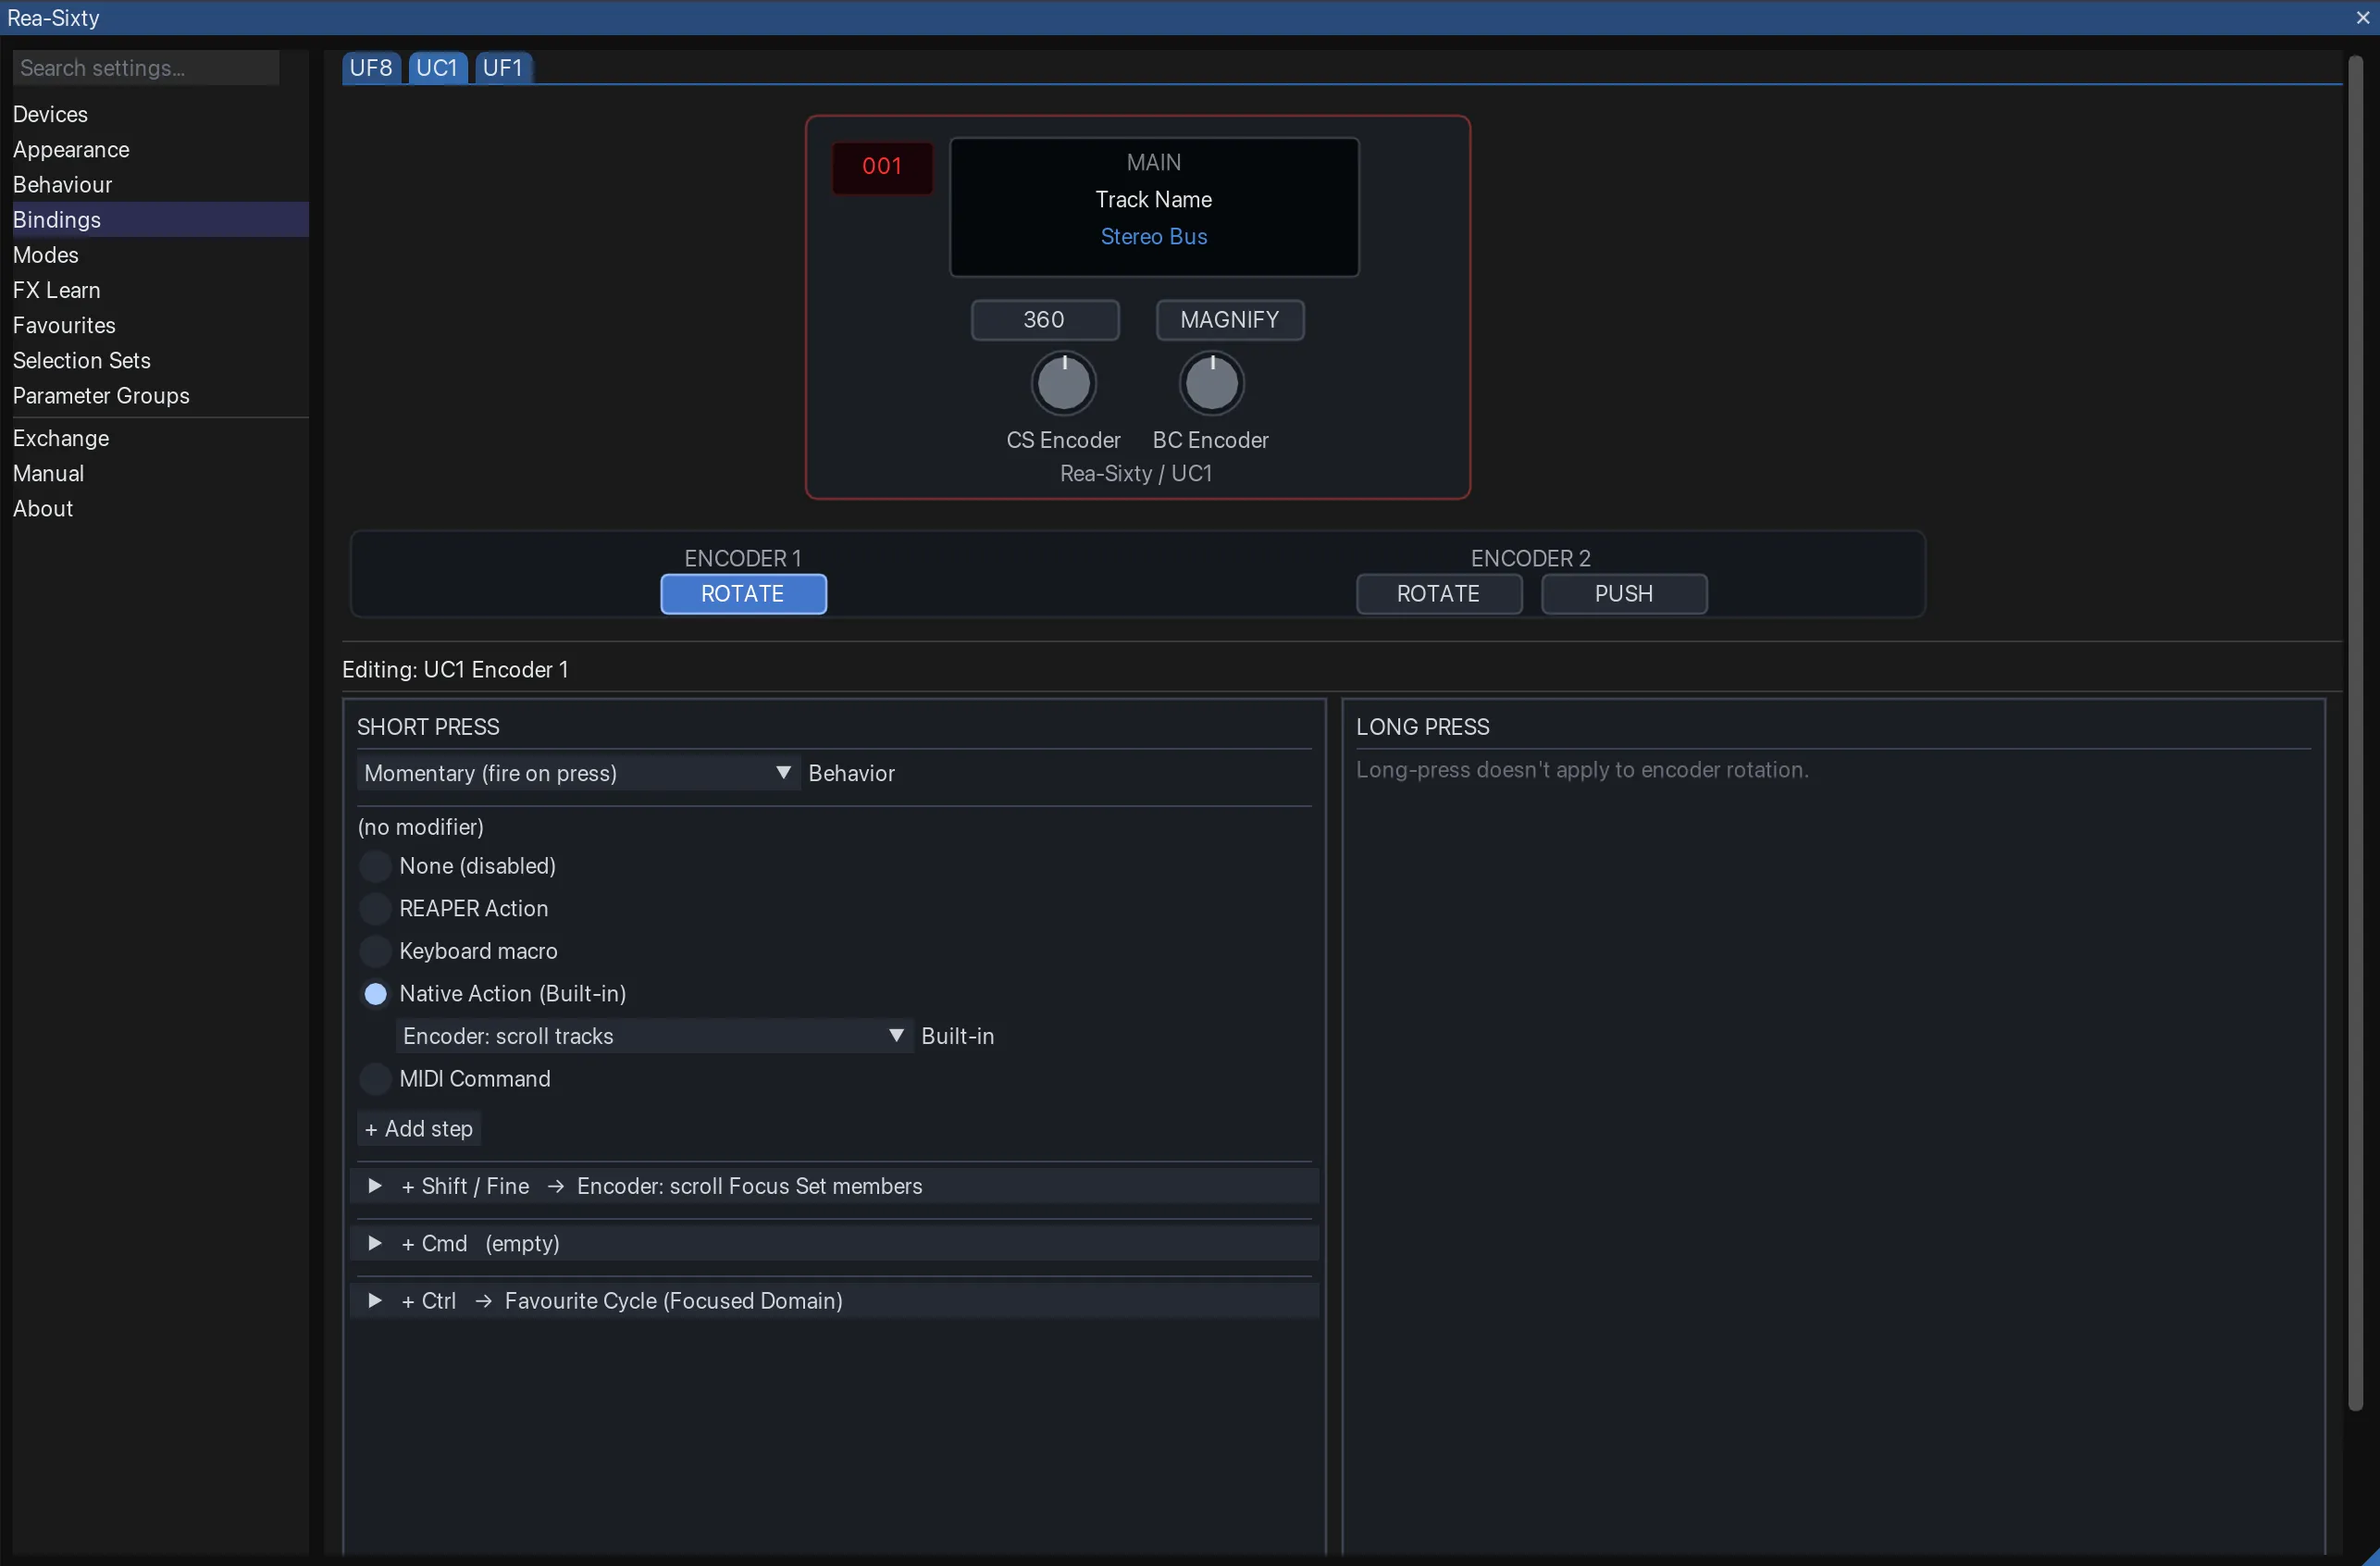
Bindings pane, UC1 — encoder rotate and push are distinct binding targets.
Bindings pane, UF1 — soft-keys, four V-Pots, the channel encoder, the nav cross and the jog wheel.
Top of the pane: a tab bar with UF8, UC1 and UF1, each rendering its hardware as a vector schematic. Click any button, knob, encoder, or fader to select it; the per-button editor opens below the schematic.
The eight top soft-keys wear their LED colour in the schematic, so a bank you coloured reads as that bank at a glance. It is the active colour, the one the key shows when it is lit, and it follows the Plain / Shift switch, because a key can be one colour on Plain and another on Shift. White is left alone: it is the factory colour on every key nobody has touched, and eight white tiles would say less than the grey they replaced. A dynamic bank is not coloured at all, for the same reason its labels are not shown: its colours come from the focused track, and this panel has no track.
The “current layer” follows whichever Layer button (1 / 2 / 3) is highlighted in the schematic — click a Layer button to switch the live layer; the green outline indicates which one is active. There is no separate layer-tab strip.
Layers switch Quicks only (checkbox on the UF8 tab, under the schematic, off by default). Off, a layer key re-binds the whole surface and every key can carry a different action per layer. On, the surface keeps Layer 1’s bindings everywhere and the layer key only selects which group of Quicks and soft-key banks is live: three sets of banks rather than three surfaces. Quick 1 to 3 and the sub-bank row are the exception either way, since their bindings are how a layer’s sets are reached. The LAYER lamps and the green ring follow the layer regardless, because that is what the hardware is on, and bindings stored on Layers 2 and 3 are left alone for when you switch it off again.
Five click-to-edit special cases:
- Top-soft-keys (the 8 buttons above the V-Pots) open the user-Quick slot editor for the (Layer, Quick, soft-key bank) coordinate you are editing instead of the regular per-button editor — top-soft-keys are slot pickers, not direct actions.
- Soft-key bank selectors (V-POT + 1..5) open the bank cell editor with a Per-Quick LED override so the user can distinguish (Layer, Quick) contexts visually.
- The UF1 nav cross (the four arrows and the centre key around the jog wheel) opens the regular editor with a Jog Mode picker above it. Each of those five keys holds a separate binding per object, and the picker says which one you are editing. It follows the surface and moves it: change the object there and the wheel changes with it, so what you edit is always what you are holding. See the chapter Jog Mode.
- The UF1 jog wheel is selectable but fires nothing, so clicking it opens the wheel’s own settings (picker speed, fine divisor, the step for the object you are in, and its time axis) with no action picker at all. Only the settings the live object actually uses are shown.
- Everything else uses the regular per-button binding editor.
Offline soft-key editing + edit selector
You can view and edit the Top-Soft-Key slots without a UF8 connected. The engaged bank is a value Rea-Sixty holds either way, so clicking a set or a bank still moves it and the editor still follows.
When you click a Top-Soft-Key (or a bank cell) in the schematic, the Soft-Key Sets matrix appears under it. It is not a second setting beside the hardware: it shows the bank that is engaged, and clicking one engages another, exactly as pressing those keys would. What you edit is always what the surface is on.
Soft-Key Sets
A set is the six soft-key banks under one Quick key, and it has a number of its own, 1 to 9:
| Set | Layer | Quick |
|---|---|---|
| 1 | 1 | Q3 |
| 2 – 4 | 2 | Q1 – Q3 |
| 5 – 7 | 3 | Q1 – Q3 |
| 8 – 9 | 1 | Q1 – Q2 |
Sets 8 and 9 are SSL’s own CS and BC rows. They are sets like the others and sit in the matrix with six banks each, named SSL CS Bank 1 to 6 and SSL BC Bank 1 to 6 wherever the plug-in actually fills one. The channel strip fills all six. The bus comp fills two and leaves four completely empty, and those four are ordinary user banks: they read as a dash until you put something in them, and take a name and a dynamic kind like any other. On Plain, the keys SSL occupies stay SSL’s and cannot be edited; the ones it leaves free are yours, and the whole Shift set is yours on every page. Engaging one of them means disengaging: SSL’s row is what the layer shows when no set is engaged, so picking Set 8 drops the set, points the domain at Channel Strip and selects the page. The action Soft-Key Set 8 (SSL Channel Strip) gets you the same row from a key, with two differences: it acts on the layer you are on rather than moving you to Layer 1, and it leaves the page where it was instead of selecting one. Only on Layer 1 does the editor recognise the row and mark it in the matrix.
They were numbered 8 and 9 rather than 1 and 2 because set numbers are addresses that bindings point at, and renumbering would have moved everyone else’s.
The number matters because it is an address. Soft-Key Set: engage (param 1-9) is a bindable action, so a set sits on any key, foot-switch, Stream Deck tile or keyboard shortcut you like — the Quick button is one way in, not the only one. Engaging a set leaves the soft-key bank where that layer had it, so coming back puts you on the bank you were using.
The matrix is nine rows by six columns. Each row is a set, with its number in front and a name you can type beside it — the number stays visible once you have named it, because Soft-Key Set: engage takes the number as its parameter; each cell is one of its banks, showing that bank’s name, or its dynamic kind, or a dash when it holds nothing. The engaged cell is marked, and clicking a cell engages that bank. The cell is where you work on the bank: double-click it to rename it in place, right-click it for everything else — copy, cut, paste and clear the bank, its dynamic kind, the presets and the factory banks. The right-click engages the cell first, so what you edit is always what the surface is showing. What stays in the editor below the matrix are the settings of a dynamic bank (its paging control, the FX gestures, the colour palette) and the bank’s LED colours. Plain and Shift sit in the matrix header, to the right of the last bank column, because the matrix shows one of the two sets at a time and which one has to be readable inside it.
The set comes first in every name the surface announces, so you always know which of the nine you are in: a bank called KHE Amps in a set called Editing reads Editing, KHE Amps. Name neither and it reads Set 2, Soft 3. The one exception is the pages SSL fills on Sets 8 and 9, where the set’s own default name is already SSL Factory CS or SSL Factory BC and repeating it would say the same thing twice — rename the set and it comes through like any other.
Where the action can be on or off, each slot carries a Behavior (Toggle or Press), the same setting a regular button has.
Assign an action and the key names itself. Every built-in action carries a twelve-character default label — the surface’s cap — and it lands in the Label field the moment you pick the action, for as long as you have not typed a name of your own. A name you typed is never overwritten, and clearing the field lets the automatic one come back. Families share a prefix so eight of them side by side stay readable: Enc for the encoder modes, UF1 and UF8 for the surface-specific ones, Hue, Zoom. The jog cross is the exception, because there the object is the information (Item <, Point >, Razor Top, Fade Follow) and a prefix would not leave room for it.
Every soft-key bank also holds two sets of keys: Plain and Shift. Holding the FINE key switches the whole row of eight, labels and all, and releasing returns to Plain. The Plain / Shift switch in the matrix header chooses which set you are editing, and the matrix cells and the scribble previews follow it. Like those two pickers it follows the hardware: press FINE to jump to the Shift set and press it again to come back to Plain. Releasing never moves it, so you can edit with the mouse. A set you left empty shows empty on the hardware, it does not borrow the Plain label. While the Bindings pane is open the surface follows the Plain / Shift switch rather than the key you are holding: the eight keys show the set you are editing and a press fires that set, so what you see on the hardware is what you are working on. Close the pane or switch to another one and the surface goes back to following the held key.
There is no Cmd or Ctrl set. The surface carries one modifier key and no more, so those two would have to come from the computer keyboard, where they already belong to the FX-Learn modifier layers.
Each set is a full bank, not just a second list of actions: its own actions, its own labels, its own LED colours and its own presets.
A preset saved from Plain takes the Shift set with it, whenever that set holds anything, because a bank is both sets and a preset of half of it would rebuild half a bank. Such a preset replaces both sets when you recall it, whichever one you happen to be editing, and the confirm dialog says so before you press it, the same rule a factory bank longer than eight keys follows. Save while you are on Shift and you get that one set, as before; a preset with no Shift half still lands in whichever set you recall it into, so a Plain preset can be recalled into Shift.
Copy, cut and paste a whole bank. The cell’s right-click menu moves a bank the way the preset does, without naming it: copy takes the eight slots, the bank’s name and its dynamic kind, cut takes them and empties the cell, paste writes them into the cell you clicked. Copying from Plain takes the Shift set along when that set holds something, exactly as saving a preset does, and cut then clears both. Pasting reproduces a dynamic bank as a dynamic bank, which is where a copy differs from a preset recall. The clipboard lives for the session, not in the config.
Each set can be its own dynamic bank. Pick a kind with the header switch on Plain and Plain’s bank becomes dynamic; pick one on Shift and that set becomes a bank of its own, so FX on Plain and Track Colours on Shift is a thing you can build. A set left on Off (take Plain’s bank) does exactly that, which is how a set behaves out of the box.
When a bank is dynamic its keys come from the focused track. On Plain’s bank the modifiers still run the FX-key gestures, except on a key you assigned in that set, which fires instead, so nothing you were already using goes away. A set with a bank of its own carries no gestures: holding the modifier is how you reached that bank, so pressing a key there is that bank’s own push. A long press is still a long press either way.
Clear whole key does what it says: label, behaviour, LED and both sets. To empty a single set, pick None (disabled) in its action picker.
What you edit is what is engaged. Clicking a cell in the matrix engages that bank, and the editor follows it, so the pane can never sit on a different bank than the surface. The engaged cell is marked.
This works with no UF8 attached, so you can still walk through every set and bank offline — the Top-Soft-Key labels in the schematic show the bank you just engaged.
Factory Rea-Sixty soft-key banks
Right-click the bank’s cell in the matrix and open Rea-Sixty factory banks. Picking one recalls it into that cell, and Load the full set into Layer 1 / Quick 3 drops all five into Layer 1 / Quick 3’s six soft-key banks at once, leaving one place free. A bank that fills both sets is marked (Plain + Shift) in the menu.
A bank with more than eight entries fills both sets. Eight keys is one set, and a curated list longer than that would otherwise be cut off — which is how the Encoder Modes bank used to show eight of its modes. Such a bank writes Plain from its first eight and Shift from the rest, so recalling it replaces both sets of that bank, and the confirm dialog says so.
A factory bank always owns both halves, including the one it does not fill. A shorter bank used to write only the set you were on, which left the previous bank’s Shift half standing under the new Plain half — recall Focus Set & Selsets over Encoder Modes and the encoder modes stayed on Shift. A curated bank is the whole bank: what it does not fill, it clears.
The five factory banks are:
- Encoder Modes — all sixteen Channel-Encoder modes. Eight on Plain (Ch Select / Inst Cycle / FX Cycle / FX Move / CS Cycle / Markers / Nudge / Mousewheel) and eight on Shift (BC Cycle / Fav Cycle / Selset Cycle / Bank by 1 / Last Param / FX Scroll / Inst Scroll / Lanes).
- Focus Set & Selsets — pin / add / remove / toggle / set-from-selection / clear, plus Focus Scope, which cycles Both / UF1 / UF8. The sixth Plain key is left free. The scope is on the bank because setting it on one surface and then pressing on the other is the mistake this bank invites. On Shift, the three Sticky Pot actions: Pin Sticky, Pair Sticky and Sticky OnOff — pinning one parameter to a strip is the same trade as pinning one track to the surface.
- Plug-in Ops — FX GUI / FX Chain / Close All FX / Bypass / Offline / Preset prev-next / SSL Strip.
- Learn / Master — Learn-HUD / Touch-Learn / Master pin left-right / focused-track panel / Out-Gain. Two of the eight keys are free.
- Brightness — Both / LCDs / LEDs × up / down.
The favourites used to be here as two more banks, one for CS and one for BC. They are dynamic kinds instead now (see Dynamic soft-key banks), which does the same thing and stays live rather than being a snapshot. Five banks also fit the six places in a set, so the full-set load leaves nothing behind.
These are built only from Rea-Sixty’s own actions; generic DAW actions (deselect, arm, zoom, etc.) you bind yourself to a free slot.
Naming a soft-key bank
Double-click the bank’s cell in the matrix and type. (Rename… in the cell’s right-click menu does the same thing.) Enter or a click elsewhere commits, Escape leaves the name alone. What you type is what the bank is called on screen: in the mode-change banner when you switch to it, and in the focused-track panel’s UF8 soft-key bank name element. The UF8 has no display of its own to announce it on, which is why both of those are on screen rather than on the surface.
The name belongs to one modifier set, like everything else about a soft-key bank, so Plain and Shift can be two differently named banks on one key.
Recalling a preset also turns the bank back into a static one. A dynamic bank computes all eight keys from the track and ignores whatever is stored in its slots, so a preset recalled onto one would otherwise write eight actions no key could reach.
Recalling a preset names the bank after it. Load Drum compression into a bank and that is what the bank is called, in the banner and in the panel’s menu, without typing it a second time. Factory banks do the same, so a recalled Encoder Modes announces itself by name. Type over it whenever you want something else; the name is yours from then on.
With no name of your own the field starts empty and the bank announces its default name: its dynamic kind (FX, Groups, Colours, Favourites, CS Favourites, BC Favourites, Hue, OBS), else its set and position (Set 2, Soft 3, or the set’s own name in place of Set 2). On Sets 8 and 9 the default is the page the plug-in fills, SSL CS Bank 3. Clearing the field puts that default back, which is also how you undo a name.
Dynamic soft-key banks
A normal soft-key bank holds eight fixed assignments. A dynamic bank computes its eight keys live from whatever track you are looking at — its plug-ins, for instance — so the keys change as you move around the session.
Right-click the bank’s cell in the matrix and open Dynamic bank. The kinds are:
| Setting | What the eight keys become |
|---|---|
Off (static slots) | Normal behaviour — the eight slots you assigned |
FX (focused track) | The focused track’s plug-ins |
Parameter Groups | Parameter Groups 1–8 |
Track Colours | Your eight-colour palette |
CS / BC Favourites | Your eight favourites of whichever domain you last touched |
CS Favourites | The eight Channel Strip favourites, whatever you are focused on |
BC Favourites | The eight Bus Compressor favourites, the same way |
Hue Scenes | Your eight Hue scene slots, each key in its scene’s colour |
OBS Scenes | The scenes OBS is showing, by name, the one on air lit |
Selection Sets | Selection Set slots 1–8, by name and in each slot’s colour, the recalled one lit, the used ones dim |
Lanes | The fixed lanes of the selected track, by name, the ones playing lit, the comp lane green. See Fixed lanes |
The three favourite kinds differ in one thing only. The first follows the focus, which is what you want when one bank should serve both. The other two do not, so a rig can carry its channel strips on one bank and its bus comps on another and both are always what they say. All three read the plug-in’s short name onto the key, live, and light the key that is on the track.
The choice is stored per bank, so each of the six banks in a set can be dynamic or static independently. While a bank is dynamic its eight stored slots are ignored — they are not lost, and turning the bank back to Off restores them. Everything a kind can be tuned with stays under the matrix: the FX and Lanes banks’ paging control, the colour palette, and the warning about slots you left under a held modifier, which beat the computed key.
A dynamic bank announces itself in three places, so you never edit slots that cannot fire:
- The bank’s selector key on the schematic (V-POT / Soft 1-5) carries an amber tick in its top-right corner. The matrix cell itself stays plain.
- The eight scribble strips above it read the bank’s kind (
FX,GROUPS,COLOURS,FAVS,CS FAVS,BC FAVS,HUE,OBS,SETS) rather than the stored slot labels, because those labels never reach the hardware while the bank is dynamic. - Clicking any of the eight keys shows what the bank computes instead of a slot editor, with the same Dynamic bank dropdown and the same settings the cell shows, so you can switch it back to static, or tune the palette or the FX paging, without hunting for the cell.
On Sets 8 and 9 it depends on the page. A dynamic bank computes all eight keys, so it can only go where the plug-in claims none of them: the bus comp’s four empty pages take one, the pages SSL fills do not. Every page of the other seven sets can.
The UF1’s ten soft-key banks take the same setting, in Settings → Bindings → UF1. There a whole bank is dynamic the same way, its four keys show four items at a time, and a long press on the UF1’s ◄ ► keys pages through them. A long press on a dynamic key itself fires half a second after you press it, under the finger, the same as every other long press on the surface. (5-8 is always the DAW channel group, never the bank.) The FX-key gestures are global, so the five you set on either surface drive both.
The UF1’s banks work the same way, set for set: a set can take Plain’s bank or carry one of its own, and while it takes Plain’s, the four slot editors stay reachable because that is where you put the key that beats the gesture. On the UF8, dynamic banks are inactive while UF8 Plug-in Mode is engaged.
Track colours and Parameter Groups apply to every selected track, not just the focused one, so you can colour or group a whole selection with one press. The FX bank always acts on the focused track alone.
The Favourites bank
The eight keys are your eight favourites — Channel Strip or Bus Compressor, whichever class you last worked on. Rea-Sixty decides that the same way every other favourite action does: from the parameter you last touched, falling back to the class the soft-key row is showing. So the bank follows you between the two rather than making you pick one.
Each key wears its class colour from Appearance, the same yellow and red the inserts overlay and the FX bank use, so you can see at a glance which of the two you are looking at. The key of the favourite currently on the track is bright, the other assigned ones are dim, and a favourite you have not filled in stays dark and does nothing.
A press switches the track to that favourite. Whether it carries your current settings across or recalls what that favourite last had is not a property of the bank: it is the per-class setting under Favourites, which drives every favourite action alike. Channel Strips default to carrying the settings, Bus Compressors to recalling their own.
If the track has no strip at all, the press inserts the favourite at the end of the track’s FX chain. It arrives on the plug-in’s own settings, because there is nothing to carry across.
The FX bank
Each key takes one plug-in from the focused track’s chain, labelled with your own name for it, else the plug-in map’s short name, else its name with the format prefix (VST3:, JS:) and the trailing vendor suffix stripped.
The LEDs read at a glance:
| LED | Meaning |
|---|---|
| Bright | The focused plug-in — the one the surface is following |
| Dim | Present and running |
| Dark | Bypassed, offline, or no plug-in in that position |
A track you have not touched yet shows its first plug-in bright, because that is where the surface’s plug-in cursor starts.
A Channel Strip, Bus Compressor or UF8-mapped plug-in wears its class colour from Appearance. Any other plug-in takes the colour stored on the underlying static slot, so set it on the slots underneath.
Paging. A track can hold more than eight plug-ins. The Page with dropdown chooses what pages the bank:
| Setting | Control |
|---|---|
(no paging — stays on 1-8) | Default — the bank shows the first eight only |
UF8 encoder | The UF8 Channel encoder |
UC1 Encoder 1 / UC1 Encoder 2 | Either UC1 encoder |
UF8 Bank ◄ ► | The UF8 bank keys |
Note the default: out of the box an FX bank does not page, so a track with twelve plug-ins shows only the first eight until you pick a paging control. The chosen control only pages while this bank is the engaged one; the rest of the time it does its normal job. Paging returns to the first page whenever the focused track changes.
What a key press does is configurable per gesture, and the setting is global — it applies to every FX bank you create, not to one bank:
| Gesture | Default |
|---|---|
| Push | Focus FX (surface follows) |
| +Shift | Float/close FX window |
| +Cmd | Bypass toggle |
| +Ctrl | FX solo (bypass others) |
| Long-press | Offline toggle |
The full set also includes Delete FX, Move FX up and Move FX down.
A long press is half a second. On the UF8 it fires when you let go; on the UF1 it fires at half a second, under the finger. Long-press replaces the modifier rather than combining with it — Shift plus a long press runs the Long-press action, not the +Shift one.
A row that cannot reach this particular bank is shown greyed out with the reason instead of a drop-down. That happens when the modifier is already spent getting to the bank: if the bank’s Shift set carries a dynamic bank of its own, Shift switches to that bank rather than reaching this one, and if you are editing a bank that is a modifier set, all three modifier rows are out. Push and Long-press always work. The setting itself stays global; only the row is unavailable here.
Delete FX removes the plug-in immediately, with no confirmation. Think before you put it on Push.
Focus FX moves the surface onto that plug-in and re-points an already-open plug-in window at it. It does not open a window that was closed — use Float for that.
FX solo bypasses every other plug-in on the track and remembers what was on; pressing the same key again, or soloing another plug-in, puts them all back.
Parameter Groups and Track Colours
For these two the FX gesture table does not apply. Parameter Groups has its own five gesture rows; on Track Colours only short versus long press matters, and modifiers make no difference.
Parameter Groups — the eight keys are the eight groups, labelled with your group names (falling back to Grp 1…Grp 8). A key is bright when the focused track belongs to that group. What each gesture does is yours, in the bank’s own settings: five rows, Push, +Shift, +Cmd, +Ctrl and Long-press, each choosing between Join / leave the group, Group on / off and nothing. Push joins and long-press arms out of the box, which is what the bank did before the rows existed. Joining and leaving applies to every selected track. The choice is global, like the FX bank’s gestures, so one setting drives every Parameter-Groups bank on every surface. Group names and each group’s key colour are edited in the separate Parameter Groups Settings section, not here. The eight ship coloured, the same red through cyan the Track-Colours bank uses, so the groups tell themselves apart from the first press; the key wears its group’s colour, bright for a member and dim for the rest. The colour is global, like that palette: names and the on/off flag belong to the project, but what a group looks like on the surface is the same wherever you open it. Membership, the group names and their on/off state are all stored in the project. Only the multi-select toggle is global.
Track Colours — each key glows its own palette colour, brightening when the focused track wears it, and wears the name of the colour it shows: RED, ORANGE, YELLOW, GREEN, CYAN, BLUE, PURPLE, MAGENTA, PINK, WHITE. Those are the words SSL 360° itself uses for the same ten colours, so a key and the hardware always agree. A colour you mixed yourself is none of the ten and has no name to wear, so that key reads Col 1…Col 8 instead; a name you type beside its swatch beats both. A short press paints every selected track; a long press clears the custom colour instead. The palette itself is edited right below the dropdown as eight swatches, each with a name field, and is global.
If you had named these keys before the palette moved to the hardware colours, those names described the colours the slots used to carry. They are corrected once, on load, and only where the name is still the old palette’s own word for that slot. A name you chose yourself is never touched.
If a bank stays blank
With no track focused or selected, a dynamic bank goes blank and dark and its keys do nothing — there is no context to compute from. The two scene kinds are the exception: a Hue scene belongs to a room and an OBS scene to OBS, neither to a track, so those two resolve and fire either way.
One historical case: Rea-Sixty briefly had a Sends dynamic bank, which was removed. A configuration saved while it existed still loads, but the bank stays permanently blank. Set it to something else, or back to Off (static slots).
Binding visibility in the schematic
Bound buttons in the UF8 schematic are tinted (a soft green face / border); empty buttons stay neutral, so you can see at a glance which controls carry a binding. Hovering a bound button shows a tooltip listing what it fires on Plain / +Shift / +Cmd / +Ctrl, any long-press action, and, where the key has one, its behaviour (Toggle / Press).
Per-binding editor
For a regular button, the editor exposes:
- Action type — None (disabled) / REAPER Action / Keyboard macro / Native Action (Built-in) / MIDI Command.
- Action — for Native, a Built-in drop-down with a search field; for REAPER Action, an Action ID field.
- Modifier rows — (no modifier), + Shift / Fine, + Cmd and + Ctrl, in both the SHORT PRESS and the LONG PRESS column. Each row is bound separately.
- Behavior: Toggle (each press switches) or Press (on while held). It is there only where the action can be on or off: a switch like FLIP, a modifier like SHIFT, or a REAPER action with an on/off state. An action that fires once, or picks one of several modes, has nothing to choose, so the menu is not shown.
- Long press — tick Enable long-press (held > 0.5 s) to get a second column of actions that fire once the key is held half a second. Ticking it makes the short action wait for the release, so it does not also fire when you hold.
- Repeat while held — in the LONG PRESS column, per row: the long press keeps firing until you let go. The first one lands at the half second, the rest at the interval you set, 20 ms to 1000 ms, 100 ms by default. Useful on nudges, zoom steps, marker steps and anything else you would otherwise tap ten times. The tick is greyed out on an action that toggles, because repeating one just flips it back and forth, and on an empty row.
- LED — an Active and an Inactive row, each a colour plus Off / Dim / Bright, and Show LED even when no action is assigned.
- For MIDI Command bindings: device, channel, message (Note On / Note Off / Control Change / Program Change), note or CC number, and velocity or value.
- For REAPER Action bindings: Browse Action… opens REAPER’s own Action List, and Load ReaScript… picks a script.
- For the five UF1 keys the screen prints a name for (the
SOFTkey and the four display soft-keys): a Label. Leave it empty and the label follows whatever action is bound; type your own and it stays, whatever you rebind the key to afterwards. Clearing the field hands the name back to the action. This is why the UF1’s single SOFT key stops readingFocus Chanonce you give it a different job. Every other UF1 key has no field, because the surface has nowhere to print it.
Right-click context menu
Right-clicking a button in the schematic opens Copy binding / Paste binding for that binding, plus Reset binding to factory default — restores just that one control’s baked-in factory binding, leaving every other binding untouched (unlike the Reset to factory defaults in the About pane, which wipes everything).
Export / Import / Reset
Bindings are bundled into the Setup export available from the About pane (single file covers bindings + plug-in maps + Settings preferences).
On the UC1 tab the Bindings pane offers Save UC1 bindings… and Load UC1 bindings…, which cover only the five UC1 controls. Loading replaces the UC1 bindings and leaves the UF8 bindings untouched. On the other tabs it offers Reset this layer to factory defaults, Save layer N to file… and Load layer N from file….
Bindings storage paths:
- macOS:
~/Library/Application Support/REAPER/rea_sixty/bindings.json - Windows:
%APPDATA%\REAPER\rea_sixty\bindings.json - Linux:
~/.config/REAPER/rea_sixty/bindings.json
Modes pane
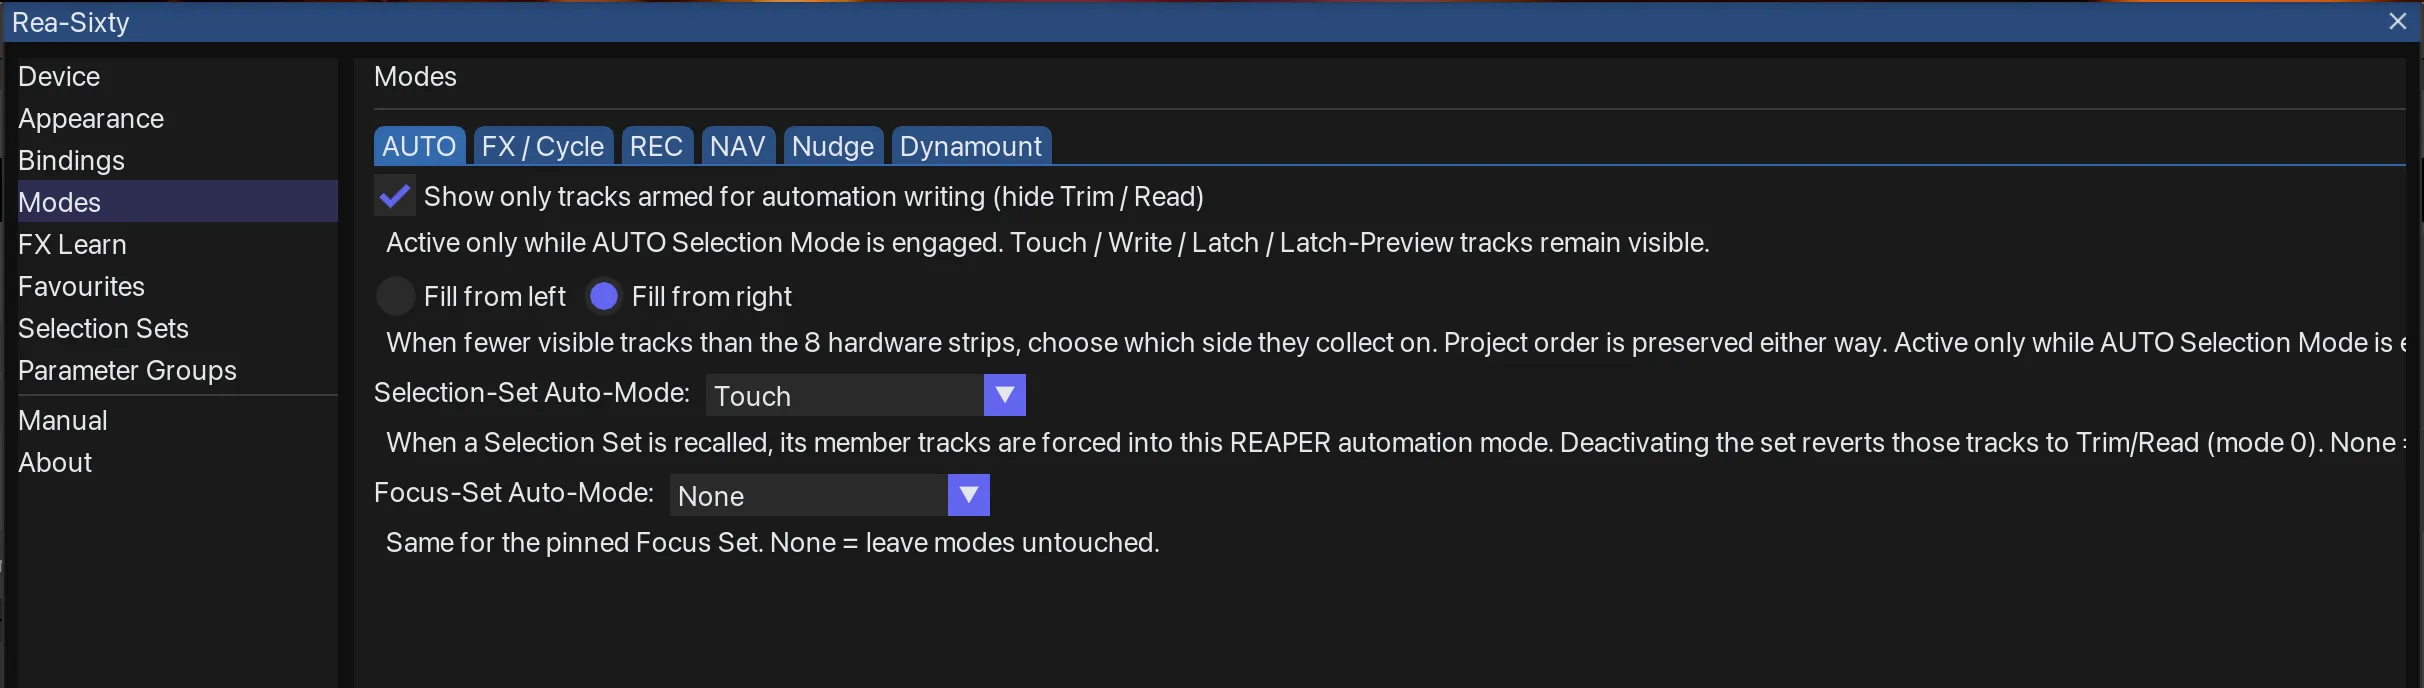
Modes → AUTO — automation-arm filtering, fill direction and the selection-set auto-mode.
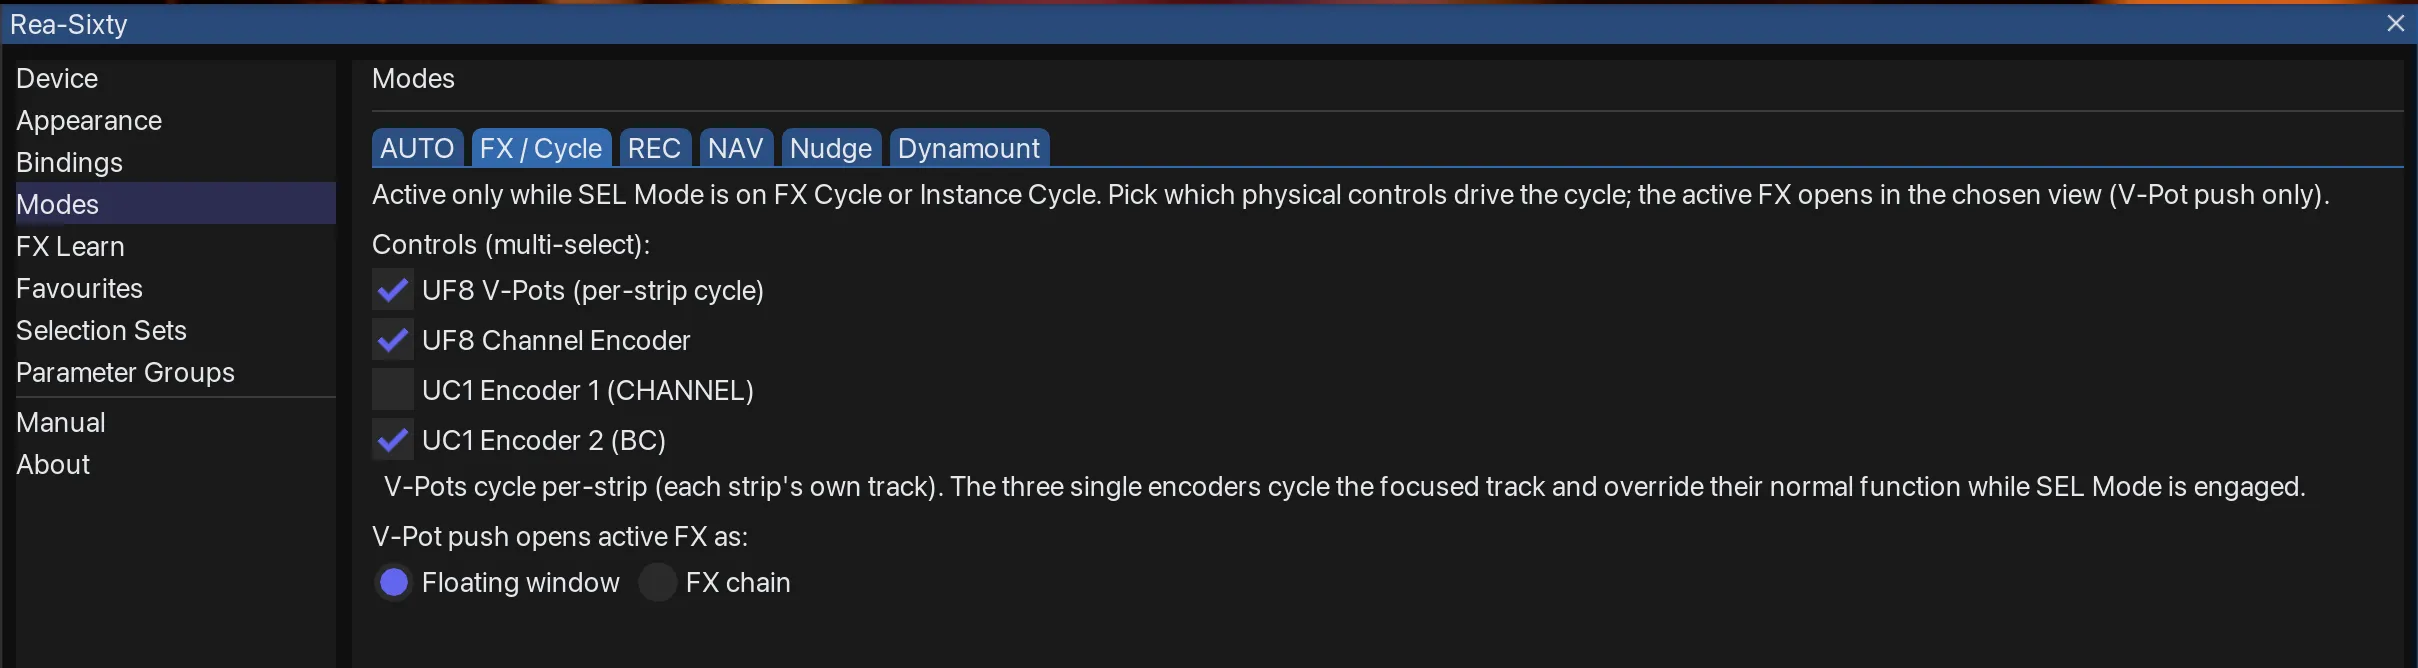
Modes → FX / Cycle — which controls drive the FX cycle, and what V-Pot push does.
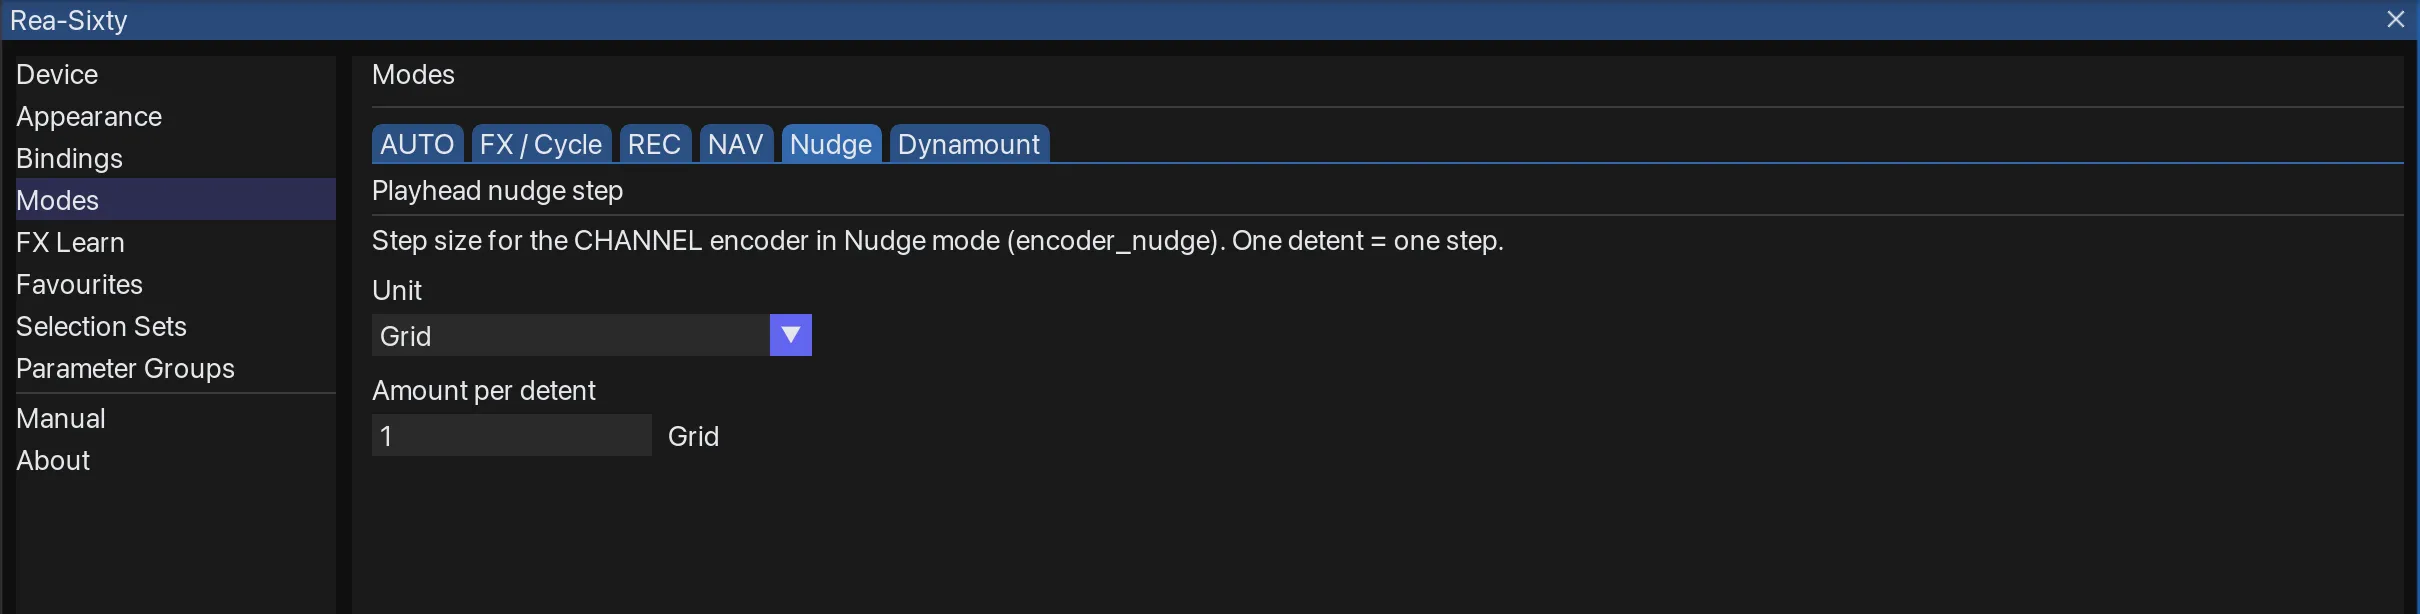
Modes → Nudge — the playhead nudge unit and the amount per detent.
This pane configures how the Selection Modes behave when they are active. Each sub-tab corresponds to one Selection Mode (or one cycle behaviour) — switching Selection Modes on the hardware uses the modes themselves; this pane only sets their per-mode options.
Eight sub-tabs: AUTO · FX / Cycle · REC · NAV · Nudge · Dynamount · Hue · OBS.
AUTO
| Setting | Effect |
|---|---|
| Show only tracks armed for automation writing (hide Trim / Read) | While AUTO Selection Mode is engaged, tracks in mode 0 (Trim) or 1 (Read) are hidden from the surface. Touch / Write / Latch / Latch-Preview tracks remain visible. |
| Fill from left / Fill from right (radio pair) | When fewer visible tracks than the 8 hardware strips, choose which side they collect on. Project order is preserved either way. Active only while AUTO Selection Mode is engaged. |
| Selection-Set Auto-Mode (combo) | None / Trim/Off / Read / Touch / Write / Latch / Latch Preview. When set, recalling a Selection Set in AUTO mode forces its member tracks into this REAPER automation mode. Deactivating the set (or leaving AUTO mode) reverts those tracks to Trim/Read (mode 0). |
| Focus-Set Auto-Mode (combo) | Same options, for the pinned Focus Set — own knob, decoupled from the slot Selsets. Pinning the Focus Set in AUTO mode arms its members to this mode; unpinning it in AUTO mode reverts them to Trim/Read. Leaving AUTO does not revert them. None = leave members’ modes untouched. |
FX / Cycle
Active only while a cycle-kind Selection Mode (FX Cycle or Instance Cycle) is on the V-Pot row. Picks which physical controls drive the cycle; the active FX opens in the chosen view (V-Pot push only).
Controls (multi-select checkboxes):
- UF8 V-Pots (per-strip cycle) — default ON
- UF8 Channel Encoder
- UC1 Encoder 1 (CHANNEL)
- UC1 Encoder 2 (BC)
V-Pots cycle per-strip (each strip’s own track). The three single encoders cycle the focused track and override their normal function while SEL Mode is engaged.
V-Pot push opens active FX as (radio pair): Floating window / FX chain.
REC
| Setting | Effect |
|---|---|
| Enable RME / TotalReaper integration | Master switch. Requires the TotalReaper extension. While REC Selection Mode is active, the assignments below trigger TotalReaper actions against the strip’s track. Preamp gain, 48V, pad and phase need it; changing the input channel does not, because that is REAPER’s own. |
| (presence line) | Says whether TotalReaper was detected. When it is missing, a button hands you to ReaPack with the repository selected, so it installs like any other package. TotalReaper ships from the same repository as Rea-Sixty, so if you installed through ReaPack it is already listed. Without ReaPack the button opens the project page instead. |
| V-Pot rotation → Preamp gain ±1 dB | Steps preamp gain instead of pan. |
| V-Pot rotation + Shift → Change input channel | Re-routes the strip’s track input on rotation. Works without an RME interface: the input belongs to REAPER, so this one only needs REC or REC + MON. |
| V-Pot push (combo) | TotalReaper action assignment. Choices: None, Toggle 48V phantom, Toggle pad, Toggle phase invert, Toggle AutoLevel. |
| Cut button (combo) | Same action list. |
| Solo button (combo) | Same action list. |
The rows above are the UF8 strips. The UC1 and the UF1 have their own set below, so each surface can be opted in separately.
| Setting (UC1) | Effect |
|---|---|
| Encoder 2 rotation → Preamp gain ±1 dB | Steps preamp gain on the focused track. |
| Encoder 2 rotation + Shift → Change input channel | Re-routes that track’s input. Also without an RME interface, like the UF8 row above. |
| Encoder 2 push (combo) | Action assignment, same list as above. |
| Cut button (combo) | Same action list. |
| Solo button (combo) | Same action list. |
| Polarity button (combo) | Same action list. |
| Setting (UF1) | Effect |
|---|---|
| Above-fader V-Pot rotation → Preamp gain ±1 dB | Steps preamp gain on the channel the fader side is showing. |
| Above-fader V-Pot rotation + Shift → Change input channel | Re-routes that channel’s input. Also without an RME interface, like the UF8 row above. |
| V-Pot push (combo) | Action assignment, same list as above. |
| Cut button (combo) | Same action list. |
| Solo button (combo) | Same action list. |
The UF1 has no Polarity key, so it has three assignable buttons rather than four.
NAV
The NAV sub-tab has five sections: Activation, Per-surface, UF8 strip display, Encoder push actions and Behaviour.
Activation — read-only list of which physical button currently fires each of the three Nav-mode toggle builtins:
- Nav Mode (Markers & Regions): toggle
- Nav Mode: Markers only (no drill)
- Nav Mode: Regions only (no drill)
Each line shows the bound layer + button + modifier + long-press flag, or “(unbound)”. Edit via Settings → Bindings.
Per-surface — a small table, one row per setting and one column per surface.
- Shows. UF8:
Off,Regions,Markers. UC1 and UF1 addMirror UF8andMarkers in region.Offkeeps the surface in its normal view. The UF8 picker doubles as the view you land in when Nav Mode is switched on. An independent mode carries its own cursor, which costs the push actions on that surface: Drill and Back become no-ops, and Jump + Drill collapses to Jump only. Toggle View flips such a surface betweenRegionsand whichever markers entry you last picked. - Encoder drives Nav. The Channel encoder on the UF8 and UF1, Encoder 2 on the UC1. Off, the encoder keeps its normal action (the UC1’s is Encoder: scroll BC anchor track by default) and its push keeps its binding.
UF8 strip display
- Lower-row format (radio):
Off (V-Pot value)/Index (R03 / M07)/Timecode (MM:SS). Off keeps the V-Pot value visible; Index / Timecode overlay marker metadata on the lower row. - Colour-bar source (radio):
REAPER marker colour/Keep track colour/Force palette grey. REAPER honours the colour override set on each marker / region; Force grey suppresses it.
Encoder push actions. Plain push, Shift + push and Long-press each pick any of the same 7 actions via dropdown, one column per surface:
| Action | Effect |
|---|---|
| Jump + Drill | In Regions view: jump transport to the region start AND enter the region’s marker list. In Markers view: jump only (drill is meaningless there). |
| Jump only | Move transport / edit cursor to the cursor item. |
| Drill only | Enter the region’s marker list (Regions view only; no-op elsewhere). |
| Back | Return from a drilled-into Markers-in-Region view to Regions. |
| Toggle View | Flip between Regions and Markers (all). |
| Add marker at playhead | Insert an empty marker at the playhead (or edit cursor when stopped). |
| Disabled | No-op. |
Defaults: Plain = Jump+Drill, Shift = Drill only, Long = Back. Setups from before the split carry their old shared values into all three columns.
View-locks (Markers-only / Regions-only) suppress Drill only specifically (Jump+Drill collapses to Jump only; Drill only becomes a no-op). Every other action fires regardless of lock. Long-press threshold ~500 ms.
Behaviour
- Region press (UF8 top-soft-key) (radio):
Jump + Drill/Jump only/Drill only. Jump = move transport to the region start; Drill = enter the region’s marker list. A Regions-only view lock suppresses Drill, and so does any surface set toMarkers in region; withDrill onlypicked, that combination leaves the key doing nothing, and the pane says so. - Auto-follow playhead / edit cursor (checkbox). While Nav Mode is active, the cursor strip tracks whichever marker / region the playhead is on (or the edit cursor when stopped). In Markers-in-Region view, the overlay auto-rolls into the next region when the playhead crosses out.
FX Learn pane
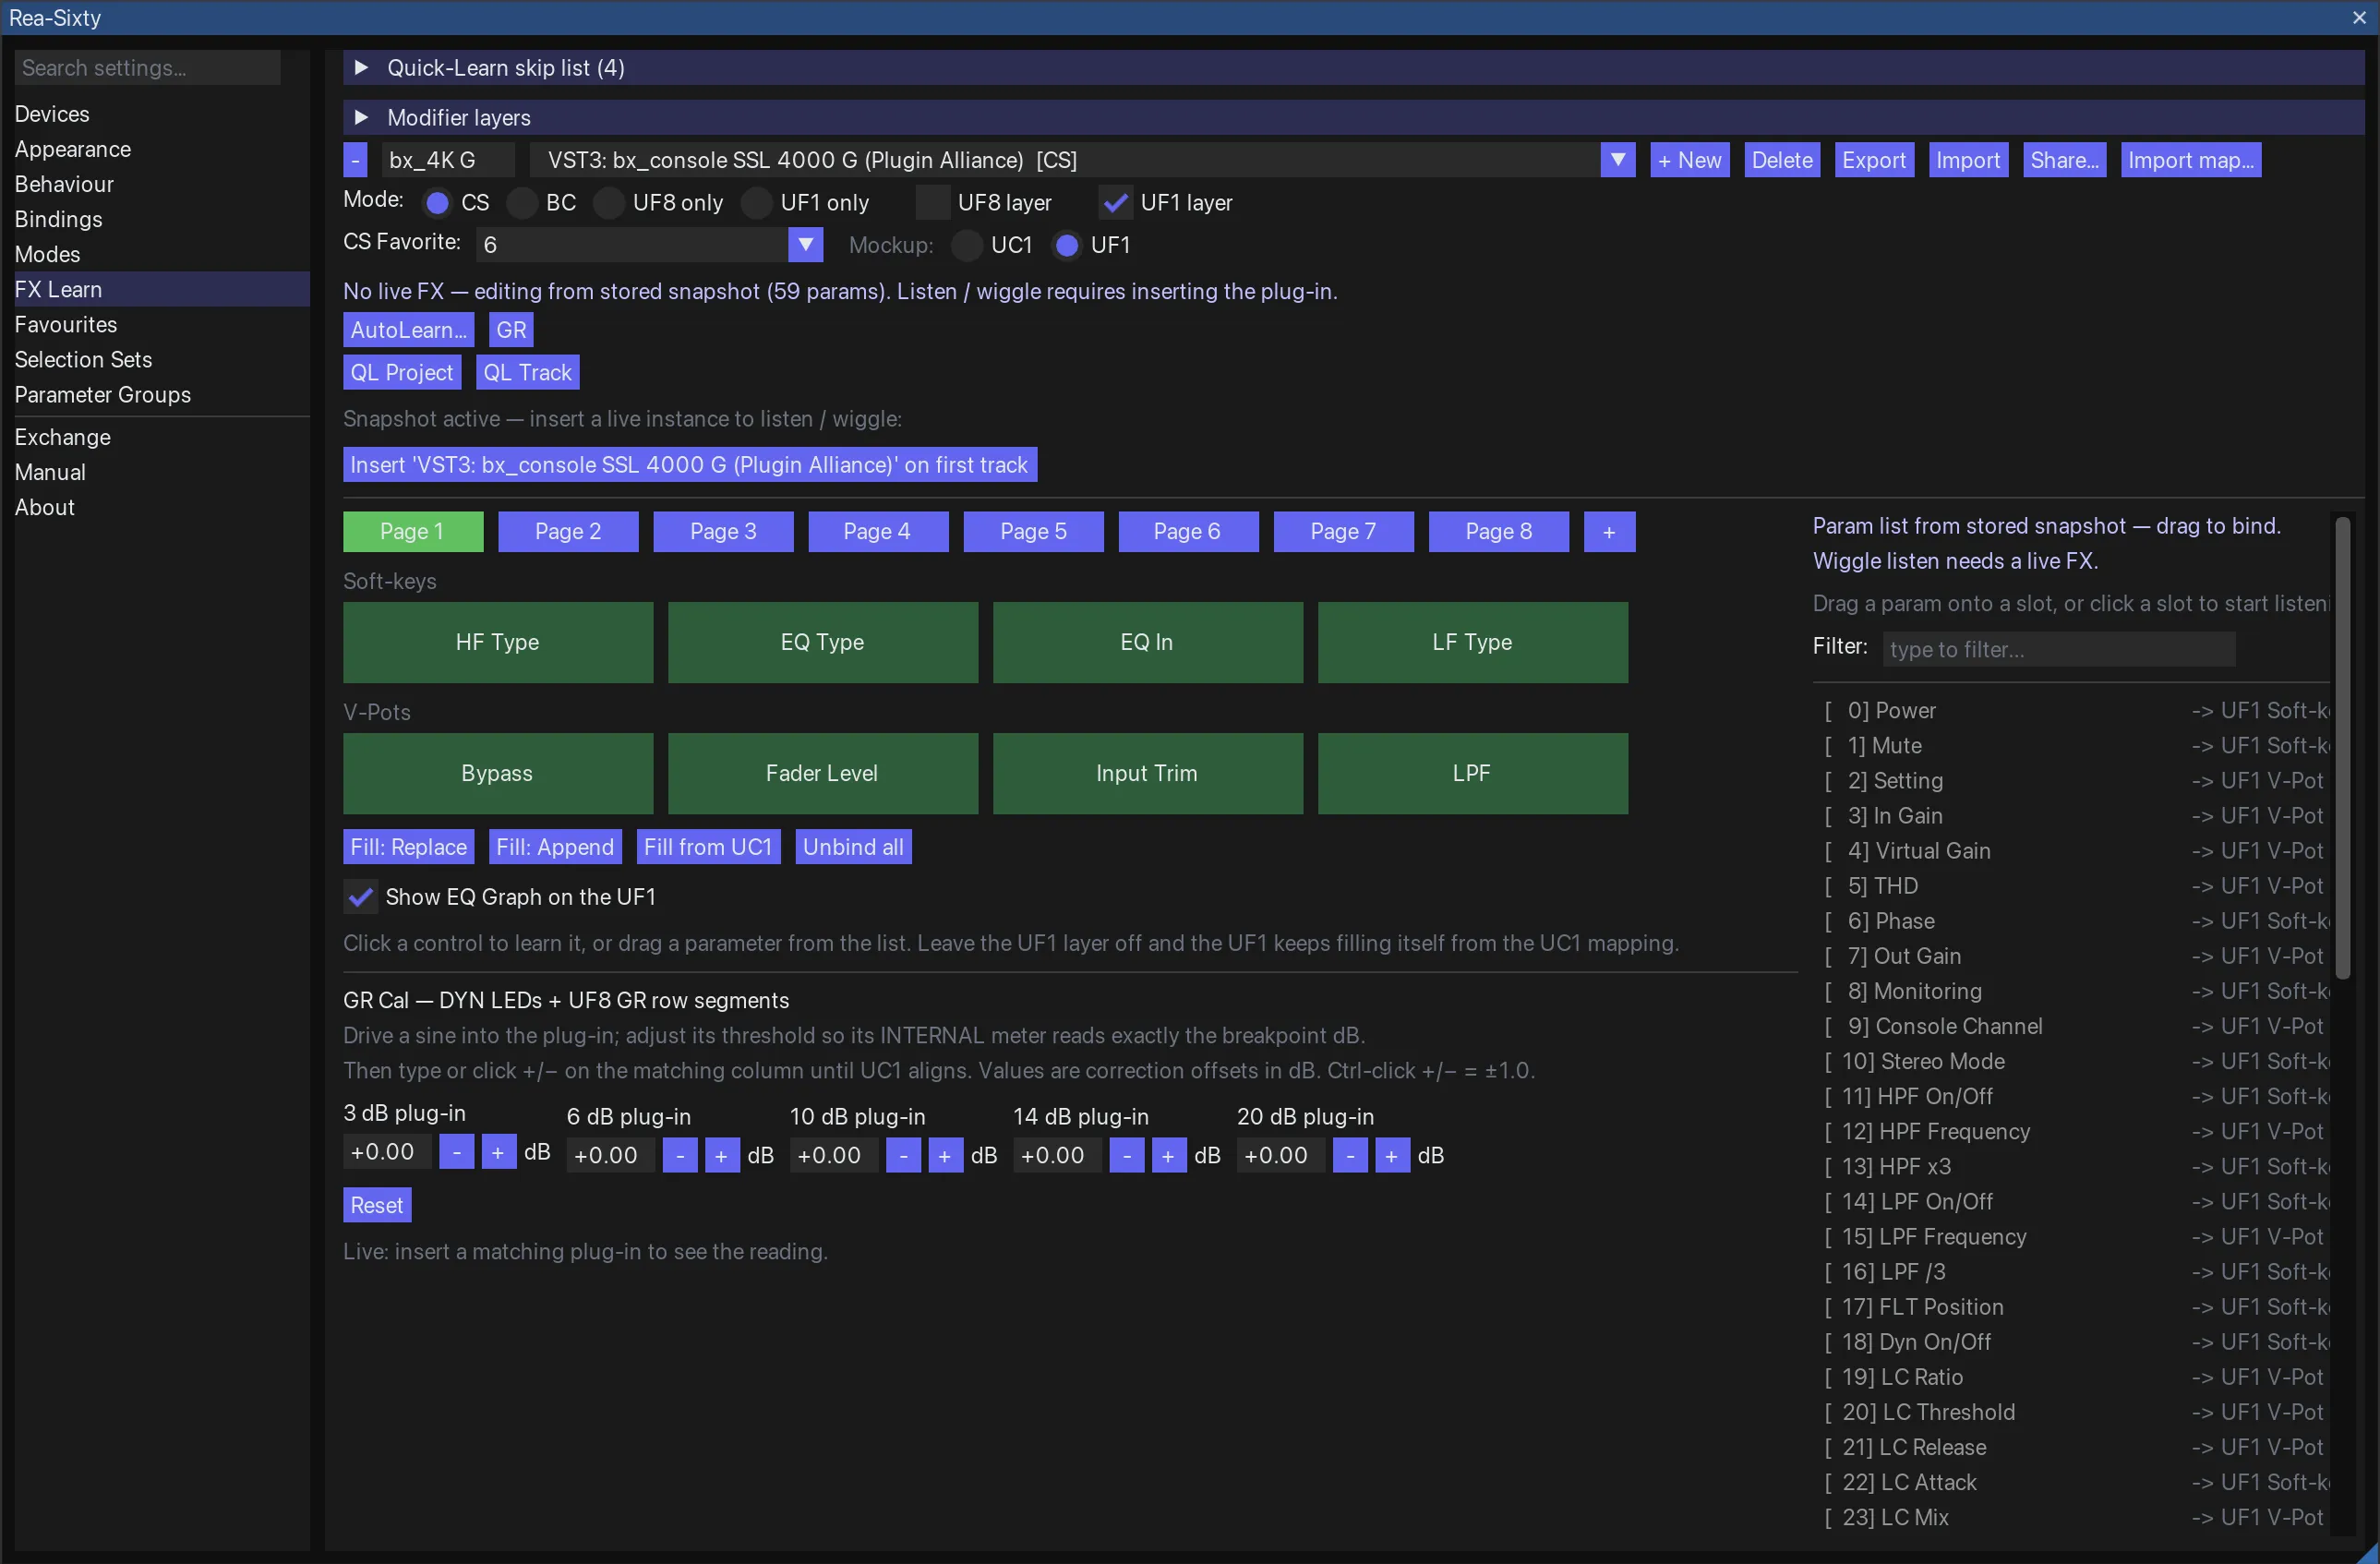
FX Learn pane — a bx_console SSL 4000 G snapshot laid onto the UF1, with the parameter list and the GR calibration table.
The FX Learn pane teaches third-party plug-ins to behave as virtual Channel-Strip or Bus-Comp Instances. Built-in maps (SSL CS 2 / 4K B/E/G / BC 2 / 360 Link and 360 Link Bus Compressor / Harrison 32C) always win — user maps can’t shadow them.
The pane is the editor. There is no separate list of maps to come back to: a map picker in the header row is the navigation, and + New, Delete, Export, Import, Share… and Import map… sit beside it. New opens a picker over your installed-FX catalog; Export and Import write and read the whole user catalog as JSON, Share… and Import map… write and read a single map as a .rea60map file.
The editor live-follows the active FX — open it and it loads the map + instance for the plug-in you’re currently looking at (the plug-in the surface is driving, else REAPER’s focused or last-touched FX, else the first open plug-in window), so you don’t have to find it in the list first. A plug-in with no map of your own leaves the editor where it is. Manually picking a different map / instance still sticks until you touch another plug-in.
Top bar:
- Mode radio row —
CS/BC/UF8 only/UF1 only. UF8-only maps the FX into the per-strip view without claiming a CS/BC slot. - UF8 layer checkbox — drives Instance Cycle / Plug-in Mode. In
UF8 onlymode there is nothing to tick: the line reads UF8 layer: on (required) and is greyed, because that mode is the UF8 layer. - CS Favourite dropdown (Channel-Strip maps) or BC Favourite dropdown (Bus-Comp maps): assign this plug-in to one of the 8 favourite slots, or pick None to clear it. See chapter Favourites.
- Mockup: radio:
UC1/UF8/UF1, showing only the surfaces this map has. Picks which schematic you edit. Persisted in ExtStateReaSixty/fxLearnMockup. - AutoLearn… button (shown once a param snapshot exists): opens an AutoLearn Setup dialog (CS / BC / UF8-only, plus which UF8 controls to fill); Run feeds the map’s param snapshot to the pattern-matching engine (hardcoded SSL seeds + user-map dictionary; three-pass: exact / substring / token). Confidence-scored suggestions open in an AutoLearn Preview modal with a per-row checkbox + confidence %, plus All / None bulk helpers. UF8 V-Pot suggestions auto-group by category (EQ / Comp / Gate / Filter / I/O / Misc). Apply writes every checked mapping into the active map, on the Normal layer only: a control that carries an Option / Control / Ctrl+Opt overlay keeps it, and so does a push-cycle you built on it. Among the patterns it knows is the strip’s own output fader (Fader Level, Output Gain, Out Gain, Output Level), which is the slot SSL Strip Mode drives and the one the UF1 wants before it offers its
PLUG-INsoft-key on a learned strip. Makeup Gain is deliberately not one of them: on a channel strip that is the compressor’s make-up, not the strip fader.
Editor body — depends on the domain:
- CS / BC domain: the UC1 / strip schematic. Click a control to learn it to a plug-in parameter; the active row’s combo lists every plug-in parameter (with current value if a live instance is on the focused track).
- UF8 only: the UF8 strip-bar schematic. Drag a parameter onto a strip slot (V-Pot, top soft-key, etc.) — the slot is the drop target, and an empty one says so: unmapped — drag a param here or click to listen.
UC1 EXT FUNCS list (CS mode)
Below the UC1 mockup, Channel Strip domain only, a 4-column grid lets you fill the UC1’s hidden EXT FUNCS menu (opened with the UC1’s Back button) with up to 10 of this plug-in’s parameters. The grid is two side-by-side groups of five rows; each row is a Name field plus a parameter dropdown.
- The Name is shown on the UC1 LCD — the carousel shows up to 11 characters, the header line shows the full name.
- Empty rows are skipped on the surface; the order on the device follows the grid (left column top-to-bottom, then right column).
- The dropdown lists this plug-in’s parameters (from the FX-Learn param snapshot); pick (none) to clear a slot.
- This applies to user-mapped (non-SSL) channel-strip plug-ins only. SSL channel strips and the Harrison 32C keep their fixed built-in EXT FUNCS list and are not edited here.
- Saved per plug-in in
user_plugins.json(extFuncs, schema v8).
Note: a parameter you put in EXT FUNCS that’s also on a physical V-Pot uses the plain encoder path — it doesn’t share that V-Pot’s range / curve / sensitivity. (SSL built-in EXT FUNCS slots keep full knob travel.)
Right-click context menu
Right-clicking a mapped control on the UF8 / UC1 / UF1 schematic opens per-control options:
- Clear binding.
- Fill sequential (right) on a V-Pot / Fader / Solo / Cut / Sel — UF8 only, there being no row of strips to fill on the UC1 — shown when the bound parameter’s name carries a number (e.g. CH1 Volume): binds the strips to the right, overflowing onto later fader banks, to the parameters numbered after it (CH2 Volume, CH3 Volume, …) and copies the source strip’s attributes onto them. Carried fields: faderInverted; V-Pot inverted / vpotMode / polarity / defaultNorm / stripColour / travel (range + curve + sensitivity); Solo / Cut / Sel colour; Reverse LED flag.
- Inverted [off/on] on a Fader / V-Pot — flips the rotation / direction-to-value mapping.
- Reverse LED [off/on] on a Solo / Cut / Sel button — XORs the LED on/off bit before painting. Use this for plug-ins whose Cut/Bypass param reports
1 = inactiveso the LED would otherwise stay bright while the function is off. Saved per(fader-bank, strip, button)inuser_plugins.json. - V-Pot mode: Value / Toggle on a V-Pot — Value = continuous (rotate scrubs, push resets to Push reset); Toggle = binary (rotate ignored, push flips 0↔1).
- Polarity: Unipolar / Bipolar on a Value-mode V-Pot — Unipolar (default) renders the LCD ring as L→R sweep; Bipolar renders centre-out (like SSL Pan) and makes the Log / Exp curve presets mirror around 0.5. Made for Pan, EQ-gain, mid-range freq sweeps — anything where “neutral” sits in the middle.
- Knob travel (UC1 pots and V-Pots only, see Knob travel + curve editor below) — inline Min / Max sliders + Advanced… opens the curve editor.
- Push reset slider (Value-mode V-Pot) — the value the V-Pot snaps to when pushed. On a Bipolar V-Pot, a small “0.5” quick-set button + hint appears when the slider isn’t already at centre.
- Display label (inline text field) — per-slot override for the scribble-strip name (1..12 ASCII chars; a longer stored label is trimmed, never blanked). Empty = falls back to the parameter’s default short name. On the Normal layer of a bound control it names the parameter itself (
paramLabels, schema v13), so the same name shows on every surface; modifier layers keep their ownUserLinkSlot.customLabel, and UF8 faders useUserUf8StripBinding.faderLabel. Re-binding a slot to a different parameter clears its custom label (the label named the old param), so the field and the readout stay in agreement. - Save feel to / Apply feel from / Clear preset (UC1 pots, UF8 V-Pots and UF1 V-Pots only) — reusable tuning presets; see Feel presets below.
UF1 layer
A map can carry a UF1 layer of its own, next to the UC1 one. The UF1 layer
tick-box turns it on and the Mockup: radio swaps the schematic between the UC1
and the UF1, so you lay parameters onto whichever surface you are editing.
Leave the UF1 layer off and the UF1 fills itself from the UC1 mapping — one map, both surfaces, nothing to maintain twice. Turn it on when the UF1 should differ, and the four buttons below the schematic manage it:
| Button | Does |
|---|---|
| Fill: Replace | Clear the whole UF1 layer, then add every parameter the UC1 does not carry: switches onto soft-keys, the rest onto V-Pots |
| Fill: Append | Keep what is there and add the remaining parameters (not on the UC1 or UF1 yet) into free slots |
| Fill from UC1 | Copy the UC1 layer’s assignments onto the UF1 |
| Unbind all | Empty the whole UF1 layer; the layer stays on |
One warning about Unbind all: an empty UF1 layer is authoritative. Clearing
the layer does not hand the UF1 back to the UC1 fill — it leaves the UF1 empty,
which is what “I want nothing here” has to mean. Untick UF1 layer to go back to
inheriting.
EQ Graph on the UF1 draws the EQ curve for a learned channel strip. Rea-Sixty normally finds the fifteen EQ parameters by SSL’s own parameter names, which a third-party plug-in does not use; when this is on it resolves each one through the map instead. It only makes sense on a map whose domain is a channel strip. ReaEQ states its band widths in octaves, and the graph converts them to Q before it draws.
Two controls, one above the other:
- EQ Graph on learned Channel Strips (global) — the default for all of them.
- EQ Graph on the UF1 (per map) — Follow global · Always on · Never. New maps start on Follow global, and the entry spells out what that currently resolves to, so you can tell an override from the global agreeing with it. The same three-way sits on the Learn-HUD’s UF1 tab: the button reads EQ Graph: global / on / off and cycles through them.
The built-in SSL strips and the Harrison 32C ignore all of this — they find their parameters by name and always draw the curve. And when the impersonator is running, the curve on an SSL strip is the plug-in’s own, not our reconstruction of it.
Modifier layers (Normal / Option / Control / Control+Option)

FX Learn → Modifier layers — hold Option, Control, or both, and the surface switches to that overlay mapping.
A user-mapped UC1 control can carry four independent layers — Normal plus three held-modifier overlays, Option, Control and Control+Option — so the same physical pot or button drives a different parameter (with its own invert, knob-travel, push-cycle, and Display label) depending on which modifier you hold.
- Editing: the editor’s Layer: radio row (Normal / Option / Control / Ctrl+Opt), or tapping that modifier on the keyboard, selects which layer you’re editing; every per-control edit (bind, invert, Display label, knob travel, push-cycle) applies to the selected layer. Controls with no overlay on the active layer show a dim “ghost” ring — at runtime they inherit their Normal mapping.
- Enabling at runtime: three switches under Settings → FX Learn → Modifier layers — “Hold Option for the FX-Learn Option layer”, “Hold Control for the FX-Learn Control layer” and “Hold Control+Option for the combined FX-Learn layer”. All three are on by default. Holding Option/Alt selects the Option layer, Control the Control layer, and both together the Control+Option layer; with the combined switch off, both-held falls back to Normal, and holding neither is always Normal. The held modifier takes effect live — on the bound control, the UC1 LCD readout, and the Learn-HUD’s layer badge. (Windows: Alt is the Option layer, Control the Control layer, either side; left Alt and left Control together are the combined one. AltGr also gives Option: Windows reports it as Ctrl+Alt and the synthetic Ctrl is dropped. Any pairing that is not the two left keys gives Option alone.)
- Fallback: an overlay left unmapped passes through to the Normal mapping for that control, so you only override the controls you want different under a modifier.
- Scope: UC1 only. The Display label (custom name) is per layer — each layer can show its own name on the UC1 readout / Learn-HUD.
Knob travel + curve editor
Every user-learned FX-Learn slot and every UF8 V-Pot binding can carry a custom range, response curve, and encoder sensitivity. Defaults (Min=0, Max=1, sensitivity=1, no curve) make the maths byte-identical to a plain linear mapping, so untouched bindings behave exactly as if the feature wasn’t there.
In the per-slot right-click menu:
- Min / Max rows — a fixed-width 4-column table (label · slider · numeric input · Set button) so both rows line up pixel-perfect. Slider scrubs in 0..1; the input accepts exact values; Set snaps the edge to the plug-in’s current parameter value (handy when you’ve dialled the FX to where you want the limit and just want to capture it). Sliders auto-correct the opposing edge to keep Min ≤ Max.
- Reset — restores Min=0, Max=1.
- Advanced… — opens the Curve editor popup.
The Curve editor popup:
- Sensitivity — a labelled row with a typeable value box and a 1x reset button, no slider. Range 0.01× .. 4×, encoder-delta multiplier. Combines multiplicatively with Shift = Fine (Shift still quarters on top of the user-set value). Hidden when editing a fader target.
- Canvas — draw a piecewise-linear response curve. Click empty space to add a breakpoint, drag to move, right-click to remove. The Y axis is normalised within [Min..Max], so the Linear preset is always a 45° diagonal regardless of how the range is trimmed.
- Presets — Linear (clears all breakpoints), Log (param rushes to the top, fine control near 1; on a Bipolar V-Pot the curve mirrors around 0.5 for a gentle ramp near centre + coarse at the edges), Exp (param stays small longer, fine control near 0; Bipolar mirrors for fine control at the edges + a rush through the centre), Reset all (clears curve + resets sensitivity to 1×). Bipolar polarity is re-read on every preset click so flipping it in the parent menu takes effect without re-opening the editor.
- Close dismisses the popup; all edits persist live as you make them.
Feel presets
A tuned “feel” — the bundle of per-control tuning values, independent of which parameter the control is bound to — can be saved into one of ten named preset slots and re-applied to any other knob or V-Pot, on any plug-in. Useful for reusing, say, a Log frequency sweep or a slow stepped-detent across many controls without re-dialling each one.
The preset carries: invert · Min/Max range · sensitivity · curve · polarity · push-reset. It deliberately does not carry the binding (which parameter) or the display label (which names a specific parameter).
At the bottom of the right-click menu on a UC1 pot, UF8 V-Pot or UF1 V-Pot:
- Save feel to ▸ — pick a slot (
1: (empty)… or an existing name to overwrite); an empty slot asks for a name (Enter saves), an existing one is overwritten under its name. The current control’s feel is captured into that slot. - Apply feel from ▸ — lists the saved presets by name; picking one writes its feel onto the right-clicked control.
- Clear preset ▸ — lists the saved presets; picking one empties that slot.
- Apply this feel to all mappings — takes the right-clicked control’s current feel (invert · Min/Max range · sensitivity · curve · polarity · push-reset) and writes it onto every UC1 control in this plug-in’s map, buttons included, on the layer you’re editing — one action instead of re-applying a preset control by control. Offered on UC1 pots only. The same action is on the on-screen Learn HUD (Feel presets ▸ Apply this feel to all mappings).
The ten slots are global — shared across UC1 pots, UF8 and UF1 V-Pots, and every plug-in, and they survive a REAPER restart. Because both surfaces draw from the same store, a feel saved from a UC1 pot can be applied to a UF8 V-Pot and vice-versa. Persisted to REAPER’s global ExtState (rea_sixty / knob_feel_presets) as JSON, separate from user_plugins.json. Toggles, buttons, and faders have no continuous travel, so the menu only appears on pots and V-Pots.
Stepped parameters
When the bound parameter is a discrete-stepped enum (e.g. PSP Townhouse attack/release time selectors, HPF slope pickers, oversampling toggles) — anything REAPER reports as having discrete steps — the editor automatically switches to a stepped-aware layout. Sensitivity, range, and push-reset still apply; curve does not.
- Sensitivity label flips to Detent speed. The default 1.0× means 2 detents per step on V-Pots and UC1 pots (matches the legacy UC1 stepped feel). 2.0× → 1 detent per step. 0.5× → 4 detents per step. 4.0× and above fire multiple steps per detent. Shift-Fine still applies on top — at the minimum (0.01×) Shift gives an effective 0.0025×, which is 800 detents per step.
- Canvas + preset row hidden. A single info line replaces them:
Stepped parameter — N values (~X.XXX per step). Curve disabled; Min/Max snap to the step grid. - Min / Max in the right-click menu snap on commit to the nearest step boundary, so the encoder always traverses real values. Below the table a hint line reads
~K steps reachable in this range. - Push reset (Value-mode V-Pots) snaps the chosen default to the nearest step.
The runtime accumulator decays after 150 ms of inactivity, so reversing direction at sub-threshold doesn’t leave residual fractional steps fighting the new motion.
JSFX continuous params are handled specially: a JSFX often reports a coarse step size for a knob that is really continuous, which would otherwise force jumpy 2.4 dB jumps. Rea-Sixty normalises the JSFX step against the parameter’s range so such a control resolves finely (continuous), with a fine-control accumulator for sub-step moves.
In the FX-Learn schematic, slots with customised knob travel show:
- Two radial ticks at the Min / Max angles on the on-screen knob (7 o’clock → 12 → 5).
- A small centre dot when a curve is set.
UF8 V-Pots apply the same sensitivity → curve → step math on every encoder movement, so external automation writes stay coherent. UC1 channel-strip / bus-comp pots honour the same path, so a UC1 pot and a UF8 V-Pot bound to the same parameter stay in lock-step. User EXT FUNCS entries do not. Built-in SSL CS / BC slots are intentionally untouched and keep the legacy linear + EQ-gain virtual-notch path; knob travel only kicks in when a user-learned slot is present for the focused plug-in.
UF8 faders intentionally exclude knob travel. Absolute-position + motor feedback creates round-trip races with plug-in quantisation (fader jumps during user motion, snaps on release). The plug-in’s own taper is the right place for fader-side shaping.
Step cycle (rotary)
A V-Pot or UC1 pot can step through a curated list of a plug-in’s button / enum options instead of moving a continuous parameter — for example walking an EQ type A → B → C, or a saturation mode, from a single rotary. Turning scrubs the list and stops at the ends; pressing advances one step and wraps around.
You build a step cycle in the editor: in the FX-Learn V-Pot right-click menu (or the on-screen Learn-HUD), pick Step cycle (turn) and edit the list — drag to reorder, untick to exclude an option, + Add step to add one by name. The same editor opens for UC1 pots. Re-learning a pot the normal way clears any step cycle on it, so a continuous pot is one re-learn away.
Building one by touch — wiggling the control with Touch-to-Learn armed and then clicking the plug-in’s buttons — is switched off on both surfaces: it wrote step cycles nobody asked for.
Multi-instance picker
When an FX anywhere in the project matches the map’s name, the editor shows an Instance: combo to choose which instance’s live readouts feed it, with Auto (first match) at the top. The list spans the master and every track, not just the focused one. Picking an instance also points the surface at it; switching to another map resets the pick to Auto.
GR calibration: capture, don’t type
Both calibration tables, the BC VU needle (6 columns) and the DYN GR LEDs with the UF8 GR row (5 columns), work the same way and each column carries a Set button.
Drive a sine into the plug-in and set its threshold so the plug-in’s own meter reads the column’s dB, then press Set on that column. Under the button it then says at 2.20, or whatever the plug-in was actually reporting at that moment. There is nothing to type and nowhere to type it.
That difference is the reason the button exists. A column corrects the reading, and the reading is not always the number on the plug-in’s face: the PreSonus interface asks for the instantaneous reduction in dB and forbids the host to add ballistics, while a drawn needle has its own inertia and its own scale, and a plug-in with several stages is asked to report their sum. Capturing records both halves at once: when it reports this, show that.
One column is enough to start. A plug-in that reports 2.2 where it shows 4 is reporting a fraction, not a fixed error, so the columns you have not captured follow the same proportion and say from others under themselves. Capture a higher one and it stops guessing there: that measurement replaces the estimate, the span between the two captures is interpolated, and everything above extends the newer slope. So the low end is one press and the high end is refinement, not a second full pass.
Each column reads back the reading it sits at, and a captured one carries a forget button that drops the measurement so the column follows the others again. Reset clears the table, and a table with nothing captured behaves exactly as it did before this existed.
GR meter override
Default GR meter behaviour is to read the host-extension GainReduction_dB value REAPER exposes for any plug-in implementing the PreSonus VST3 convention. That works for most modern compressors out of the box, with no setup.
When a plug-in doesn’t expose the host-extension (or exposes a wrong value), a small GR button next to AutoLearn in the editor header opens a compact override popup:
- Combo lists every VST3 parameter on the editing map; pick the one that reads the plug-in’s gain-reduction value.
- Offset (dB) slider, added to the reading before the sign is dropped. It is there for a plug-in that does not sit at zero when it is not compressing. Mind the direction, it is the opposite of what the word suggests on most compressors: they report gain reduction as a negative number, so a negative offset makes the meter read higher and a positive one pulls it towards zero.
- Host standard (GainReduction_dB) is the first entry and the normal case, not an empty setting. Picking it clears any parameter override.
When set, the button shows a tick mark next to the GR label. The override flows through to both the UC1 BC VU motor calibration tables and the DYN GR LED strip. Per-map; saved in user_plugins.json under metering.gainReduction.vst3Param + metering.gainReduction.offsetDb.
Param snapshot
The first time the editor sees a live instance of a map with no snapshot, parameter names, default values and which ones are switches are snapshotted into the catalog, so the editor stays usable even if no instance of the plug-in is loaded. Snapshot params re-takes it.
Storage
Catalog file at ~/Library/Application Support/REAPER/rea_sixty/user_plugins.json (and equivalent paths on Windows / Linux). Versioned schema (currently v18). Old files auto-migrate on first load; v17 is the one migration that edits rather than adds, writing the UF1’s PLUG-IN key into a hand-made UF1 map and shifting the soft-keys at and after it one place along.
Selection Sets pane
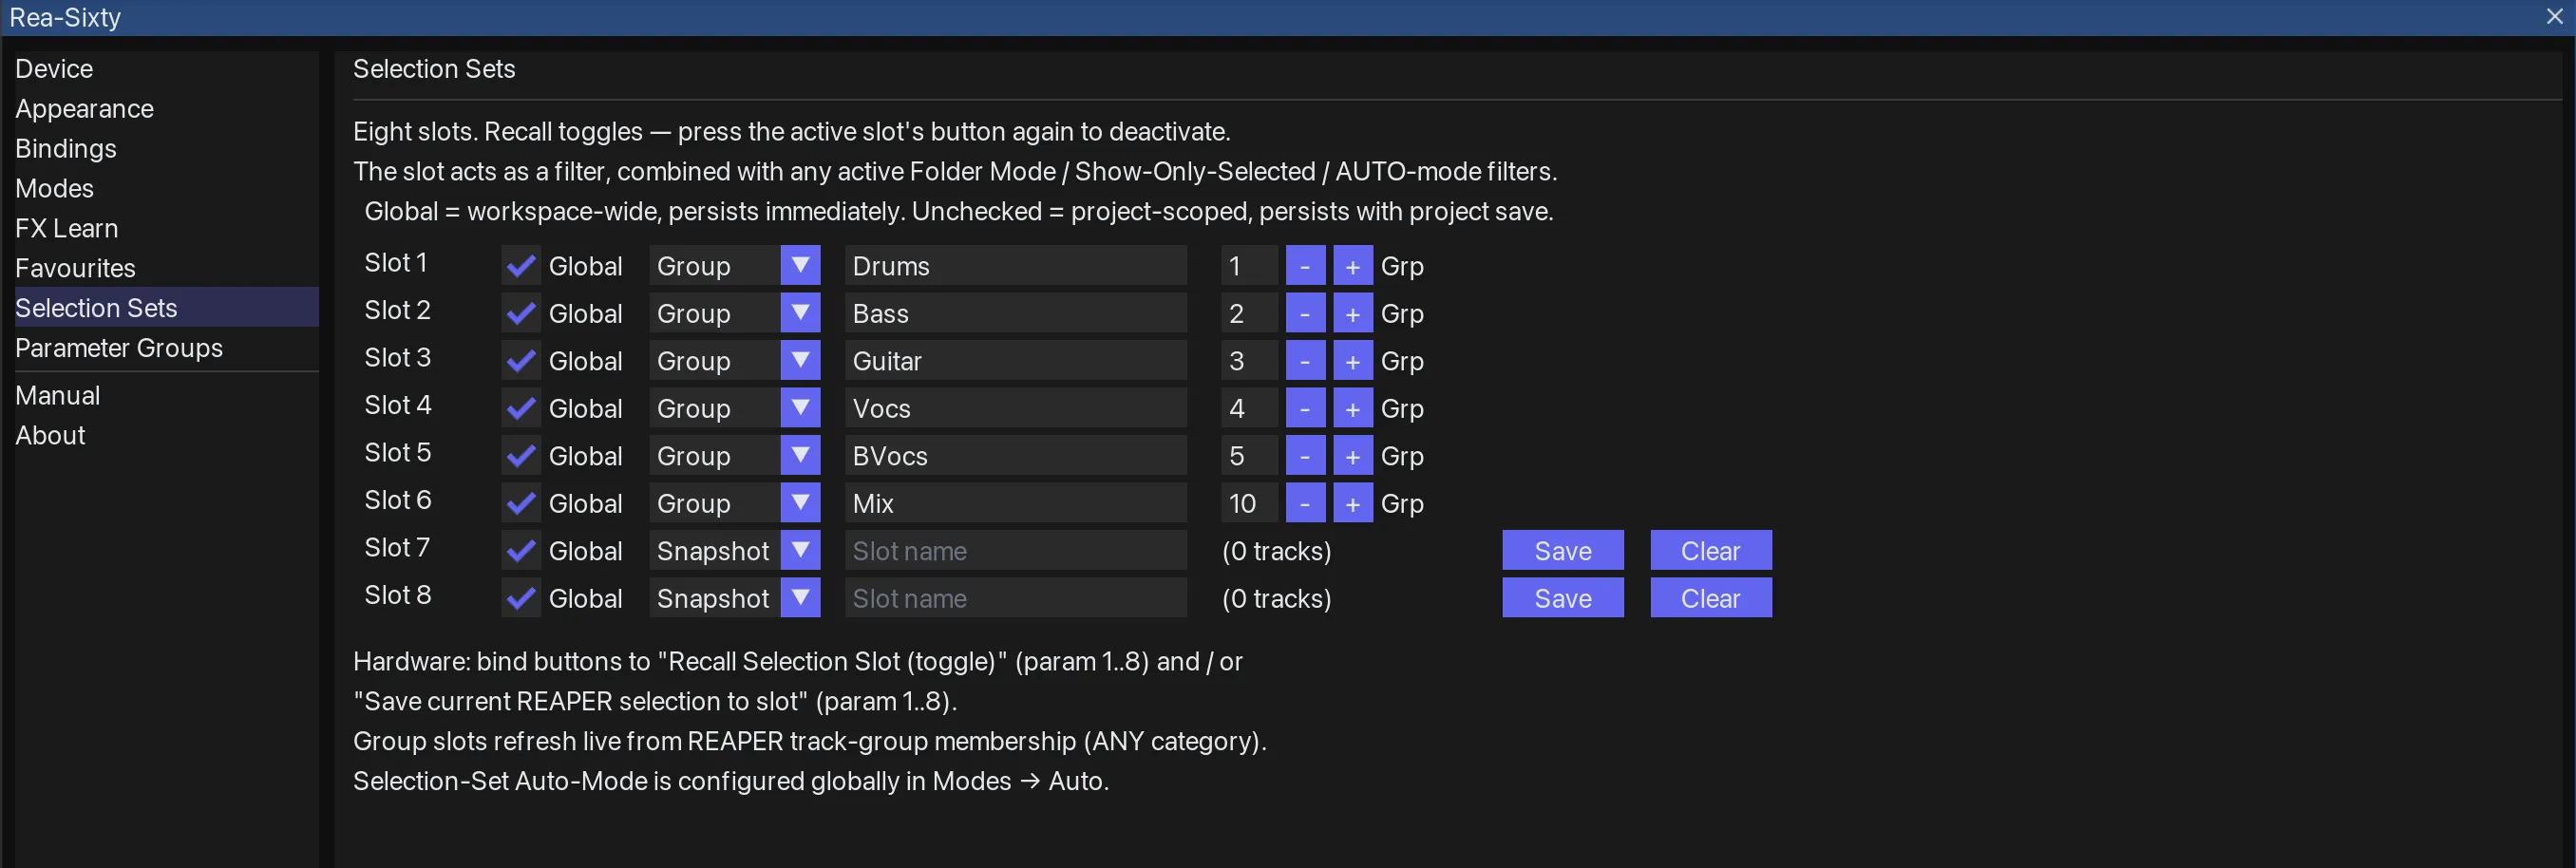
Selection Sets pane — eight slots per project, here bound to REAPER track groups.
Eight slots (1..8). The slot acts as a filter — combined with any active Folder Mode / Show-Only-Selected / AUTO-mode filters (a track must pass all of them). Recall toggles — pressing the active slot’s hardware button again deactivates it.
Each slot is either:
- Snapshot — fixed list of REAPER track GUIDs frozen at save time.
- Group — bound to a REAPER track group (1..128; 1..64 before REAPER 7.23). Membership refreshes continuously from REAPER’s track groups across all Lead/Follow categories (ANY category).
The slot rows are laid out as a fixed-width 8-column table so columns align across rows regardless of slot type. Left to right:
• Slot N— the•prefix marks the currently active slot.- Global checkbox. When ON, the slot’s content is workspace-global (ExtState, persists immediately). When OFF, project-scoped (saved into the project’s RPP chunk on Cmd+S). Switching a slot to Group ticks Global for you, since “group N” is a stable concept across projects; untick it for a per-project group.
- Type combo:
Snapshot/Group. - Name text field.
- Colour swatch — the slot’s key colour on the Selection Sets dynamic bank. Global, like the Parameter Groups’ colours: the sets belong to the project, the colour of slot 3 is the same in every project. The eight ship as red, orange, yellow, green, blue, violet, magenta and cyan. The keys can only show the SSL’s ten button colours, so a colour you pick lands on the nearest of them.
- Grp spinner (Group rows) — REAPER track group index 1..128. Snapshot rows show
(N tracks)in this column instead. - Save button — Snapshot rows only. Overwrites the slot’s GUID list with the current REAPER selection. (Save is hidden on Group rows — pressing it there would silently convert the slot to Snapshot and drop the live group binding, which is bad UX.)
- Clear button — Snapshot rows only. Empties the slot.
Recall is not a settings-pane button: slot activation lives on the hardware. Bind a button to the Recall Selection Slot (toggle) builtin with param 1..8 — pressing it engages the slot; pressing it again disengages. The • marker shows which slot is currently active.
Auto-mode binding
A single global “Selection-Set Auto-Mode” combo (Settings → Modes → AUTO) applies to every slot. When a slot is active in AUTO Selection Mode + the combo is set to a value other than None, recalling that slot arms its tracks to the selected automation mode. Leaving the slot (or switching out of AUTO) reverts them to Trim/Read.
Slot bank-snap
Recalling a slot snaps the surface to strip 0 = first channel of the set, so larger sets always start at the beginning. Re-pressing the same slot key turns the set off, and the surface scrolls back to the selected track.
Driving from hardware
Bind buttons to Recall Selection Slot (toggle) with param 1..8, and Save current REAPER selection to slot with param 1..8, via Settings → Bindings.
All eight on one bank. Give a soft-key bank the dynamic kind Selection Sets. On the UF8 the eight soft keys are slots 1 to 8; on the UF1 the four keys show 1 to 4, and a long press on ◄ / ► turns to 5 to 8. A key reads the set’s name, or Set 3 for an unnamed one and Grp 12 for a group slot, and wears the slot’s colour from the table above. Lit is the recalled set, dim a used slot, dark an empty one.
| Gesture | What it does |
|---|---|
| Push | Recall the set, press again to switch it off (the surface filter, as Recall Selection Slot) |
| Hold | Store the current REAPER selection, into an empty slot only |
| Shift + push | Store the current selection over what is in the slot |
| Cmd + push | Select the set’s tracks in REAPER, without the filter |
| Ctrl + push | Clear the slot |
Storing from the surface leaves the name empty; name the set under Settings, Selection Sets. The mode banner says what happened (Selection Set 3 • stored, cleared, selected), and the UF1’s time field flashes STORED 3, SELECT 3 or CLEAR 3. Hold with no track selected stores nothing and says so. The slots are the same ones as in the pane above and follow the project tab.
Sticky Pot pane
Every Sticky Pot pin in the project, one row per pinned track: track, plug-in, parameter and its live value. Pins themselves are made on the hardware, with Sticky Pot: Get next touched Parameter. This pane is where you see what is pinned, drop one, and give a pin a second parameter.
- Sticky Pot active (checkbox) — the same global suspend the Sticky Pot: Toggle active/inactive action does. Off means every pin steps aside and the V-Pots go back to their normal view; the pins are kept.
- Pair — press it, then touch a second parameter on that same track. It joins the same pot. The surface has the same thing as Sticky Pot: Pair next touched Parameter, which takes whichever pinned track you touch. Both values are noted at that moment, so pairing itself moves nothing; only the next turn of the pot does. A parameter on another track is ignored, so grabbing the wrong plug-in first costs nothing. The capture gives up after twenty seconds, like the pin capture.
- Ratio — how far the second parameter travels for a given move of the first, and in which direction.
-1.00is counter-running one to one, which is what an 1176 wants: input up, output down, level unchanged. A positive value runs both the same way, a smaller number moves the second one less. The second parameter stops at its own end of travel while the pot keeps going. Changing the ratio pivots around where the pair stands at that moment, so nothing jumps.
Move either parameter by hand — in the plug-in, from another controller — and the pot takes over from there. The ratio stays as it is; what moves is the point it counts from. Your correction is the new zero, not something the next detent undoes. The same applies after a project load: whatever the two are at when you first touch the pot is where the coupling starts.
- Unlink — drop the second parameter, keep the pin.
- Clear — drop the pin.
A row whose track is gone shows track gone, and one whose plug-in is gone shows plug-in gone. Both can still be cleared here. Pinning a new parameter to a track drops that track’s pairing.
Parameter Groups pane
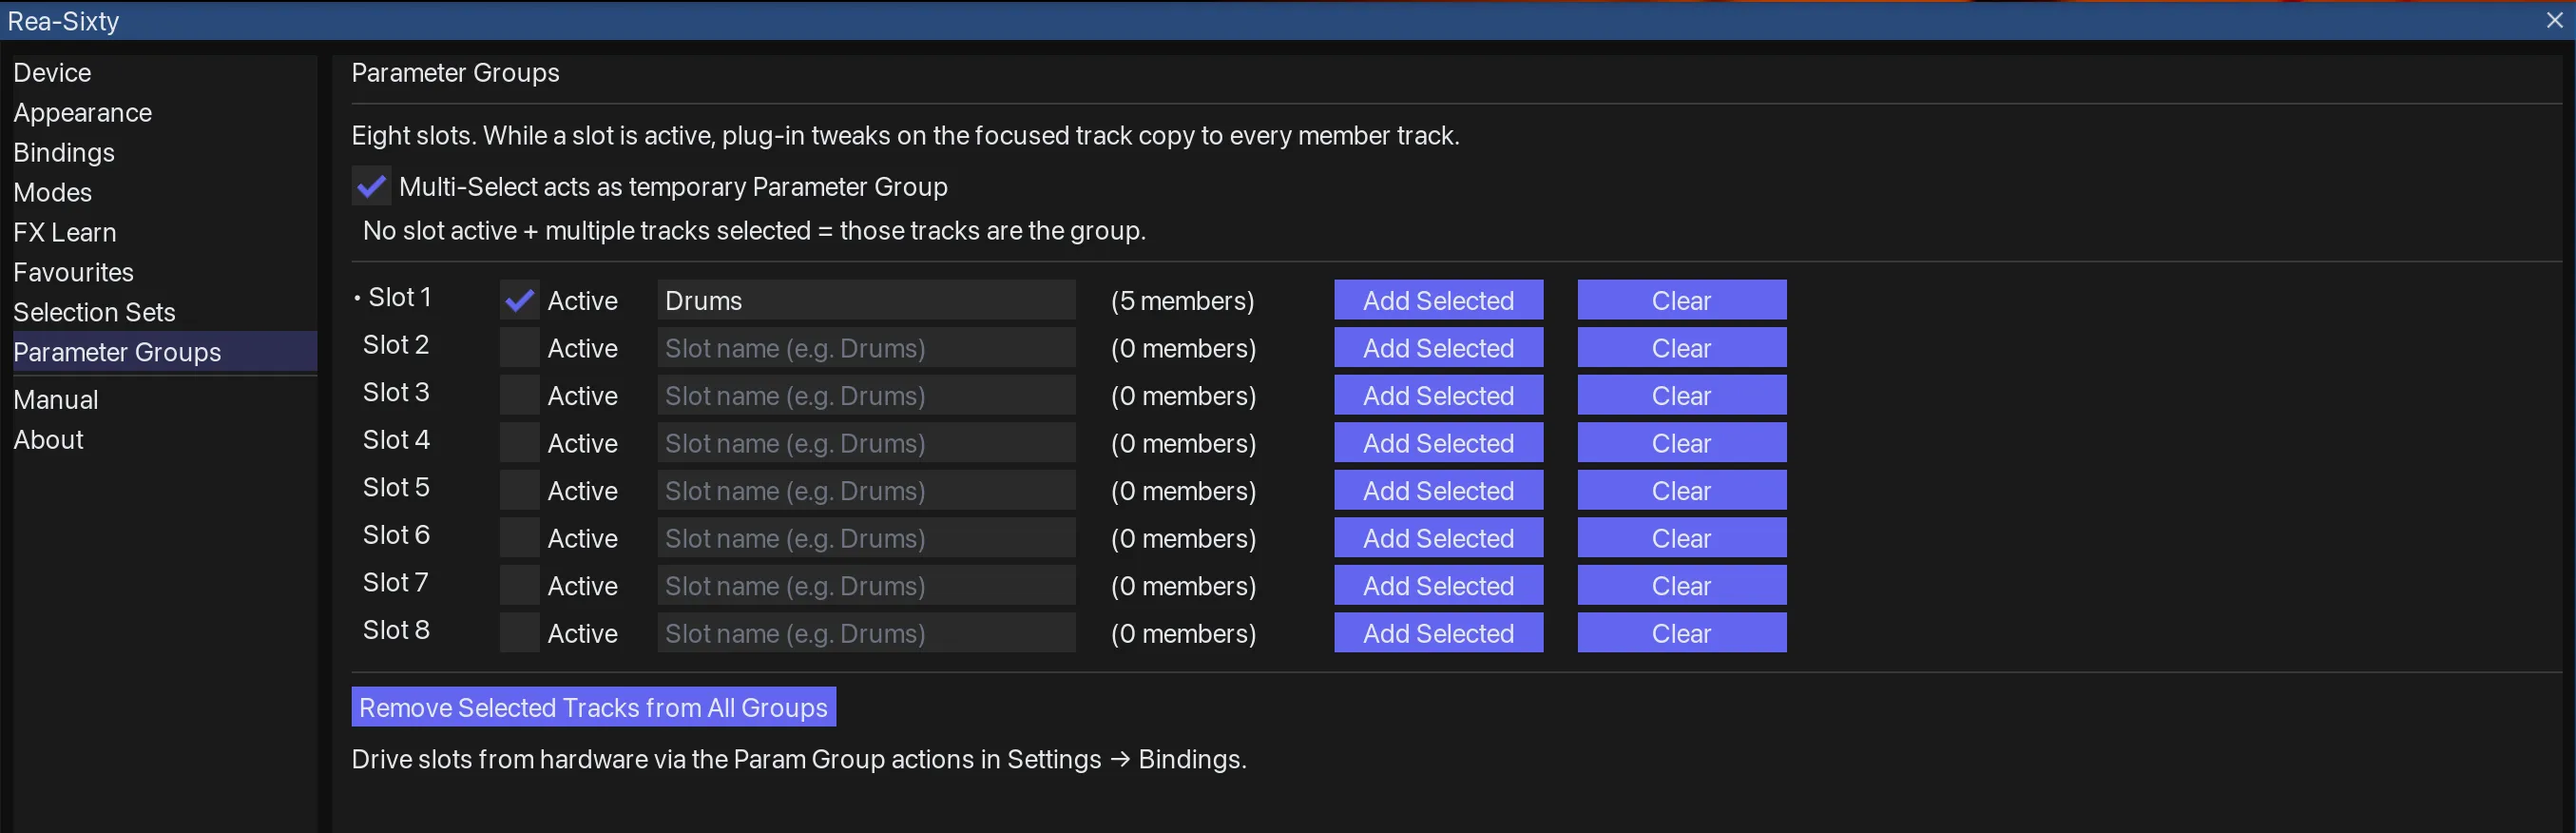
Parameter Groups pane — eight slots, each collecting parameters across tracks.
Parallel parameter control across multiple tracks: while a slot is active, plug-in tweaks on the focused track copy to every member track of the slot. This works for the SSL Channel Strip / Bus Comp, for learned FX, and now for any other plug-in with no mapping required — as long as the member track hosts the exact same plug-in. (See the Parameter Groups reference section for the full rules.)
Top of the pane:
- Multi-Select acts as temporary Parameter Group (checkbox). When on AND no persistent slot is active AND multiple tracks are selected, including the focused track, those tracks become the live group.
Slot rows are laid out as a fixed-width 7-column table (so columns stay aligned across rows). Per row, left to right:
• Slot N—•prefix marks an active slot.- Active checkbox — toggle this slot’s active state. Several slots can be active at once, and a track is a target if it belongs to any of them (
resolveBroadcastTargetstests the track’s membership mask against the active-group bits). Membership in two active groups changes nothing; a track never has to be in all of them. - Name text field.
- Colour swatch: the key colour on the surface. White leaves the Parameter Groups bank’s keys their usual colour.
- Member count display:
(N members). - Add Selected button — add currently-selected REAPER tracks to this slot’s membership.
- Clear button — empty the slot’s membership.
Bottom of the pane:
- Remove Selected Tracks from All Groups button — pull every currently-selected track out of every slot.
- Hint text pointing at the Param Group native actions in Settings → Bindings.
Storage
Per-track slot membership lives in P_EXT:reasixty:pg_mask as an 8-bit bitmask (one bit per slot). Slot names and the active flag live in the project itself, written through REAPER’s project-config hook. The JSON file (parameter_groups.json, in the rea_sixty folder inside the resource folder) is global and holds only the multi-select toggle.
About pane
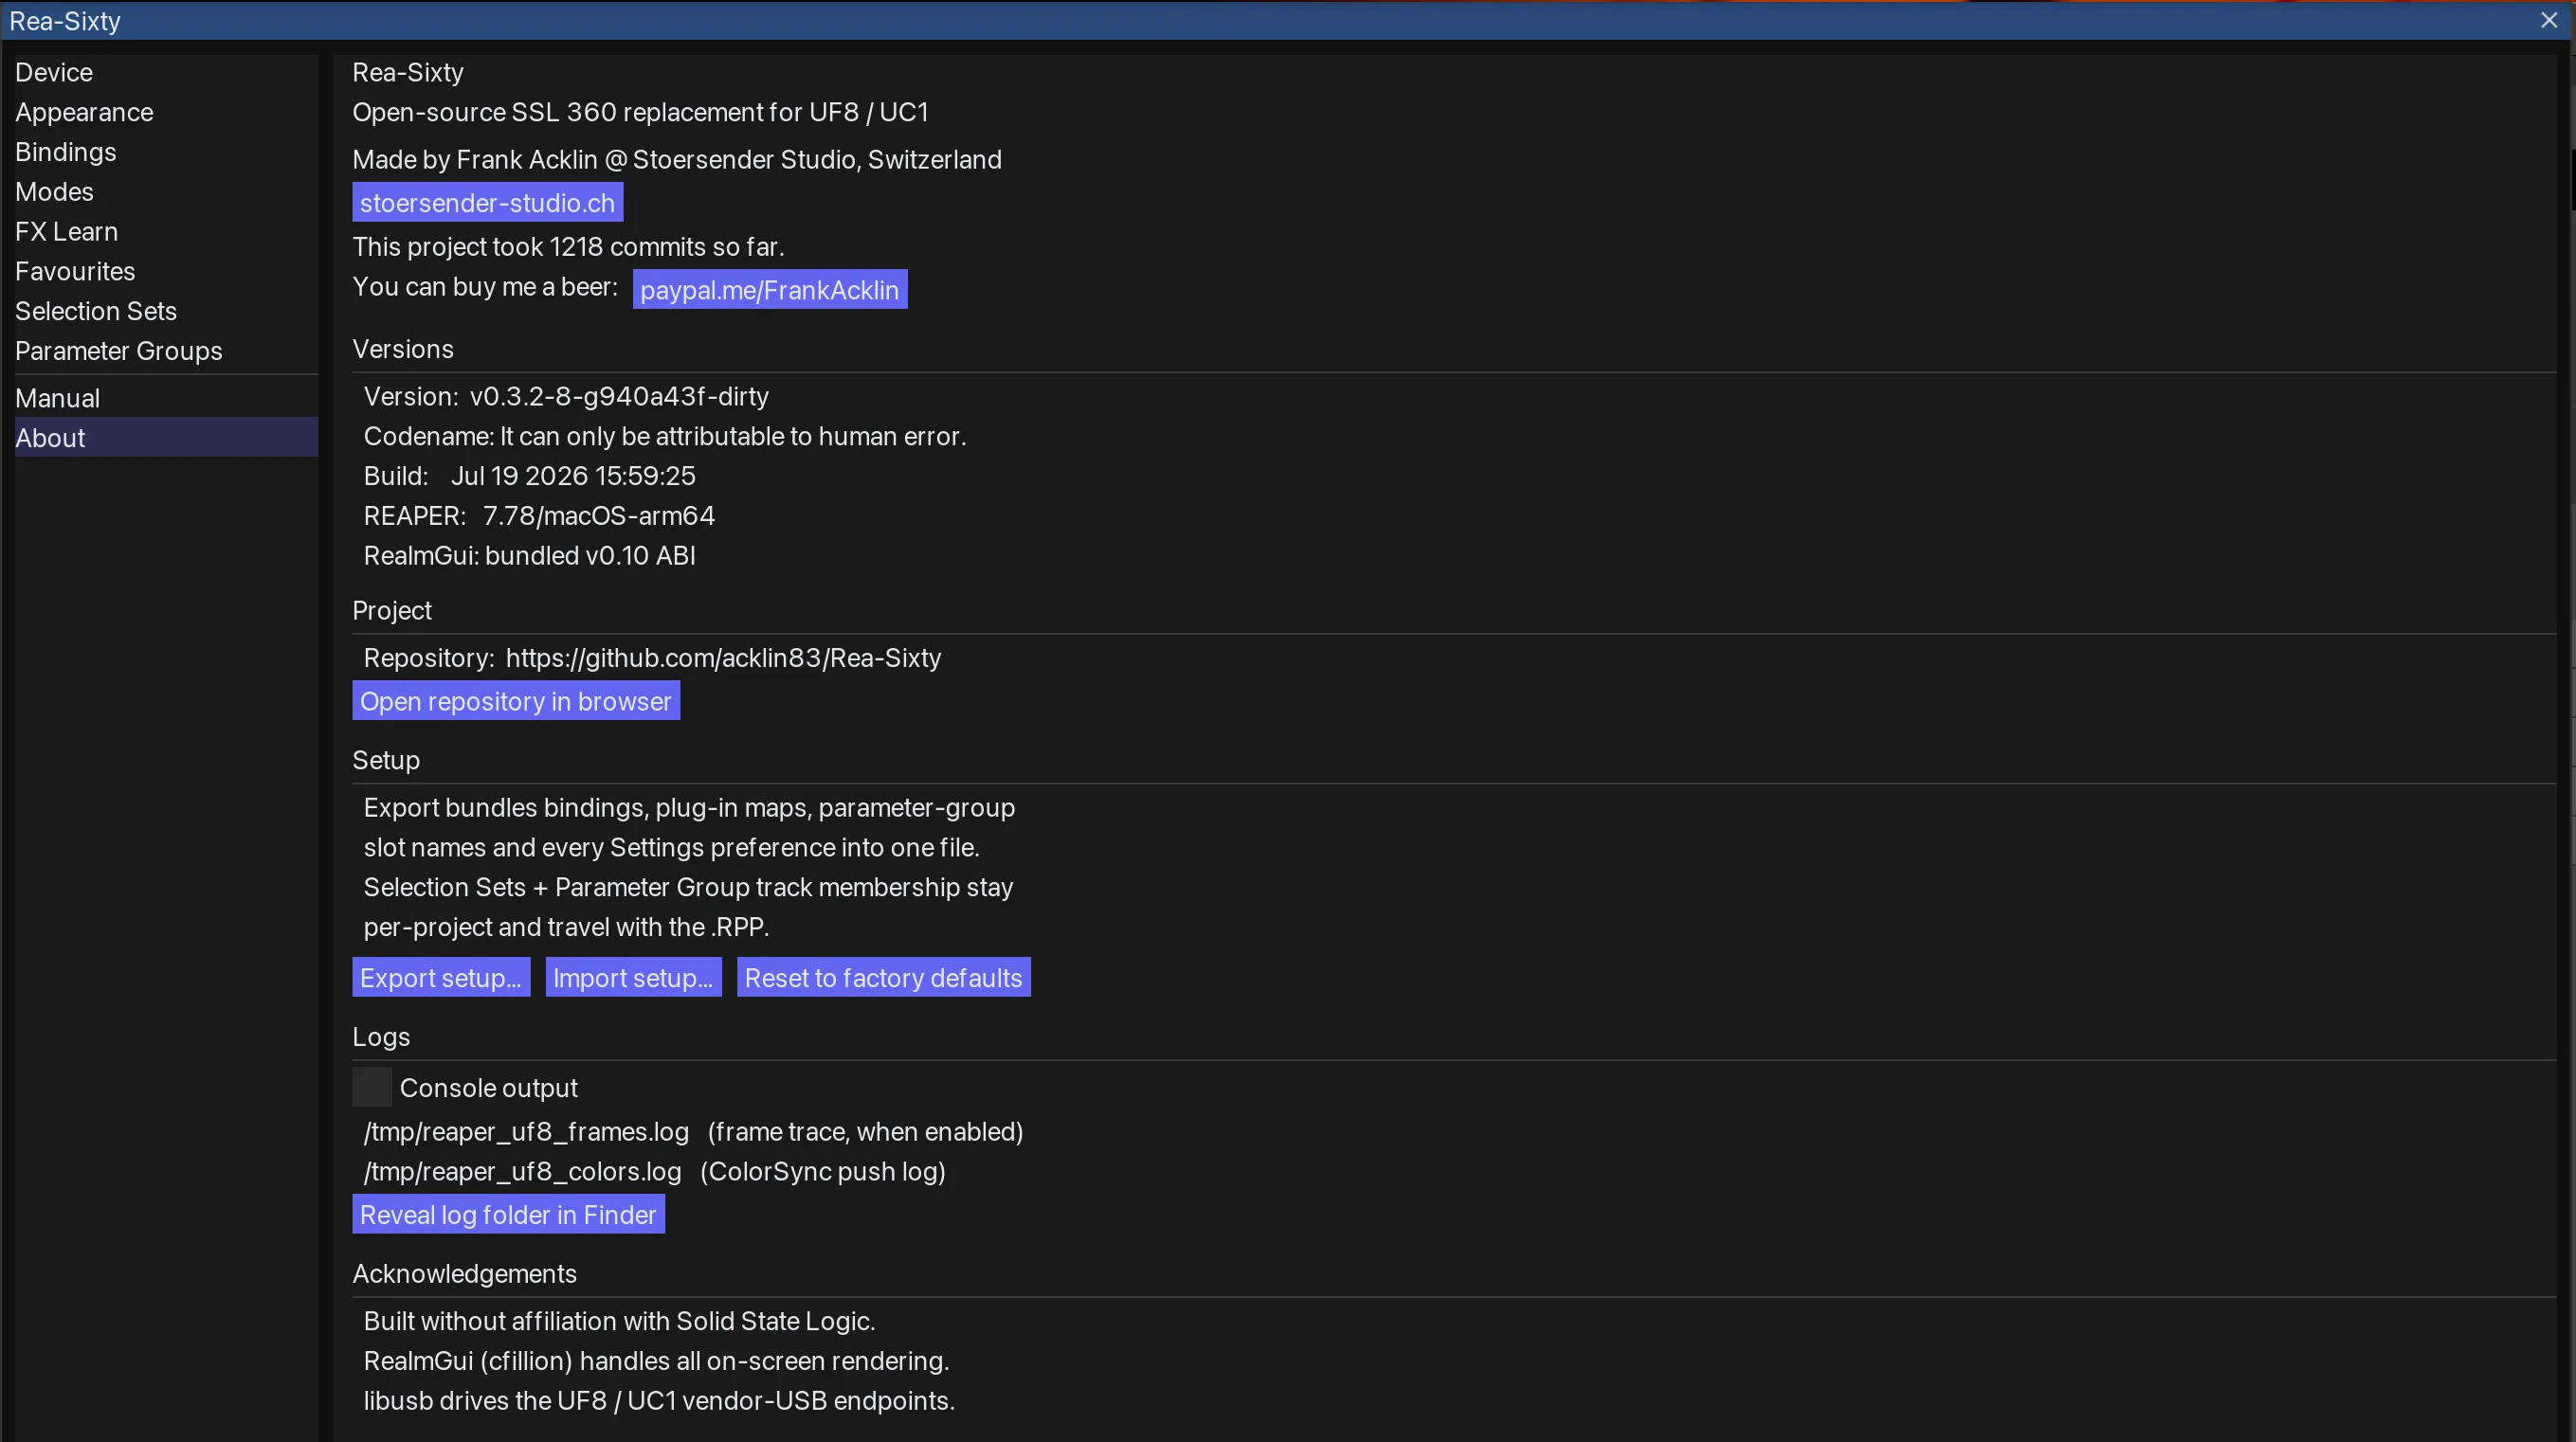
About pane — version and codename, setup export and import, and the log paths.
The pane stacks several sections from top to bottom.
Header
- Title + tagline (“Open-source SSL 360 replacement for UF8 / UC1 / UF1”).
- Author byline: “Made by Frank Acklin @ Stoersender Studio, Switzerland”.
- Button stoersender-studio.ch — opens the studio website in the system browser.
- Commit-count blurb (“This project took N commits so far”).
- “You can buy me a beer:” + paypal.me/FrankAcklin button.
Versions
- Version —
git describe --tags --always --dirtyof the source tree at build time. On a tagged release:v0.5.3. Past a tag:v0.5.3-N-g<sha>(N commits past the tag). With uncommitted changes: trailing-dirty. Read this line first when triaging issues so it’s obvious which build is loaded. - Build — date + time of the compiled extension.
- REAPER — the host REAPER version string.
- ReaImGui — the bundled-ABI banner (currently v0.10).
Project
- Repository URL display + Open repository in browser button.
Setup (Export / Import / Reset)
A single bundled file format covering: bindings, learned plug-in maps, and every Settings preference. Parameter Group names and memberships are per-project and travel with the .RPP, as do Selection Sets you left project-scoped — a slot ticked Global lives in the workspace and does ride along in this file.
- Export setup… — save the bundle to a chosen JSON file.
- Import setup… — load a bundle (replaces in-memory state immediately; warnings reported inline).
- Reset to factory defaults — confirmation popup. Replaces bindings + learned FX + every Settings preference with the baked-in factory configuration. Per-project Selection Sets and Parameter Group memberships are untouched.
Windows USB driver (Windows only)
Section appears only when the build is Windows.
- Text: binds UF8, UC1 and UF1 to WinUSB so libusb can claim them without Zadig. One-time setup, requires admin. Plug the devices in before pressing, because the rebind only reaches devices attached at the moment it runs. SSL 360° stops seeing them after install; reinstall SSL 360° to revert.
- Current driver binding: one line per device saying what it is bound to right now, with a Refresh button.
WinUSB / Rea-Sixtymeans ours and the device will be picked up; anything else means another driver still owns it. It only reads, so it raises no admin prompt, and it re-reads itself when an install or uninstall finishes. - Install UF8/UC1/UF1 WinUSB driver button: runs the in-product installer with a UAC and publisher prompt, then reports what actually happened. Either installed, or failed with the path of a log you can paste, or cancelled at the permission prompt. Cancelling is not a failure and is named as such. While it runs, both buttons disappear so a second press cannot race the first. After it finishes, unplug and replug the devices.
- Where the devices go afterwards. Our INF puts them in class
USBDevice, so in Device Manager they move out of Universal Serial Bus controllers into Universal Serial Bus devices, and each is renamed for itself:SSL UF8 (Rea-Sixty / WinUSB),SSL UC1 (Rea-Sixty / WinUSB),SSL UF1 (Rea-Sixty / WinUSB). Looking for the old name in the old category and finding nothing does not mean the unit is dead. - Uninstall button: runs
pnputil /delete-driver /uninstall(UAC prompt), removes every copy ofrea_sixty_winusb.inffrom the driver store, and clears the Rea-Sixty signing cert from the My / Root / TrustedPublisher stores. After uninstall, unplug and replug devices; the SSL 360° driver (or whatever was previously bound) takes over again. If a copy is ever left behind, the supported cleanup ispnputil /delete-driver oemNN.inf /uninstall /forcein an admin prompt, never regedit, which Windows refuses.
Linux udev rule (Linux only)
Section appears only when the build is Linux.
- Text: grants non-root USB access by installing
/etc/udev/rules.d/99-rea-sixty.rules. One-time setup, requires sudo (graphical password prompt). - Install Linux udev rule button — runs pkexec, writes the rule, reloads udev. After install, unplug + replug the surfaces, then restart REAPER.
- Uninstall button — pkexec removes
/etc/udev/rules.d/99-rea-sixty.rules, then reloads + triggers udev. After uninstall the surface drops back to root-only USB access until a rule is reinstalled.
Logs
- Lists two diagnostic log paths,
reaper_uf8_frames.logandreaper_uf8_colors.log. Logs live in the system temporary folder:/tmpon macOS and Linux,%TEMP%on Windows. The pane shows the real path for your platform rather than assuming one. - Reveal log folder in Finder button (Reveal log folder in Explorer on Windows, Reveal log folder on Linux): opens the folder.
- Console output checkbox, off by default. REAPER pops its Console window open for every message, which is noise when a device simply is not connected. The same text still goes to the log files either way, so nothing is lost — switch it on while diagnosing.
On-Screen Display
Rea-Sixty draws several optional helpers on REAPER’s own screen. Each is rendered by a companion script that auto-installs and auto-starts with the extension — no manual ReaScript setup. Enable the overlay, focused-track panel, and mode-change banner in the Settings window; the Learn-HUD is toggled by an action.
MCP Inserts overlay
A highlight drawn directly on the Mixer’s track Inserts (FX) list, marking the active Channel-Strip plug-in (default yellow) and active Bus-Comp plug-in (default red) on the surface-focused track / BC anchor. The default is an outline only (Fill opacity 0).
Enable via Settings → Appearance → On-screen → “Show MCP Inserts overlay”. Controls (the CS / BC colours are shared with the focused-track panel):
- CS colour / BC colour pickers.
- Fill opacity (0 = outline only) and Border opacity.
- Inserts row height and Inserts top offset — a fallback. The overlay measures each row of the FX list and draws on the measured row, which is why it lines up on any theme and any UI scale; these two are only read if that measurement fails.
Focused-track panel
A frameless, Gridbox-style box that floats on the Arrange (or any window you drag it onto), showing the surface-focused track’s name, its active CS / BC plug-in (as short names — your FX-Learn displayShort, with the SSL factory plug-ins shown as CS2 / BC2), and the last-touched parameter per domain. A touched parameter shows your custom Display label when one is set (for the held FX-Learn layer), matching the surface readout.
Enable via Settings → Appearance → On-screen → “Show focused-track panel”. Drag the body to move, drag the edges to resize; position + size persist. Right-click menu:
- Layout — Two lines (CS / BC) or One line.
- Track name — Show track name; Use track colour (draws the track name in the track’s REAPER colour — falls back to grey if the track has no custom colour assigned); Full name / Smart abbreviate / Abbreviation length; Before / After CS/BC (whether the track name sits before or after the plug-in tag).
- Customize — Font size, Corner radius, Background / Border / CS / BC colour.
- Elements — what the panel shows besides the track name and the plug-in tags. Mode indicator (Sel / Encoder) — the UF8’s Selection Mode and Channel-Encoder Mode, each as a drop-down you can switch with: eight Selection Modes, sixteen Encoder Modes. Picking the row you are already on does nothing, and picking Select or Channel Select returns you there. Every drop-down in the panel shares one fixed width, so nothing under the mouse moves when a mode name changes length. UF1 encoder mode and UF1 jog mode — the UF1’s own two rings, which are separate from the UF8’s and are scrolled blind under a held key, so this is the only always-on readout of them. Flash mode changes — the transient banner, in the panel instead of its own window. UF8 soft-key bank name — a drop-down of every soft-key bank that holds something, by the names you gave them in Bindings, with the one you are on selected. Picking a row engages that bank, layer and Quick included, so the panel is a jump menu over the whole soft-key configuration. Plain banks only. Shift rows were listed for a day and taken out again: picking one could not reliably put the surface on that set, and a menu entry that does not go where it says is worse than no entry. Hold the modifier to reach the Shift set, as everywhere else. Sets 8 and 9 are not in the list either: engaging those is a domain move, which is not what a jump menu over your own banks is for. Settings + HUD buttons, CS / BC cycle buttons, and Click plug-in name to open. All off by default except the last.
- Align — centre the box horizontally or vertically on screen.
- Load on startup — auto-launch the panel when REAPER starts (writes a marked one-liner into
Scripts/__startup.lua; untick to remove it). - Close panel.
Mode-change banner
A transient on-screen banner that flashes the new mode for ~2 s whenever you switch Selection Mode or Channel-Encoder Mode, then auto-hides — a quick “what did I just switch to?” confirmation without looking at the surface.
Enable via Settings → Appearance → On-screen → “Show mode-change banner”, or bind / run the Mode-change banner: show / hide (flashes Sel / Encoder mode) action. It is off by default and remembers its on / off state across restarts.
Drag the banner while it is visible to reposition it; the position persists. Right-click it for font size, duration, ring neighbours, colours, Load on startup and Close banner.
Point at it and it waits. While the mouse is over the banner, and for as long as its right-click menu is open, the hide timer is suspended, so you can drag it or work the menu without racing the two seconds. Move the pointer off and it goes. Pointing at the empty spot where it usually appears does nothing: a hidden banner is click-through, so it never catches a click meant for the arrange view.
Learn-HUD
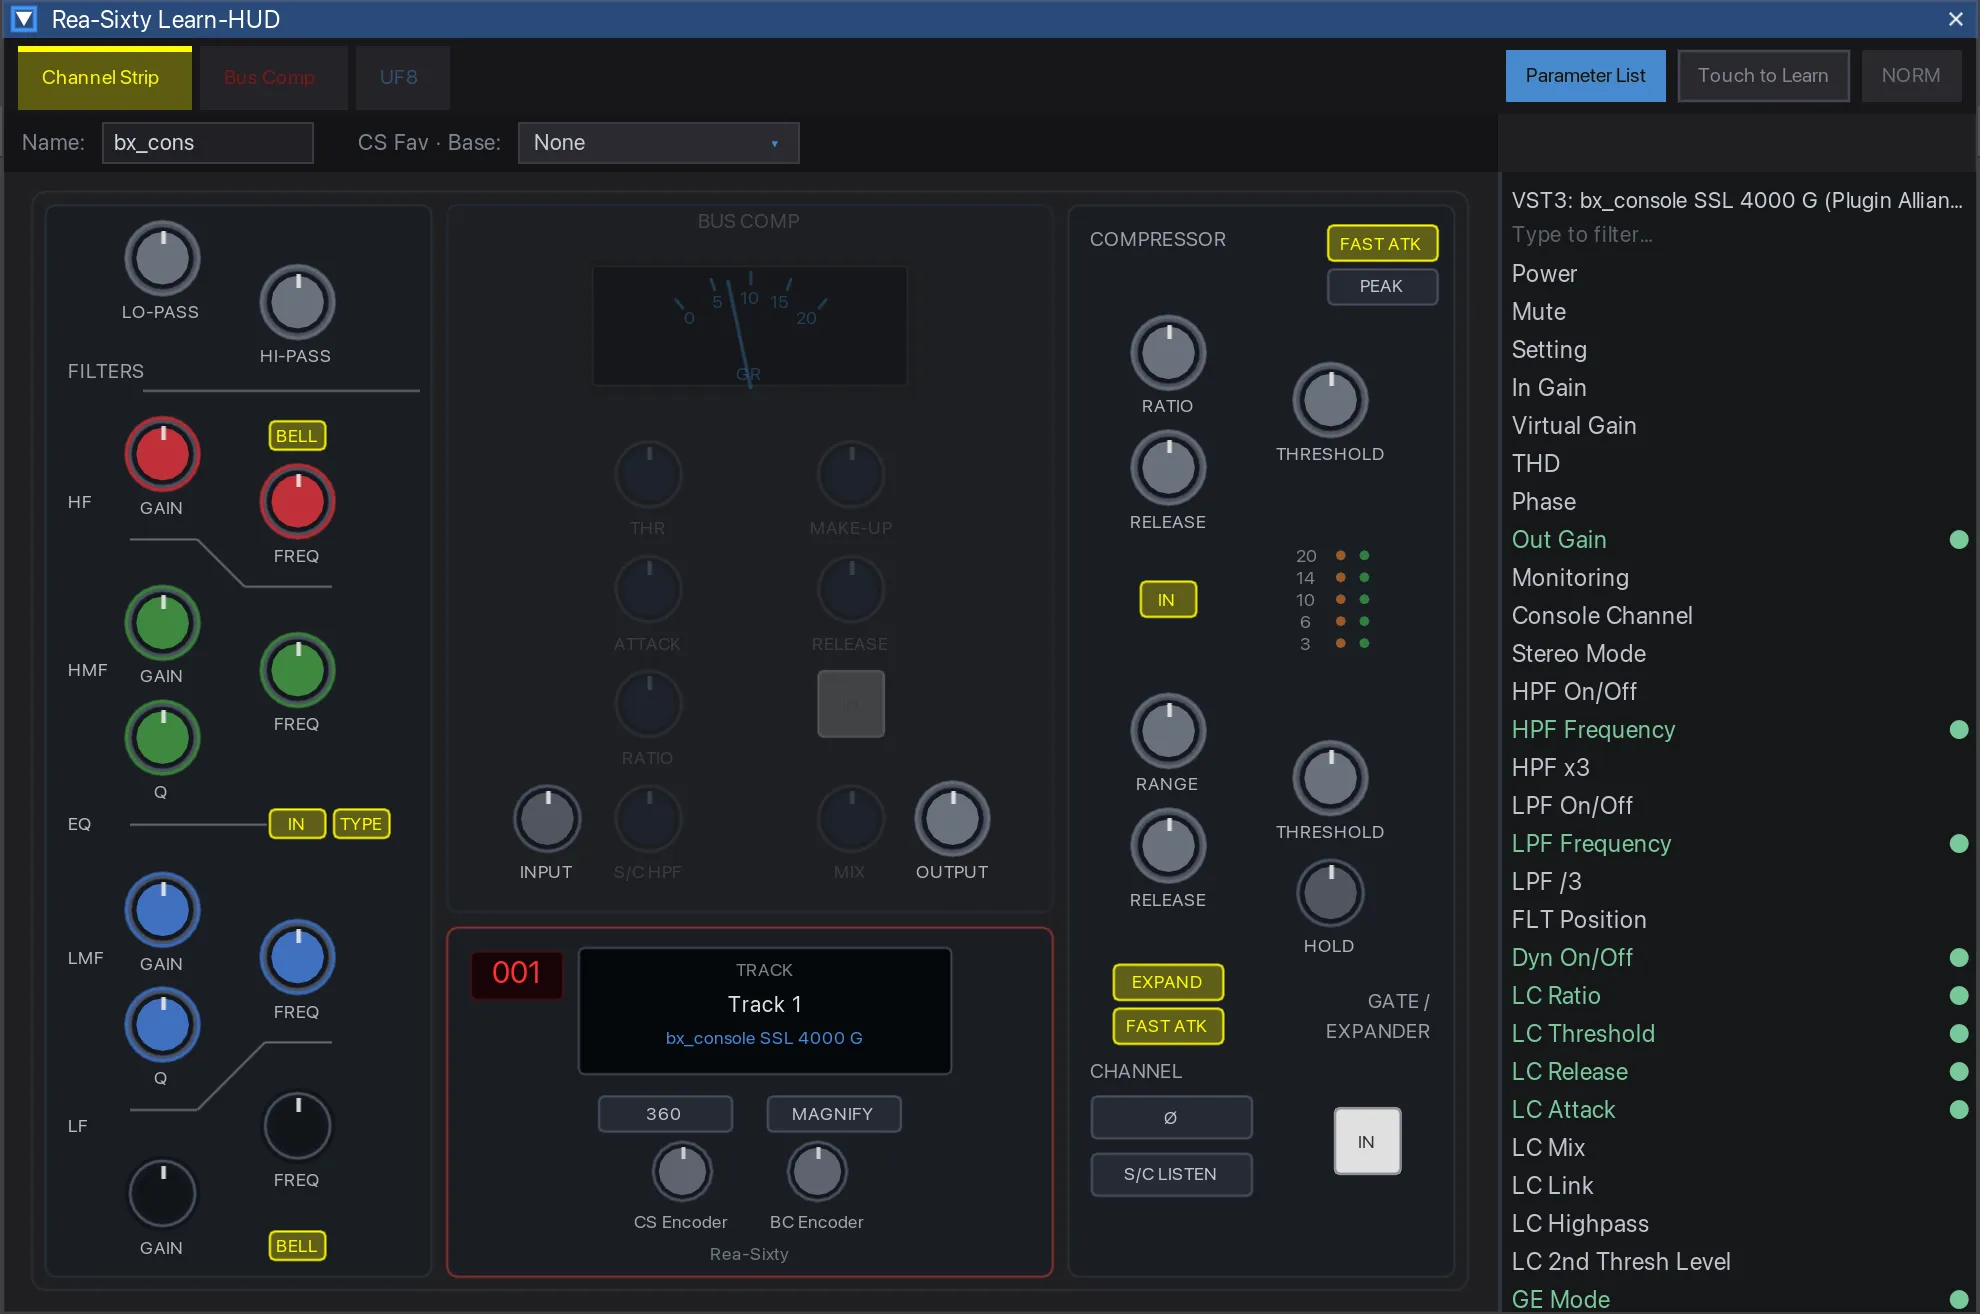
Learn-HUD, Channel Strip — the mockup mirrors the mapped plug-in, and mapped parameters are dotted in the list on the right.
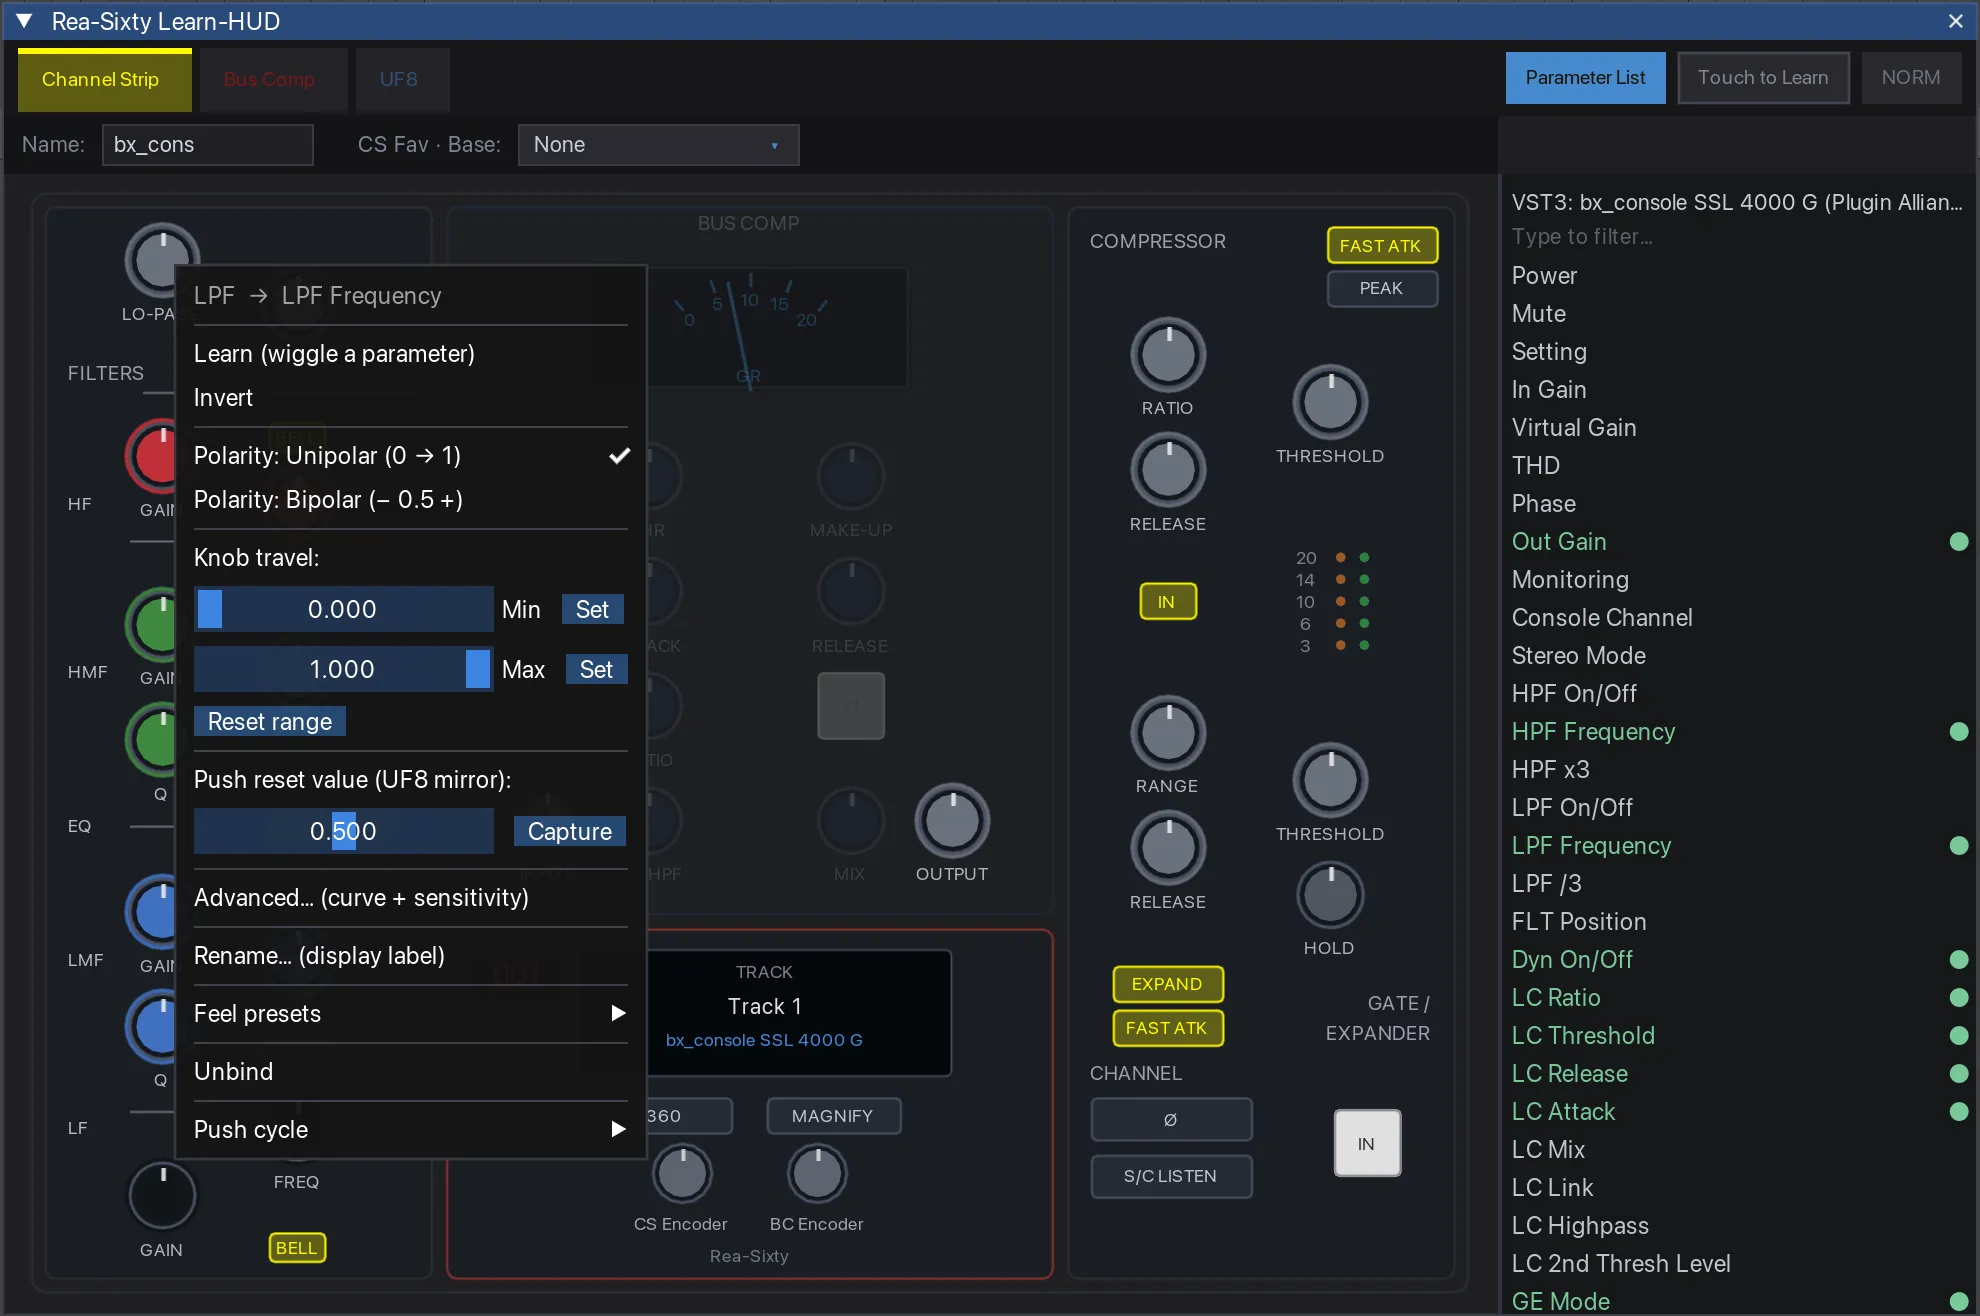
Right-clicking a pot opens its per-control menu: polarity, knob travel, push-to-reset and the feel presets.
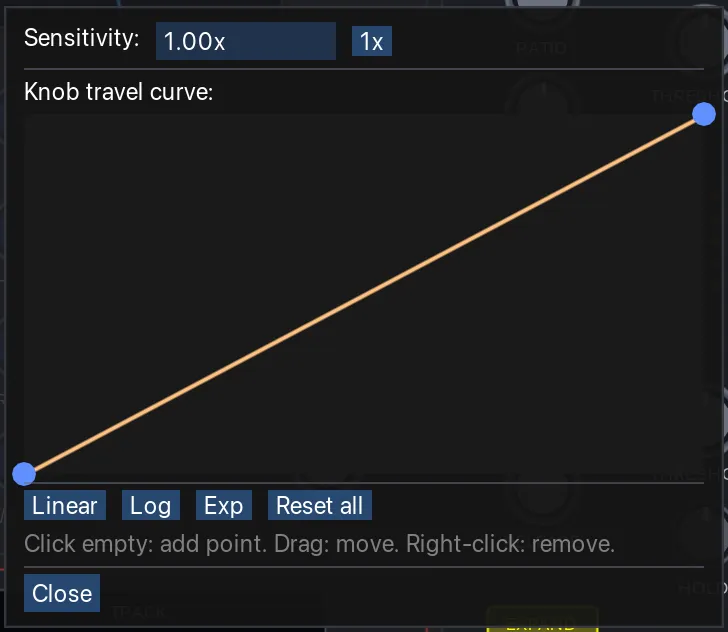
The Advanced popup — the knob-travel curve editor, with Linear, Log and Exp presets.
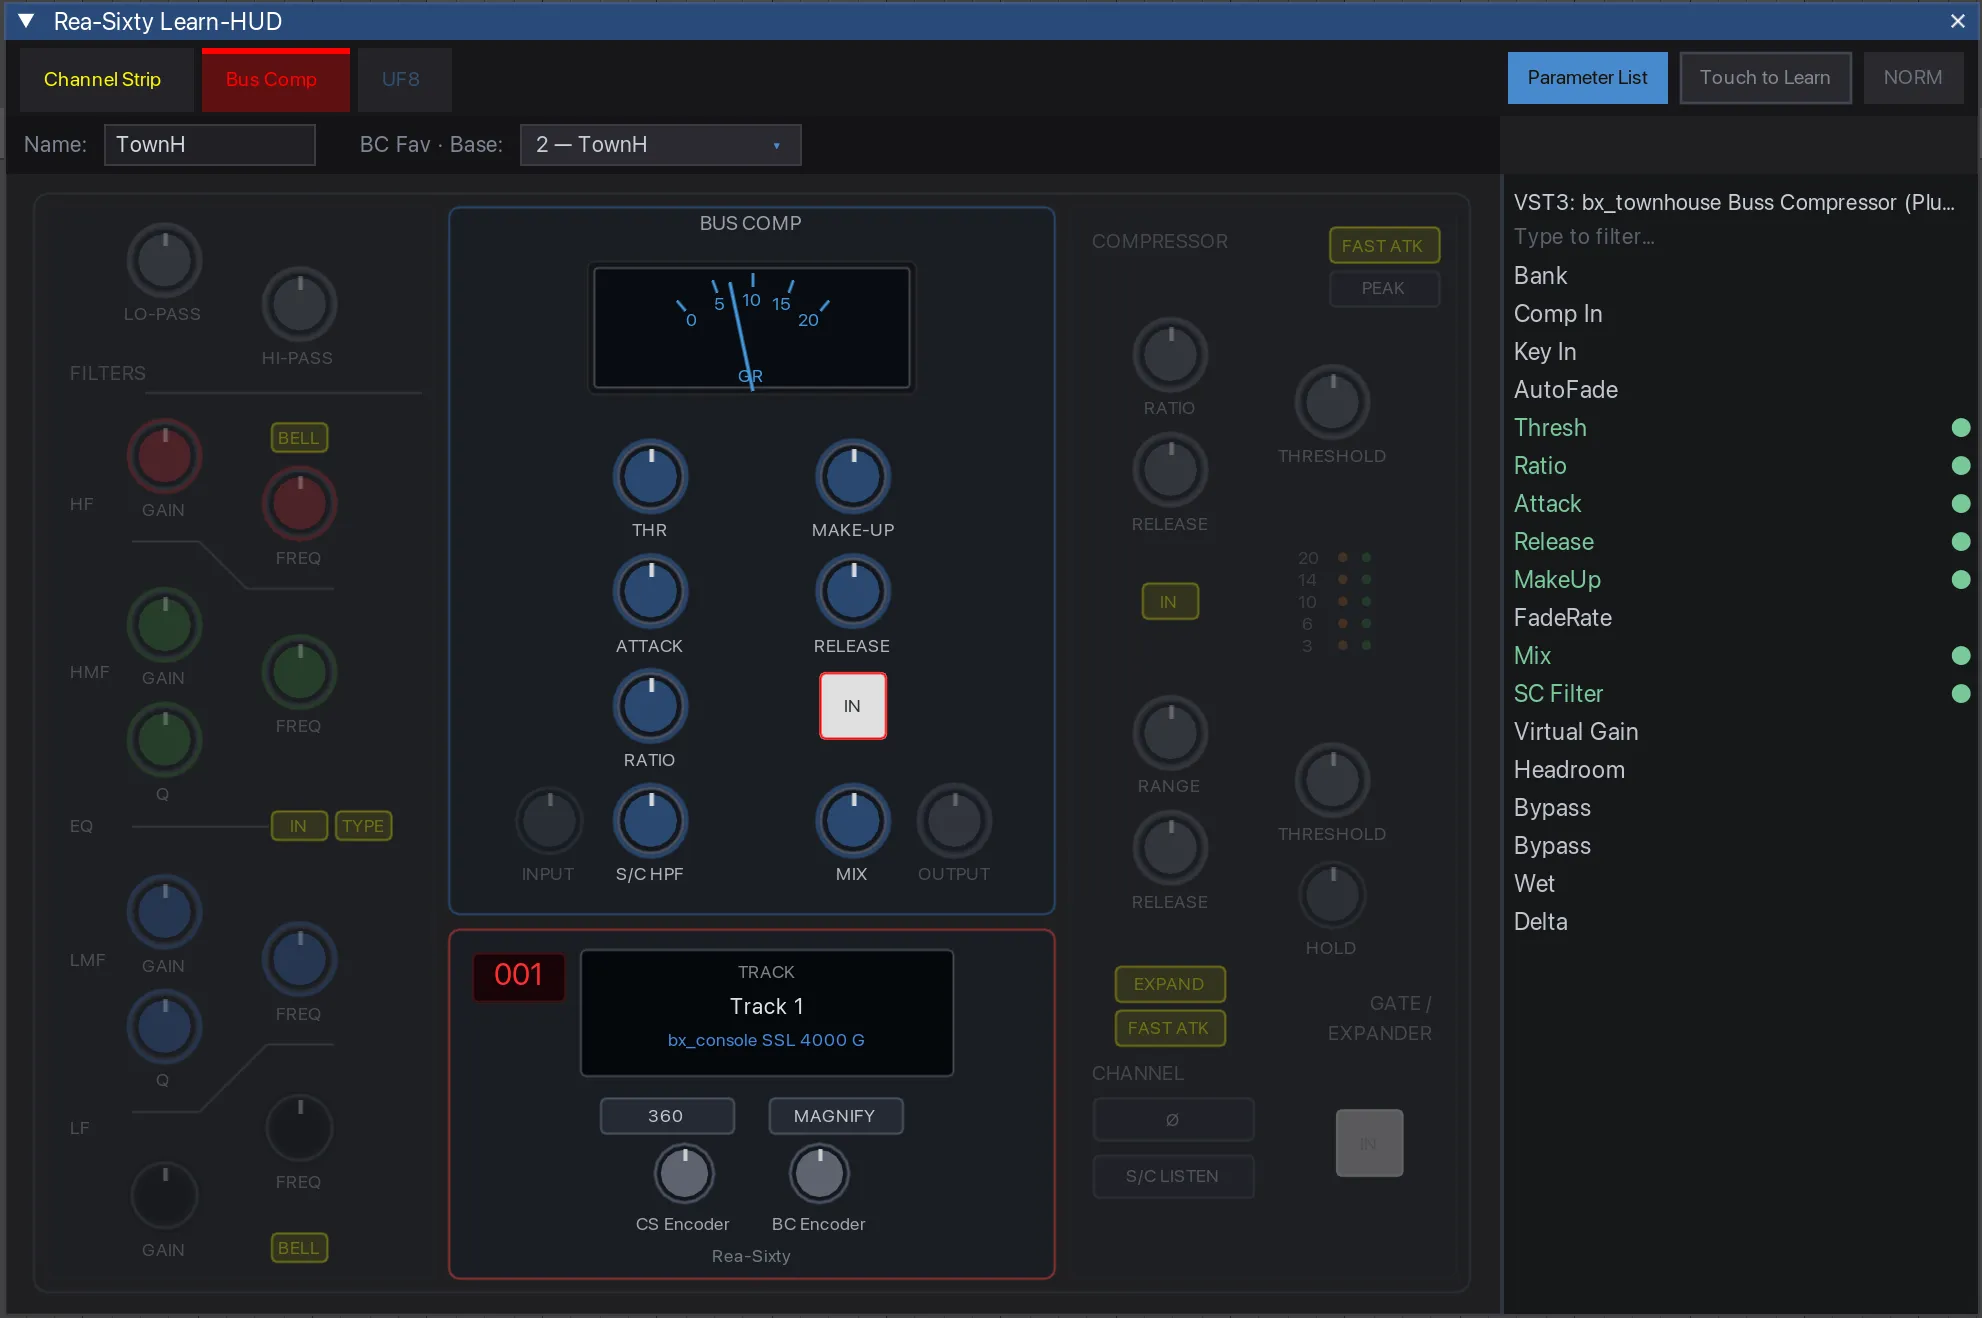
Learn-HUD, Bus Comp — the GR needle tracks the plug-in, here bx_townhouse.
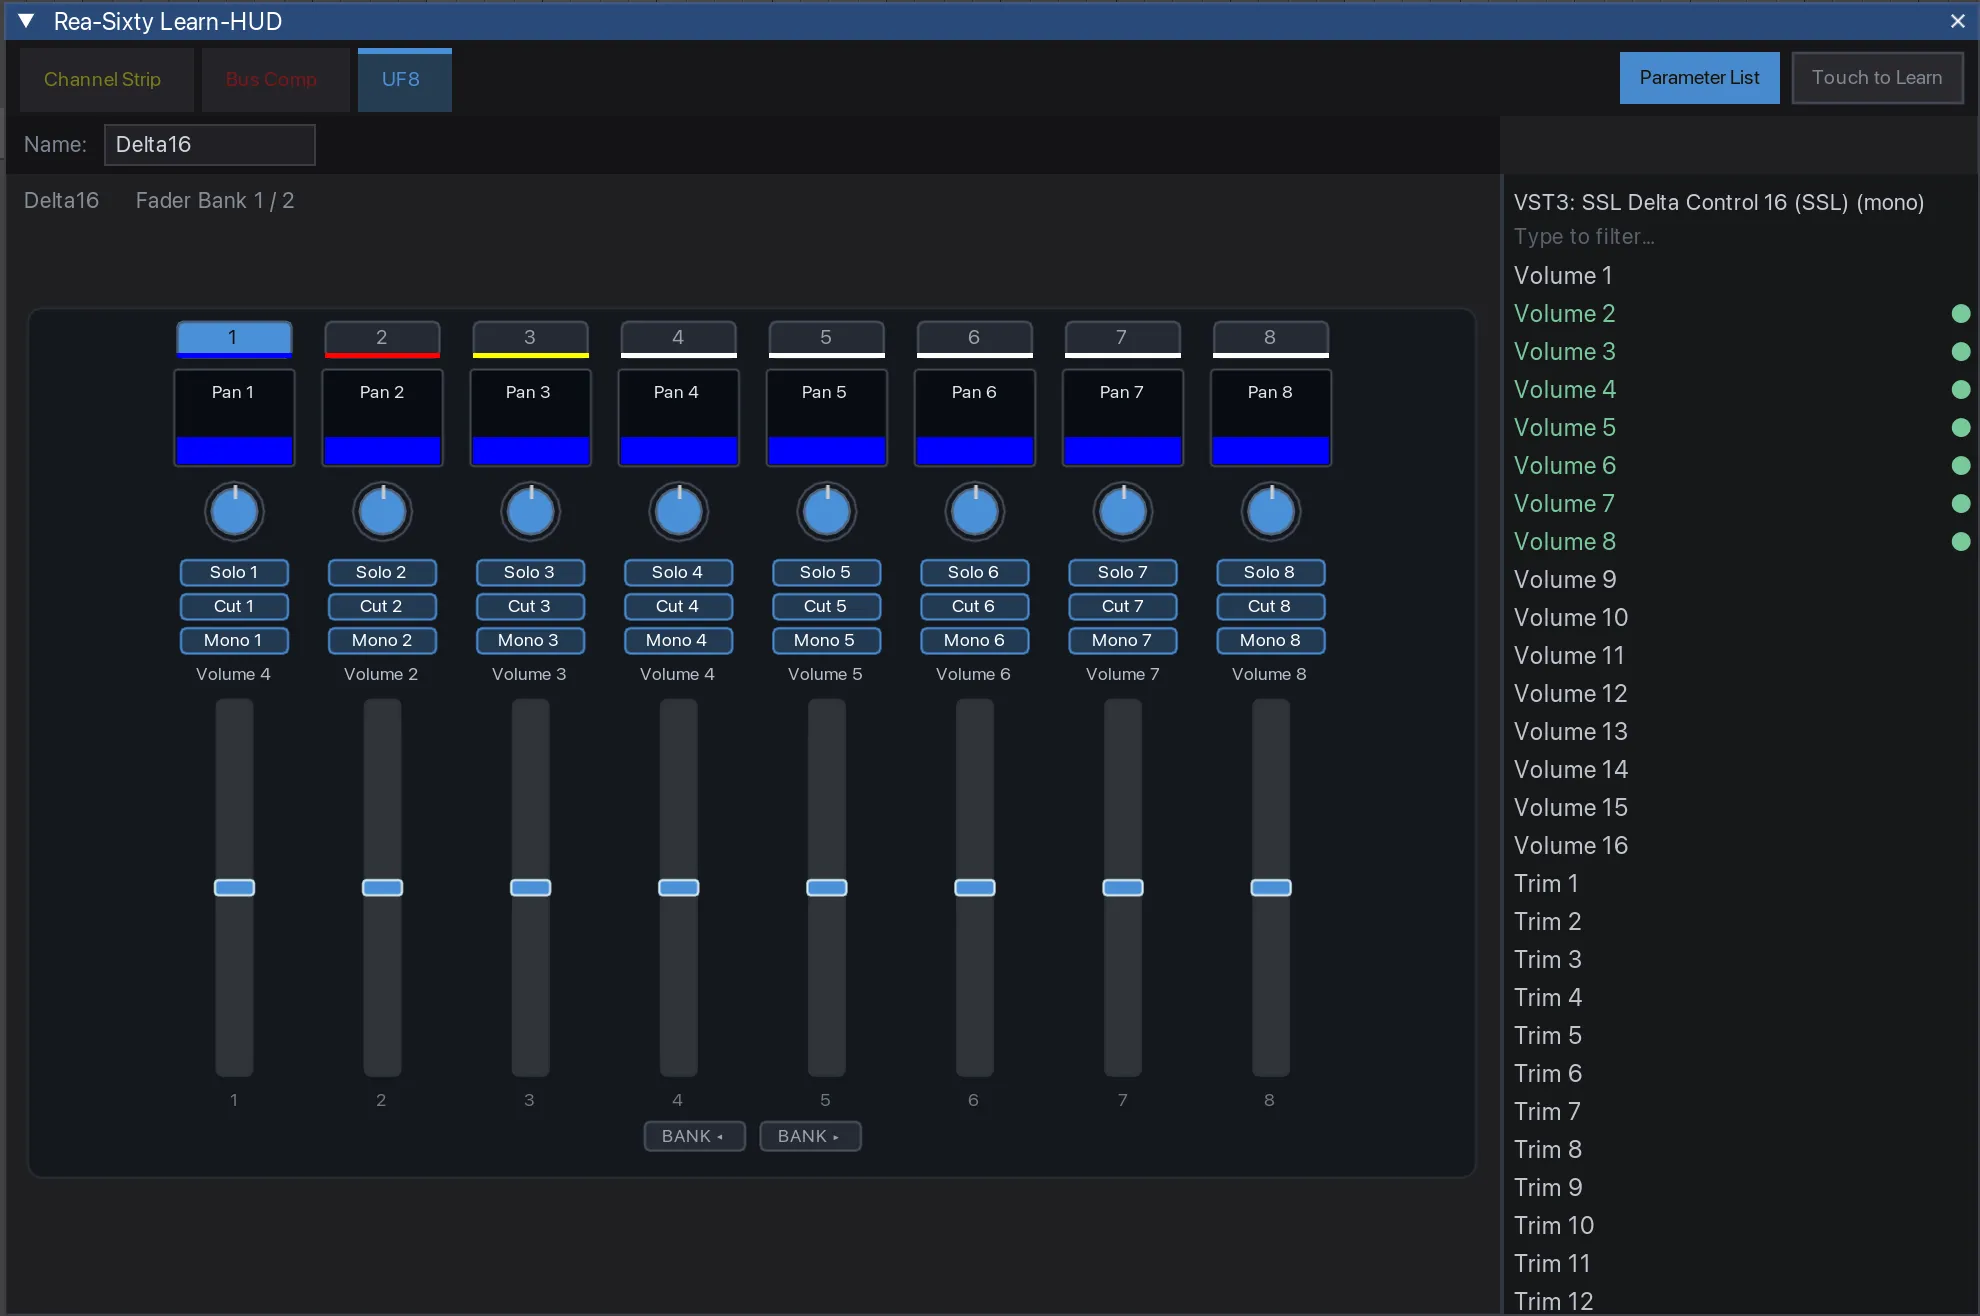
Learn-HUD, UF8 — all eight strips, driving SSL Delta Control 16.
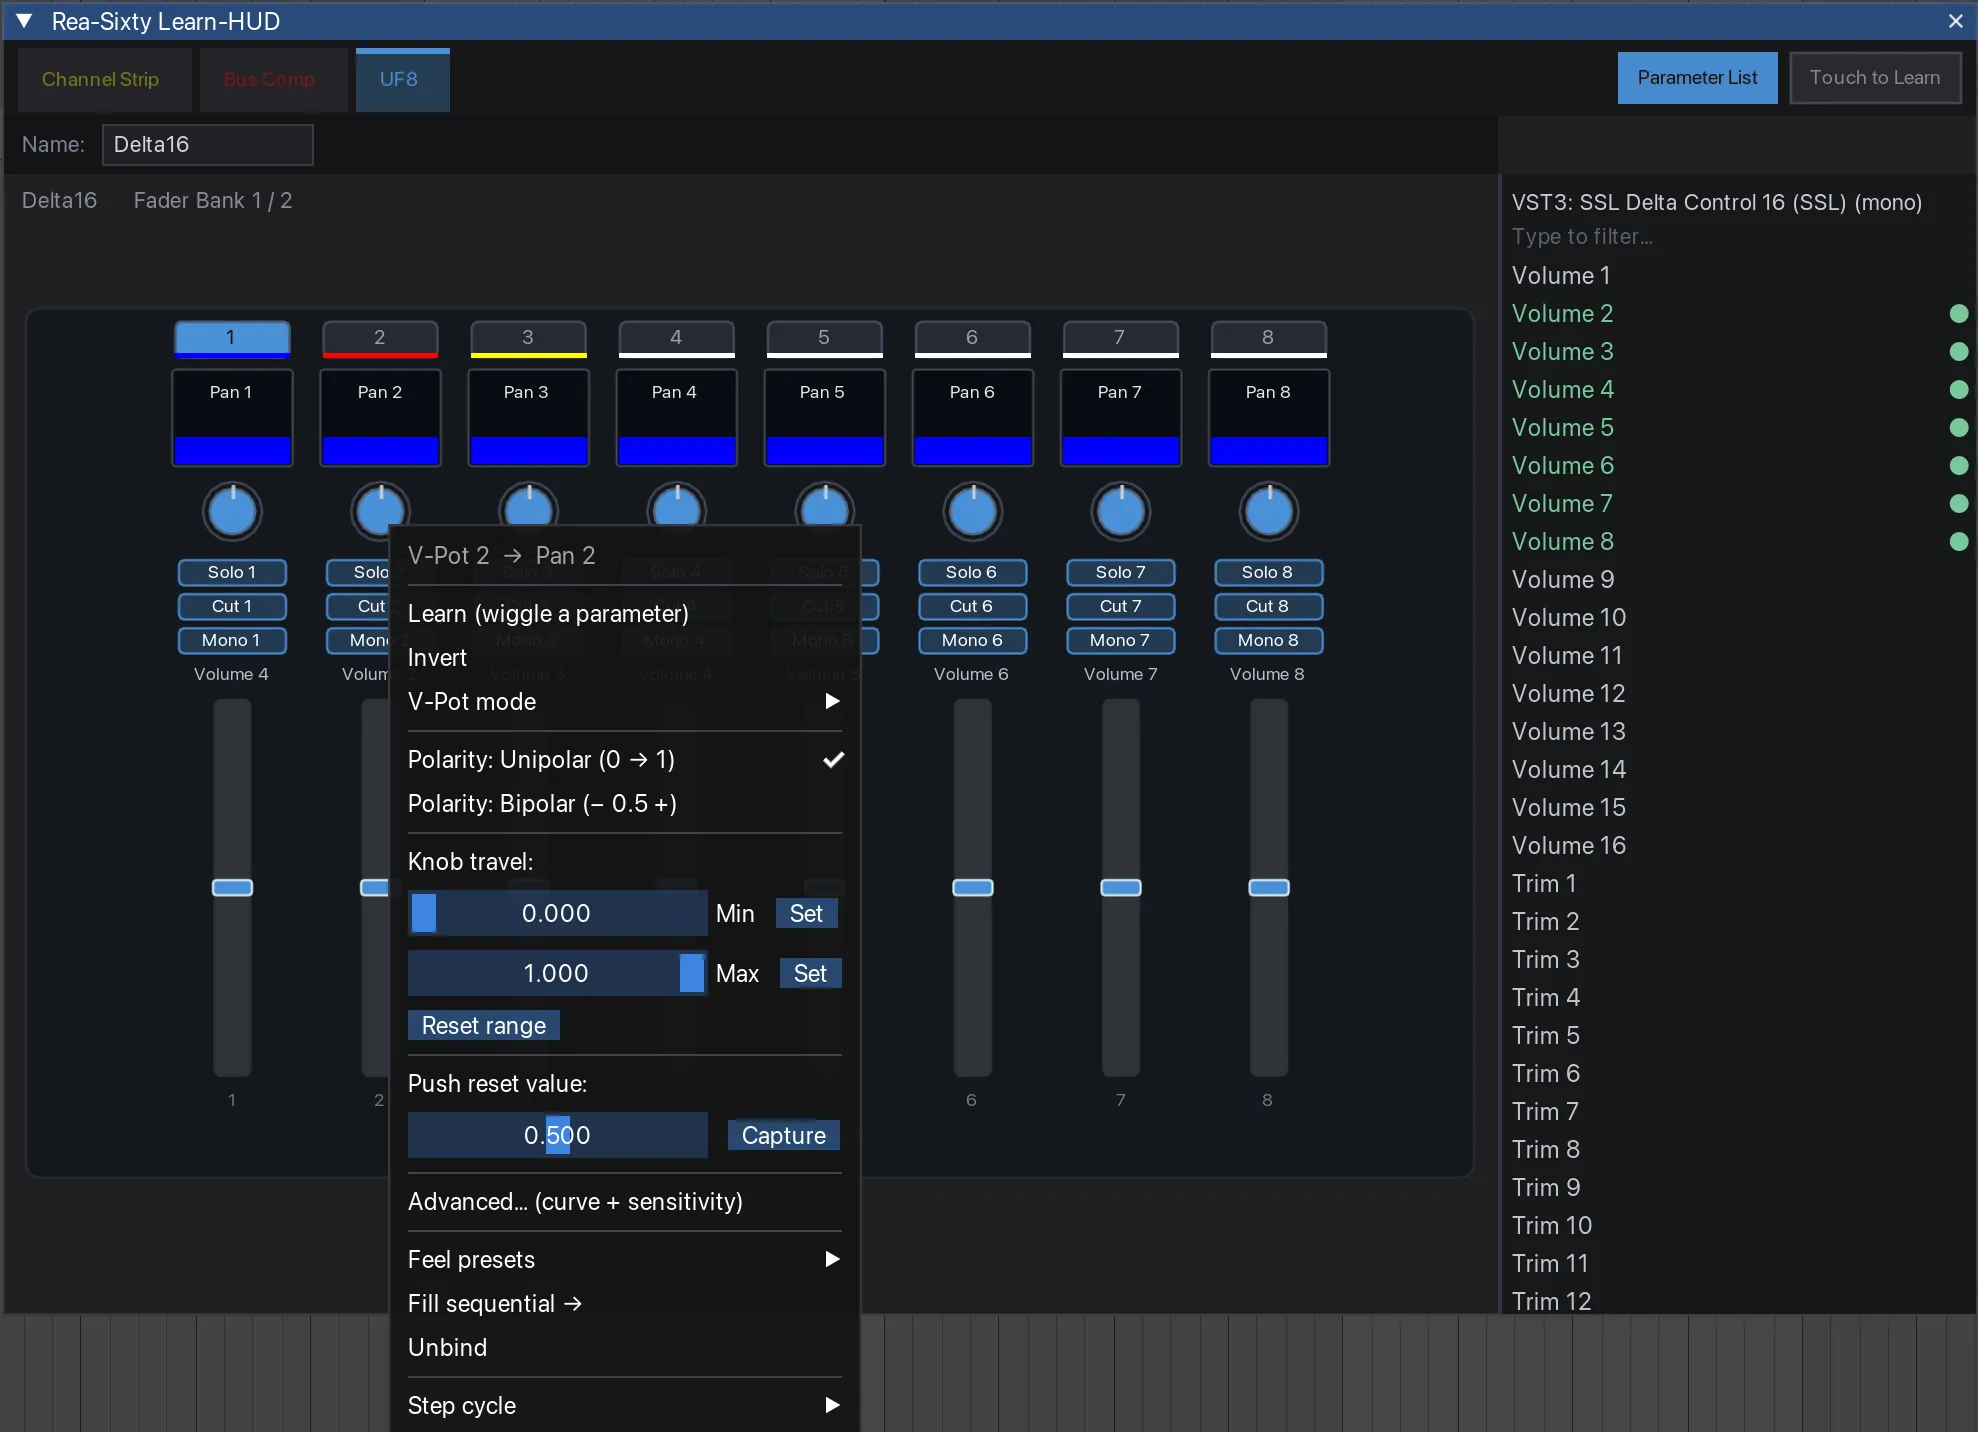
The same per-control menu on a UF8 V-Pot.
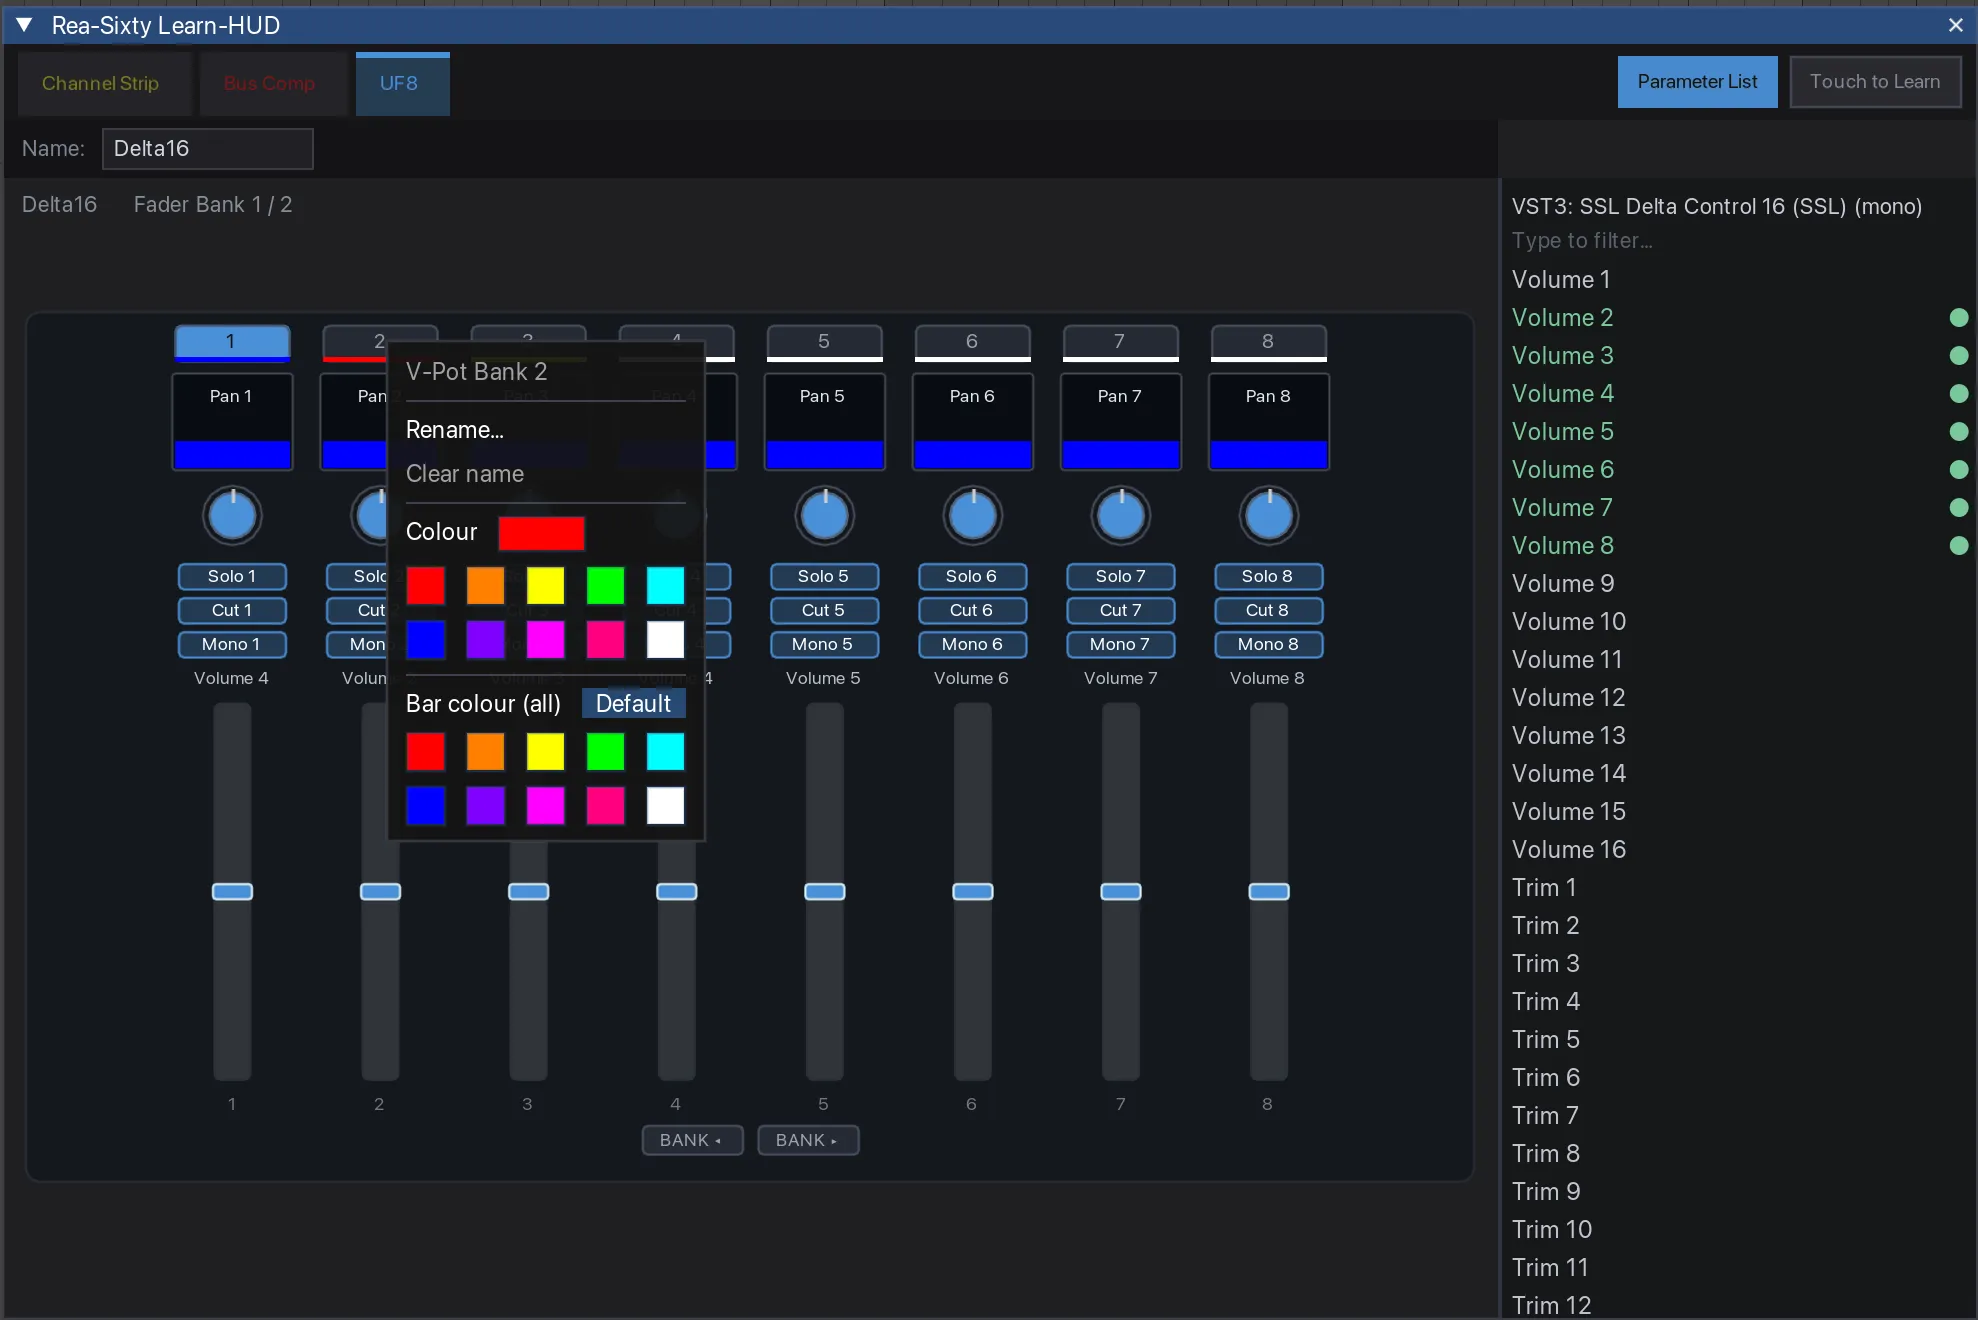
Soft-key right-click — per-binding LED colour from the palette.
A dockable window showing the focused plug-in’s UC1 control → parameter assignments as a grouped, readable text list — so you can see what each pot / button does without opening Settings.
- Toggle with the Learn-HUD: show / hide (focused plug-in assignments) action (bind it to a surface button) or the REAPER action “Rea-Sixty: Toggle Learn-HUD” (
REASIXTY_LEARN_HUD_TOGGLE). There is no Settings checkbox. - Channel Strip / Bus Comp / UF8 / UF1 tabs at the top, auto-following the focused domain (click to pin one). The BC tab follows the BC anchor / BC-encoder selection, and a CS-mapped plug-in only ever shows on CS (and BC on BC) — the two domains never cross. The UF8 tab shows the per-strip UF8 assignments (V-Pot / fader / soft-keys) for the focused plug-in and offers the same learn / tuning controls.
- Each row = the SSL slot name + the bound parameter’s name (or your custom Display label). Rows are grouped by section (Filter / EQ / Dynamics / Gate / I-O for CS; the Bus-Comp knobs for BC), with Dynamics + Gate in a right-hand column to mirror the hardware.
- A layer badge (NORM / OPT / CTRL / C+O) shows the held FX-Learn modifier layer; the list follows it live. On a modifier layer the list shows only the controls you actually overlaid on that layer — controls that fall through to their Normal mapping read as unmapped, so you can see at a glance what’s layer-specific.
- Right-click → View switches between the grouped text List and a hardware Mockup (the UC1/UF8 face). Right-click → Text size (list) (XS … XL); the menus themselves honour your Appearance → Font Size. The window size persists globally.
- Click a row (or mockup control), then wiggle that plug-in’s parameter to learn it onto the control (user maps only — built-in SSL maps are factory-fixed and show a hint instead).
- Right-click a control (list row or mockup knob/button) for a per-control menu: Learn (wiggle a parameter), Invert (flip the control’s polarity), Rename… (set a custom Display label; empty reverts to the default name), Unbind, plus the knob-travel / curve editor, feel presets and stepped-parameter controls — full FX-Learn parity without opening Settings. All act on the active modifier layer; Invert / Rename / Unbind are disabled on an unmapped control, and built-in SSL maps show the factory-fixed hint.
- The right-click menu (on an empty spot, not on the UF8 tab) carries a CS Favourite submenu. It favourites the live Channel-Strip into a favourite slot and is greyed when no CS is on the focused track. See chapter Favourites.
Native actions
Bind these to a UF8 / UC1 / UF1 control in Settings → Bindings → (button) → Native. An action that only works on the UF8 and UC1 is not offered for UF1 controls. Actions that take a parameter (slot number, soft-key index, etc.) are flagged below.
The picker groups them into categories — Selection Modes, Encoder Modes, Cycle Actions, Plug-in, Layer, Soft-Key Bank, SSL, Master, and so on. Hardware Modes collects everything that changes what the surface is doing rather than acting on a track — FLIP and PAN, Folder Mode and Show Only Selected, Home, SSL Strip and UF8 Plug-in Mode, the on-screen panel toggles, Touch-to-Learn, the mirror and follow settings below, and Restart. The sections in this chapter are grouped by function rather than by category, so a single category’s actions appear in several places.
Selection Mode toggles
Switch which Selection Mode is active (see chapter Selection Modes for what each one does). Pressing a mode’s toggle while it is already active returns to NORM.
- Selection Mode → NORM (SEL Button) — set the active Selection Mode to NORM (the default).
- Selection Mode → REC (SEL Button) — toggle REC mode (SEL = arm).
- Selection Mode → REC + MON (SEL Button) — toggle REC+MON mode (SEL = arm + monitor).
- Selection Mode → AUTO (V-Pot) — toggle AUTO mode (SEL = step the track’s automation mode; V-Pots show automation indicator).
- Selection Mode → FX Cycle (V-Pot) — toggle FX Cycle Sel-Mode (V-Pots walk every FX per strip; push opens active FX).
- Selection Mode → Instance Cycle (V-Pot) — toggle Instance Cycle Sel-Mode (V-Pots walk only Instances per strip).
- Selection: Clear All Tracks — clear the REAPER track selection.
Channel Encoder mode toggles
Change which job the large CHANNEL encoder does. The current mode persists across REAPER restarts.
- Encoder Mode → Channel Select — Channel Select (the default; rotation moves track selection ±1).
- Encoder Mode → Nudge — playhead nudge. Step size is set in Settings → Modes → Nudge: an amount + unit (ms, seconds, grid, bars, samples, frames). Default is one grid step per detent — “Grid” follows the project grid, so it covers beats and bars.
- Encoder Mode → Mousewheel — synthesised mouse-wheel under the screen cursor (use to scroll plug-in windows, browsers, etc.).
- Encoder Mode → Markers (prev / next) — step prev / next REAPER marker.
- Encoder Mode → Bank by 1 channel — surface bank by 1 strip per detent.
- Encoder Mode → Last Touched Param — step the last-touched REAPER parameter ±.
- Encoder Mode → Instance Cycle — Instance Cycle on the focused track.
- Encoder Mode → FX Cycle — FX Cycle (every FX) on the focused track.
- Encoder Mode → Instance Cycle (across tracks) — Cycle Instance across tracks: Instances on the focused track, then one detent per track boundary onto the neighbour’s first/last Instance. Hard-stop at the project edge.
- Encoder Mode → FX Cycle (across tracks) — Cycle FX across tracks: same cross-track behaviour for every FX.
- Encoder Mode → FX Move (in chain) — move the active FX up / down within the focused track’s chain on rotation (within-chain only; hard-stop at the ends).
- Encoder Mode → Selection Set Cycle — step through populated Selection Set slots (off → 1 → 2 → … → off).
- Encoder Mode → CS Cycle (Favourites) — cycle the active CS through the favourite slots (see chapter Favourites).
- Encoder Mode → BC Cycle (Favourites) — the same for the Bus Compressor, using the BC favourite slots.
- Encoder Mode → Favourite Cycle (Focused Domain) — cycle whichever domain the focused parameter belongs to, falling back to the domain you last touched. Respects each domain’s copy/own setting.
- Encoder Mode → Lanes — step through the fixed lanes of the selected track (see chapter Fixed lanes).
- Encoder: dispatch by current mode — routes rotation to whichever encoder mode is currently set. Bound by default to the CHANNEL encoder so rotation just “does the right thing”; rebind if you want a fixed behaviour.
Direct encoder rotation handlers
Bind these to a non-CHANNEL rotation (UC1 Encoder 2, footswitches with rotation, etc.) when you want a single fixed behaviour regardless of the global encoder mode.
- Encoder: cycle plug-in instance — Instance Cycle on focused track (rotation = step ±).
- Encoder: cycle FX (all on focused track) — FX Cycle on focused track.
- Encoder: cycle instance (across tracks) — Cycle Instance across tracks (direct): Instances on the focused track, then cross to the adjacent track at the edge.
- Encoder: cycle FX (across tracks) — Cycle FX across tracks (direct): every FX, crossing to the adjacent track at the edge.
- Encoder: move active FX up/down in chain — direct-rotation counterpart of the FX Move mode: rotation moves the active FX up / down in the focused track’s chain (hard-stop at the ends).
- Encoder: select prev/next track — step REAPER track selection ±1.
- Encoder: scroll tracks — visible-track scroll + select + UC1 focused-track follow + force CS-domain focus. Like Encoder: select prev/next track but UC1-aware. Default binding on UC1 Encoder 1.
- Encoder: extend track selection (Shift+Arrow style) — extend the REAPER track selection across the visible space, anchored to the focused track (Shift+Arrow-style range select).
- Encoder: nudge playhead — playhead nudge ±.
- Encoder: scroll mouse-wheel under cursor — synthesised scroll-wheel under the screen cursor.
- Encoder: scroll BC anchor track — scroll the UC1’s Bus Comp anchor track ±1 (which track the BC section is pinned to). REAPER selection and UF8 bank stay put.
- Encoder: scroll and select BC anchor track — same scroll as Encoder: scroll BC anchor track, but additionally pulls REAPER selection + UF8 bank to the new BC anchor. Use this when you want the BC encoder to drive the whole surface, not just the UC1 carousel.
- Encoder: scroll Focus Set members — encoder scroll within the Focus Set (see below). Walks the set in REAPER project order; works regardless of whether the Focus Set is pinned.
Plug-in Mixer modes
Engage / disengage the on-surface plug-in editing modes.
- Toggle SSL Strip Mode — toggle SSL Strip Mode. While active, fader → CS Fader Level, V-Pots → CS controls, soft-keys → CS bypass / EQ-In / Filter-In.
- Toggle SSL Strip Mode (with GUI) — same, AND open the CS plug-in’s floating GUI (pinned per the GUI-pin settings).
- Toggle UF8 Plug-in Mode — toggle UF8 Plug-in Mode. All 8 strips become the strips of a single FX-Learn-mapped plug-in. Bank ← / → flips between fader-banks A / B for ≥9-control plug-ins.
- Toggle UF8 Plug-in Mode (with GUI) — same, AND open the plug-in’s floating GUI.
Plug-in commands
These act on the FX the cursor currently points at on the focused track (the FX that the last cycle landed on; defaults to the first online Instance after a fresh load).
- Plug-in: toggle focused GUI — toggle the floating GUI of the cursor FX. With the Device option Auto-engage UF8 Plug-in Mode on, also engages UF8 Plug-in Mode if the cursor lands on a UF8-mapped plug-in.
- Plug-in: toggle bypass (active FX) — toggle bypass of the cursor FX.
- Plug-in: toggle offline (active FX) — toggle offline state of the cursor FX.
- Plug-in: next preset (active FX) — load the next preset.
- Plug-in: previous preset (active FX) — load the previous preset.
- Plug-in: cycle preset (encoder, active FX) — encoder-rotation variant that steps presets ± by detent count.
- Plug-in: move active FX up in chain — move the cursor FX up one slot in the track’s FX chain.
- Plug-in: move active FX down in chain — move the cursor FX down one slot.
- Plug-in: toggle FX chain window (focused track) — open / close REAPER’s FX chain window for the focused track (pinned per the FX-chain pin settings).
- Plug-in: close all floating FX windows — close every floating FX window and FX chain window in the project, the Master included.
- FX param: step up — step the FX-Learn slot a V-Pot is bound to upward from a button. Action-picker exposes the slot target (combo built from the built-in plug-in map registry — link IDs are stable across SSL CS / BC variants), a step-size slider, and a wrap-vs-clamp checkbox. Honours the slot’s range, curve, and sensitivity, so a button bound to FX param: step up and a V-Pot bound to the same slot stay in sync. Useful for “+1 dB” or “next preset value” buttons.
- FX param: step down — same as FX param: step up with the sign flipped.
Sticky Pot
Pin one plug-in parameter to a track’s V-Pot. The pin stays on that track — it moves with the track across banks and overrides the strip’s normal V-Pot target (the focused parameter, or pan) until you clear it. Each track can hold its own pin. A pinned strip’s value line shows the parameter’s name (with a leading *) and value, and the readout ring follows it.
- Sticky Pot: Get next touched Parameter — arm capture. The next plug-in parameter you touch — in the plug-in’s own window, or on a controller — pins to the track it belongs to. Touch the parameter you want and it sticks. While capture is armed, a V-Pot press on a strip clears that strip’s pin instead of capturing.
- Sticky Pot: Pair next touched Parameter — arm the pairing. The next plug-in parameter you touch joins the pin on its own track, so one pot moves both, counter-running until you change the ratio in Settings, Sticky Pot. A touch on a track that has no pin is ignored and the arm keeps waiting. Lit while armed.
- Sticky Pot: Toggle active/inactive — suspend every pin at once (so the V-Pots return to their normal view), then bring them all back. The pins themselves are kept. Lit while active.
A V-Pot press on a pinned strip resets its parameter to the centre (a two-state parameter flips instead). Pins are saved with the project and restored on reload — keyed to the track and the plug-in, so they survive re-banking and FX-chain reorders.
A pin can carry a second parameter, so one pot moves two. Arm it from the surface with Sticky Pot: Pair next touched Parameter, or in Settings, Sticky Pot with Pair on that pin’s row: either way you then touch the second parameter on the same track, and from then on it follows the pinned one at the ratio you give it. -1.00, the default, runs it exactly counter to the pin, which is how you hold an 1176 at one level while you drive it harder. Both values are anchored when you pair them, so nothing jumps at that moment. The surface keeps showing the first parameter, and the second stays an ordinary parameter you can still reach in the plug-in or from anywhere else: it only moves when the pot moves the pin, and if you have moved it yourself in the meantime, the pot carries on from where you left it.
Under FLIP, the pin moves onto the fader instead of stepping aside. FLIP assigns the current V-Pot parameter to the fader, and the pin is that parameter — so the fader’s value, motor follow and touch all track the pinned parameter, while the V-Pot rides Volume as it normally does under FLIP.
Sticky Pot otherwise steps aside automatically whenever a mode already owns the V-Pot: UF8 Plug-in Mode, SSL Strip Mode, PAN held, and the Instance / Instance-Cycle Selection Modes. Release the mode and the pins reappear.
Favourites
Replace or duplicate the active plug-in, carrying values across (see chapter Favourites). All of these act on every selected track, else the surface-focused track. Each exists three times: for the Channel Strip, for the Bus Compressor, and in a Focused Domain form that follows whichever you are working on.
- Switch to CS Favourite 1 … 8 / Switch to BC Favourite 1 … 8 / Switch to Favourite 1 … 8 (Focused Domain) — replace the active plug-in with favourite N. Lit when it already is that favourite.
- Copy to CS Favourite 1 … 8 / Copy to BC Favourite 1 … 8 / Copy to Favourite 1 … 8 (Focused Domain) — insert favourite N below the active plug-in with the values carried, and bypass the original. An instant A/B.
- CS Favourite Cycle / BC Favourite Cycle / Favourite Cycle (Focused Domain) — step through the favourites; on an encoder, one step per detent.
- CS Favourite Copy/Own / BC Favourite Copy/Own / Favourite Copy/Own (Focused Domain) — flip that domain between carrying live values and restoring each favourite’s own settings.
The cycles are also available as Channel-Encoder modes — Encoder Mode → CS Cycle (Favourites), → BC Cycle (Favourites) and → Favourite Cycle (Focused Domain) (also listed under Channel Encoder mode toggles).
Instance navigation
These step only the Instance index (CS / BC / UF8-Mode-mapped). They are the focused-domain equivalent of the Instance Cycle Sel-Mode, but as standalone bind targets.
- Instance: next (focused domain) — next Instance in the focused domain on the focused track. Wraps while Wrap Plug-in Cycle is on (the default).
- Instance: previous (focused domain) — previous Instance in the focused domain.
- Soft-Key Set 8 (SSL Channel Strip) — bring SSL’s own channel-strip row back to the top soft-keys, which also sets the focused domain to Channel Strip (so a subsequent Instance: next walks CS Instances and the UC1’s CS section refreshes). It drops whichever set was engaged on this layer, which is how the SSL row reappears. Named for the row you see rather than for the focus change underneath it.
- Soft-Key Set 9 (SSL Bus Comp) — the same for SSL’s bus-comp row. Both have a plain-numbered twin, Soft-Key Set: engage (param 1-9) with param 8 or 9. That one goes the matrix’s way: they move you to Layer 1 and select the page, so from Layer 2 or 3 the two are not interchangeable.
The focused parameter slot is preserved across an Instance Cycle when the new instance offers the same LinkSlot (same domain, same parameter convention). Stops the focused-param surfaces (UC1 BC/CS encoder, V-Pot mirroring) from snapping back to slot 0 — typically the Bypass / FX In toggle — on every cycle step. Cross-domain cycles (CS → BC) and UF8-only user maps still reset to slot 0 because the slot position isn’t meaningful there.
Per-track automation modes
Set the automation mode of every selected track. (Automation: Off / Trim and Automation: Trim are alternate names for the same REAPER mode 0; both kept for binding-file compatibility.)
- Automation: Off / Trim, Automation: Trim — mode 0 (Off / Trim).
- Automation: Read — mode 1.
- Automation: Touch — mode 2.
- Automation: Write — mode 3.
- Automation: Latch — mode 4.
- Automation: Latch Prv — mode 5 (Latch Preview).
Project-global automation override
Same six modes, but applied via REAPER’s global override (overrides every track without changing each track’s own mode).
- Automation: Off / Trim (Global), Automation: Trim (Global), Automation: Read (Global), Automation: Touch (Global), Automation: Write (Global), Automation: Latch (Global), Automation: Latch Prv (Global).
- Automation: Zero All Tracks (→ Trim/Read) — reset every track’s automation mode to Trim/Read (mode 0). Useful to revert a write session.
Bank navigation
- Bank ← (UF8 Plug-in Mode: fader-bank; else ±strip scroll) — scroll the surface one bank left (8 strips, 9 with the UF1 Extender, less any pinned strips). In UF8 Plug-in Mode the same button flips between fader-banks A / B (for 16-strip plug-ins) instead, and in an “of focused track” send or receive view it pages the send list.
- Bank → (UF8 Plug-in Mode: fader-bank; else ±strip scroll) — scroll 8 strips right (same fader-bank flip in UF8 Plug-in Mode).
- Bank by 1ch ← (one strip) / Bank by 1ch → (one strip) — scroll one strip at a time.
- Home (clear routing toggles) — clear all routing toggles (send / receive views) so V-Pots and faders return to track volume + pan. Also resets the send-list page to the start and drops the Soft-Key Set engaged on the current layer.
- Page ← (soft-key bank prev) / Page → (soft-key bank next) — step the SSL Soft-Key PAGE bank, prev / next of the six pages, in either domain.
DAW Layer keys
- Switch to Layer 1 / Switch to Layer 2 / Switch to Layer 3 — switch SSL DAW layer.
SSL Soft-keys
- Select soft-key bank (param 0..5) — select Soft-Key bank N. Six pages in either domain (
kCsMaxBankandkBcMaxBankare both 5); the bus comp’s plug-in only fills the first two, and the four it leaves empty are ordinary user banks. - SSL Soft-Key (current bank, slot 0..7) — focus the SSL parameter under soft-key N on the current page.
- Focus SSL param (V-POT row) (param: 0..7) — focus SSL V-Pot N in the V-POT row, whatever page the surface is on — the row is fixed, like every sibling. Siblings Focus SSL param (row 1) … (row 5) name a fixed row instead, so a key can always land on the same parameter whatever page you are on. None of these switch a bank, and none of them follow the page — the old name, SSL Standard Bank N, read as though they did both. The page-following action is SSL Soft-Key (current bank, slot 0..7) (
ssl_softkey), which is what the Top Soft-Keys carry out of the box.
Send / Receive
All of these are toggles, and all take param: 0 = Faders, 1 = V-Pots to choose which control the route lands on. In the binding editor that choice is the Flip checkbox. See Send and Receive views for what the strips then do.
- 8 sends of focused track — spread the focused track’s send list across the eight strips.
- 8 receives of focused track — same for its receives.
- Send 1 ↦ all tracks … Send 8 ↦ all tracks — eight separate actions. Each keeps every strip on its own banked track and drives that track’s send number N.
- Receive 1 ↦ all tracks … Receive 8 ↦ all tracks — same for receives.
Home (clear routing toggles), listed above under bank navigation, turns all of them off at once.
Selection Sets
- Recall Selection Slot (toggle) (param: 1..8) — toggle slot N: activate if inactive, deactivate if already active. Activation filters the surface to the slot’s tracks and snaps the bank to strip 0 = first slot track. Coexists with the Focus Set (the slot filters, the Focus Set pins within the filtered list).
- Save current REAPER selection to slot (param: 1..8) — save the current REAPER track selection into slot N.
- Encoder: cycle Selection Set (off → 1 → 2 → … → off) — encoder-rotation handler that steps off → first populated slot → next → … → off. Skips empty slots.
- Focus Set — pin-source actions (Focus Set: add selected tracks / remove selected tracks / pin (toggle) / clear / toggle selected tracks / replace with selection / toggle the UF1 channel (pick the panel side), the four Focus Set scope actions, plus the Encoder: scroll Focus Set members encoder action). See Selection Sets → Focus Set for the full list and behaviour. Focus Set: pin (toggle) lights while the pin is on and the set has members.
Surface filters / view toggles
- Toggle Folder Mode (parents only) — toggle Folder Mode (only top-level tracks visible; folder children appear on spill).
- Toggle Show Only Selected — toggle Show Only Selected (only currently-selected REAPER tracks appear).
- Toggle VCA Mode (top leads only) — only the VCA leads that follow no other VCA appear. See Operational modes → VCA Mode and VCA spill.
- VCA Spill (selected track) / Leave VCA Spill — spill the selected track’s VCA as long-press
SELdoes, or leave the spill from any level. Both light while a spill is on. - Spill (folder / VCA) — the factory long press on
SEL(UF8 and UF1). In Folder Mode it opens or closes a folder, in VCA Mode it spills a VCA lead, during a VCA spill it moves through the levels. On a UF8SELit acts on that strip’s track, from any other key on the selected track. - Open / Close Rea-Sixty Settings — open / close the Rea-Sixty Settings window. Default binding for the
360°key. - Surface mirrors: TCP / Surface mirrors: MCP — choose which window’s track visibility the surface follows: the Arrange view’s track panels (TCP) or the Mixer (MCP). Hiding a track in the chosen window removes it from the surface. These are not a toggle but a mutually-exclusive pair, so a bound key sets one mode absolutely and lights while that mode is the active one — which means you can bind both and see at a glance which is on. The choice is remembered between sessions.
- TCP follows selection — toggle whether selecting a track on the surface scrolls the Arrange view to it. Same setting as Settings → Behaviour → Tracks.
Nav overlay (Markers + Regions)
- Nav Mode (Markers & Regions): toggle — toggle the Nav overlay (UF8 strips show markers / regions, soft-keys jump to them).
- Nav Mode: Markers only (no drill) — Nav overlay restricted to markers only.
- Nav Mode: Regions only (no drill) — Nav overlay restricted to regions only.
Track arming
- Tracks: Arm All / Unarm All (toggle) — toggle arm on every track in the project. State is “all armed” ↔ “all unarmed”; mixed state arms everything first, then needs a second press to unarm all.
Master track
- Pin Master to UF8 Strip 1 — pin the REAPER Master bus onto UF8 strip 1 (toggle). Bindings category Master; also the REAPER action Rea-Sixty: Pin Master to UF8 Strip 1.
- Pin Master to UF8 Strip 8 — pin the Master onto UF8 strip 8 (toggle). REAPER action Rea-Sixty: Pin Master to UF8 Strip 8. See Master track for Replace vs Shift layout and the mode interactions.
Brightness
Each press steps one level (Dark → Dim → Half → Bright → Full). The “Both” variants step LEDs + LCDs in lockstep.
- Brightness LEDs + / Brightness LEDs - — LED ring + button-LED brightness.
- Brightness LCDs + / Brightness LCDs - — UF8, UC1 and UF1 LCD brightness.
- Brightness Both (LEDs+LCDs) + / Brightness Both (LEDs+LCDs) - — combined.
- Sleep the surfaces now — takes every surface dark at once, and lights them again on the next press. Anything you touch on any surface wakes them too. See Devices → Sleep.
Zoom
Each maps to a REAPER zoom action (defaults for the UF8 cursor pad).
- Zoom in vertically — zoom in vertically (action 40111).
- Zoom out vertically — zoom out vertically (40112).
- Zoom out horizontally — zoom out horizontally (1011).
- Zoom in horizontally — zoom in horizontally (1012).
- Zoom to fit project — zoom to fit the whole project (40295).
Jog Modes
Which object the UF1’s jog wheel is working on (see the chapter Jog Mode). The
usual picker is SCRUB held plus a turn of the wheel; these actions put the same
choice on a button. Each direct setter lights while its object is the live one.
- UF1 Jog Mode: cycle steps to the next object.
- UF1 Jog Mode: Playhead puts the wheel on the play cursor.
- UF1 Jog Mode: Scrub puts it on audible scrub.
- UF1 Jog Mode: Items puts it on the selected items.
- UF1 Jog Mode: Envelope puts it on the selected envelope points.
- UF1 Jog Mode: Razor Edit puts it on the razor edit.
- UF1 Jog Mode: Fades puts it on the fades of the selected items.
- UF1 Jog Mode: Lanes puts it on the fixed lanes of the selected track.
Lanes
The fixed-lanes keys (see the chapter Fixed lanes). They work on the selected track, from any surface.
- Lanes: next lane / Lanes: previous lane play only the lane below / above the one you hear. They light while there is a lane to go to.
- Lanes: A/B (the lanes that played before) brings back what played before the last change, all of it.
- Lanes: play all, Lanes: play none, Lanes: play only the comp lane.
- Lanes: heard lane into / out of the play set lets the lane you hear play together with the others, or takes it out.
- Lanes: comp here puts the lane you hear into the comp. It lights while comping is on.
- Lanes: tap plays the comp, hold+turn paints is the centre of the Lanes cross: a tap plays the comp lane, held the jog or encoder paints. Set the key to Press. It lights while live comping is on.
- Lanes: live comping on / off: while the song plays, every lane change cuts the comp there.
- Lanes: comp area one lane up / down gives the comp area under the edit cursor the lane above / below.
- Lanes: loop around the cut loops a few seconds centred on the cut nearest the edit cursor and switches repeat on.
- Lanes: cursor to previous edge / next edge moves the edit cursor to the previous / next comp-area or item edge.
Jog Actions
The individual things the nav cross does, one named action each. That is what makes the cross bindable per object, and it also means any of them can go on any other key. They are offered in every surface’s picker, because they act on the UF1’s jog state rather than on the key that fires them.
Razor. Each of these aims the wheel at a different part of the razor edit:
- Razor: target whole area
- Razor: target left edge
- Razor: target right edge
- Razor: target top edge
- Razor: target bottom edge
Envelope:
- Envelope: previous point and Envelope: next point walk the selection along the points of the selected envelope. The (add) twin of each extends the selection instead of replacing it.
- Envelope: lane above and Envelope: lane below select the previous or next visible track envelope. Hidden lanes are stepped over.
- Envelope: jog edits points / playhead is a toggle. The wheel either moves the selected points or nudges the play cursor. On the playhead, Cmd pulls a time selection exactly as it does in Playhead mode: the first detent drops an anchor at the cursor, the rest drag the far end, and releasing Cmd leaves the selection standing. Being a toggle, the key it sits on lights in its active colour while the wheel is on the playhead and in its inactive one while it is on the points, so the nav cross shows which of the two you are in, in the colours you gave that key.
Items:
- Items: previous item and Items: next item take the item before or after the current one on the same track, and have (add) twins as well.
- Items: item on track above and Items: item on track below take the nearest item on the next track that has one, so empty tracks are skipped. Also with (add) twins.
Fades. Each of these means two things, because the centre key decides which of the two the cross is doing. That is deliberate: a key can only hold one binding, so a switch that changes what the whole cross is for has to live inside the actions rather than beside them.
- Fades: fade-in / previous item and Fades: fade-out / next item aim the wheel at the item’s left or right fade while the cross is aiming, and walk to the previous or next item on the track while it is walking. Both have (add) twins for the walking half.
- Fades: next fade type / item above and Fades: previous fade type / item below step the aimed fade through REAPER’s seven types while aiming, and take the nearest item on the track above or below while walking. (add) twins as well.
- Fades: cross aims fades / walks items is the toggle between the two. Its LED is lit while the cross is walking.
- Fades: follow the fade with the view turns the following view on and off. It is on by default, and switching it off puts back the view you started from.
- Fades: show REAPER’s crossfade editor turns that window on and off. Off by default; it appears only while the aimed edge is a crossfade, and switching it off closes the one it opened.
Two that are not tied to a single object:
- Zoom to selection (toggle) saves the arrange view and zooms it to whatever the live object is: the selected items (both axes, through REAPER’s own zoom to selected items), the selected envelope points, or the whole project when there is no selection to aim at. Press it again and the view you came from is back. Nothing carries this at the factory, it is here for anyone who wants it on a key of their own.
- Jog: hold+turn drags, tap zooms to selection needs its behaviour set to Hold. In Razor it takes the whole area and drags its content with the wheel; in Items it arms a drag of the selected items, and a press that turns nothing falls back to Zoom to selection. On Momentary it would fire once and never let go, so the behaviour is part of the action rather than a preference.
The older collective Jog Mode: nav actions are still honoured for anyone who bound them by hand, but they are no longer offered in the picker. Each of them meant something different in every object, which is the thing the named actions above exist to undo.
Parameter Groups
Per-slot actions also exist for slots 1..8: Param Group N → Add Selected Tracks, Param Group N → Clear Members, and Param Group N → Toggle Active.
- Param Groups → Remove Selected from All — remove the currently-selected tracks from every Parameter Group slot they appear in.
- Param Groups → Multi-Select acts as Temp Group — toggle the “multi-select acts as a temporary parameter group” behaviour. When on, any multi-track selection becomes the active group for parameter-fan-out; when off, the active group is whichever persistent slot is selected.
Modifier keys
When held, these shift every other binding to its modifier slot. The UF8 has one modifier key, FINE, and it carries Shift out of the box; the UF1’s SHIFT key does the same. There is no hardware key for Cmd or Ctrl and none is bound by default — put them on any button you like, or use the computer keyboard on macOS or Windows (Settings → Behaviour → Keyboard, on by default).
- Modifier: Shift / Fine (double-click latches) — Shift modifier. Double-click latches (press once more to unlatch). The SSL
FINEkey uses this builtin. - Modifier: Cmd — Cmd modifier. From the computer keyboard this is macOS only: the Windows key is OS-reserved and not claimed, so on Windows and Linux the Cmd slot is reachable only from a surface button you bind to this action. On Linux the same is true of Shift and Ctrl.
- Modifier: Ctrl — Ctrl modifier.
Surface-state toggles
- Toggle FLIP (fader ↔ V-Pot) — swap fader and V-Pot values for the active routing target (e.g. swap send level and send pan between V-Pot ring and motorised fader).
- Toggle V-Pots → Pan — force V-Pots to Pan regardless of the active Selection Mode. Escape hatch from cycle / REC / AUTO when you need pan back quickly.
- Learn-HUD: show / hide (focused plug-in assignments) — show / hide the Learn-HUD (focused plug-in’s assignments). Bindable here (category Hardware Modes) and available as the REAPER action Rea-Sixty: Toggle Learn-HUD (
REASIXTY_LEARN_HUD_TOGGLE). See On-Screen Display → Learn-HUD. - Focused-track panel: show / hide (frameless, on Arrange) — show / hide the frameless focused-track panel. See On-Screen Display → Focused-track panel.
- Mode-change banner: show / hide (flashes Sel / Encoder mode) — show / hide the transient mode-change banner. See On-Screen Display → Mode-change banner.
- Touch-to-Learn: arm / disarm (touch a control, wiggle a param) — arm / disarm Touch-to-Learn. While armed, touch a control on the surface and wiggle a plug-in parameter to learn it to that control on the fly — FX-Learn without opening Settings. Disarming cancels and clears the pending learn. Bindable here (category Hardware Modes); the soft-keys switch to the V-Pot layer while armed, and a V-Pot press learns as a Toggle binding. Step cycles are built in the editor, not by touch (see FX Learn → Step cycle).
- Toggle UC1 Out-Gain (Mapped ↔ REAPER Fader) — flip the UC1 Out Gain pot between its mapped SSL Channel-Strip Fader Level parameter and REAPER’s track volume fader. While engaged, the pot drives track volume even on tracks with no channel-strip plug-in, and the LED ring + readout follow the track fader. Bindable from the Bindings picker (under Hardware Modes) and available as the REAPER action Rea-Sixty: Toggle UC1 Out-Gain (Mapped ↔ REAPER Fader) (
REASIXTY_UC1_OUTGAIN_FADER_TOGGLE) for the keyboard / toolbar. - Restart Rea-Sixty (re-open devices) — close the UF8, UC1, UF1 and MIDI ports and open them again, so a surface that has stopped responding can be revived without the trip through Preferences → Control Surface. Bindable here (category Hardware Modes) and available as the REAPER action Rea-Sixty: Restart Rea-Sixty (re-open devices) (
REASIXTY_RESTART) — worth a keyboard shortcut, since a hardware key is no help when the hardware is the thing that needs re-opening. This re-opens the devices, not the extension: REAPER holds the plug-in for the life of the process, so a new build still needs REAPER restarted.
Internal (not user-bindable)
- The REAPER Action picker writes an internal carrier into a binding’s action field when you select a REAPER action by name. The picker UI is what you use; that storage name is not shown in the Native action list.
Plug-in Mixer modes
SSL Strip Mode
Engage with the Plug-in button (factory default; Shift+Plug-in is UF8 Plug-in Mode) or via the Toggle SSL Strip Mode / Toggle SSL Strip Mode (with GUI) actions. There is no auto-engage: nothing else turns the mode on. Mutually exclusive with UF8 Plug-in Mode (engaging either drops the other). The mode starts off each time REAPER starts.
While SSL Strip Mode is on:
- Fader → CS Fader Level (the CS plug-in’s own fader parameter, rather than REAPER’s track volume). A strip whose track carries no CS plug-in keeps track volume on the fader. FLIP wins on a strip whose track has the focused parameter; FLIP with nothing focused leaves the fader on the CS fader.
- V-Pot → the CS plug-in’s own Pan (linkIdx 3) wherever the V-Pot would otherwise show REAPER track pan; the readout ring and the Value Line follow that param. A focused parameter still wins, exactly as outside the mode.
- Colour-bar Type zone → the label of the CS instance the fader is routed to (CS 2, 4K B, 4K E, 4K G, 32C, Link, or the user rename). It beats the FX-Cycle label while the mode is on.
- Sticky Pot steps aside while the mode owns the V-Pot layer.
That is the whole mode. Soft-keys, Solo / Cut / Sel, meters, scribble names and banking are untouched by it. The CS soft-key rows and their six pages are the SSL Soft-Key Sets (Layer 1, Q1 / Q2) and work the same whether or not SSL Strip Mode is engaged; Page ← / Page → are the generic soft-key bank keys, so on those sets they step SSL’s six pages.
The Strip-Mode target is resolved by csForStripModeOnTrack_, which applies the isDefault tiebreak. On a track carrying several CS plug-ins that can be a different instance from the one the Instance cycle (and with it the UC1) is currently on.
The with_gui variant also opens the CS plug-in’s floating GUI alongside, pinning it via the pin-position settings.
Plug-in again (or any other Plug-in Mode toggle) exits.
The UF1 has its own Strip Mode, on its own PLUG-IN key, and the two are separate: neither surface follows the other. If you would rather work them as one desk, tick UF1 follows UF8 SSL Strip Mode under Behaviour, Plug-ins.
Free soft-key slots (CS / BC)
On Layer 1, Q1 (SSL CS) and Q2 (SSL BC), the Top-Soft-Key slots the SSL plug-in leaves empty on a page — all of the unused BC banks plus the gaps in the populated banks — are now user-assignable. The slots the plug-in actually occupies stay plug-in-driven and show their fixed parameter name; the empty ones open the normal slot editor in Settings → Bindings. Assign any action and it fires when that Top-Soft-Key is pressed in that CS / BC page, with its own LED and label. This lets you fill the dead keys on the SSL banks with your own functions without disturbing the SSL mapping.
CS / BC soft-key parameter preview
In the Bindings schematic the Top-Soft-Key labels for CS (Q1) / BC (Q2) follow the page you’ve selected to edit, so you can preview every CS / BC bank’s parameter names — not just the one engaged live on the surface.
UF8 Plug-in Mode
Engage with Shift + PLUGIN on the UF8, which is where it sits from the factory. The Plug-in button’s two slots are SSL Strip Mode on Plain and UF8 Plug-in Mode on Shift: plain is the SSL strip on the UC1’s terms, Shift hands the whole UF8 to one plug-in. The Toggle UF8 Plug-in Mode (with GUI) variant is in the Bindings picker; SSL Strip Mode’s own GUI variant is there too, and also in the Plug-in Ops factory bank.
While UF8 Plug-in Mode is on:
- All 8 strips become the strips of a single FX-Learn-mapped plug-in — addressable even when fewer than 8 REAPER tracks are visible (strips past the bank-track count source their content from the focused FX instead of going blank).
- Two fader banks (16 strips total for plug-ins that need more than 8 controls) — Bank ← / Bank → flips between A and B.
- The eight Top-Soft-Keys pick which of the eight V-Pot banks the V-Pots drive.
- The active group of soft-key cells is the bank’s “active TopSoftKey ring” — 1 of 8 ringed brightly.
- Unassigned banks act as no-ops (LEDs dim).
The active plug-in is the focused track’s first UF8-Mode-mapped instance, or the Instance the cursor is currently on.
Per-V-Pot customisation lives in Settings → FX Learn → (right-click the V-Pot on the schematic). Each (fader-bank, soft-key bank, strip) V-Pot carries its own V-Pot mode (Value / Toggle / Step Cycle), Polarity (Unipolar / Bipolar — Bipolar renders the LCD ring centre-out, like SSL Pan), Push reset value, display label, strip colour, and knob travel (Min / Max range + response curve + sensitivity — see Knob travel + curve editor under FX Learn pane). Fill Sequential propagates every one of these fields to the strips to the right.
360° Link
The SSL 360° Link plug-in (a wrapper that mirrors third-party VSTs into the 360° surface) is recognised natively as a built-in channel strip, so the UC1 and SSL Strip Mode drive the linked plug-in transparently.
UF8 Plug-in Mode does not reach a Link. That mode lays the eight strips out from a map’s own UF8 block, which only a map you made yourself carries; the 360° Link is one of the shipped built-in strips and has none. Map the plug-in itself if you want it on the UF8’s strips.
User-renamed 360° Link instances show the rename instead of the generic “Link” / “L-BC” abbreviation.
Favourites (Channel Strip and Bus Compressor)
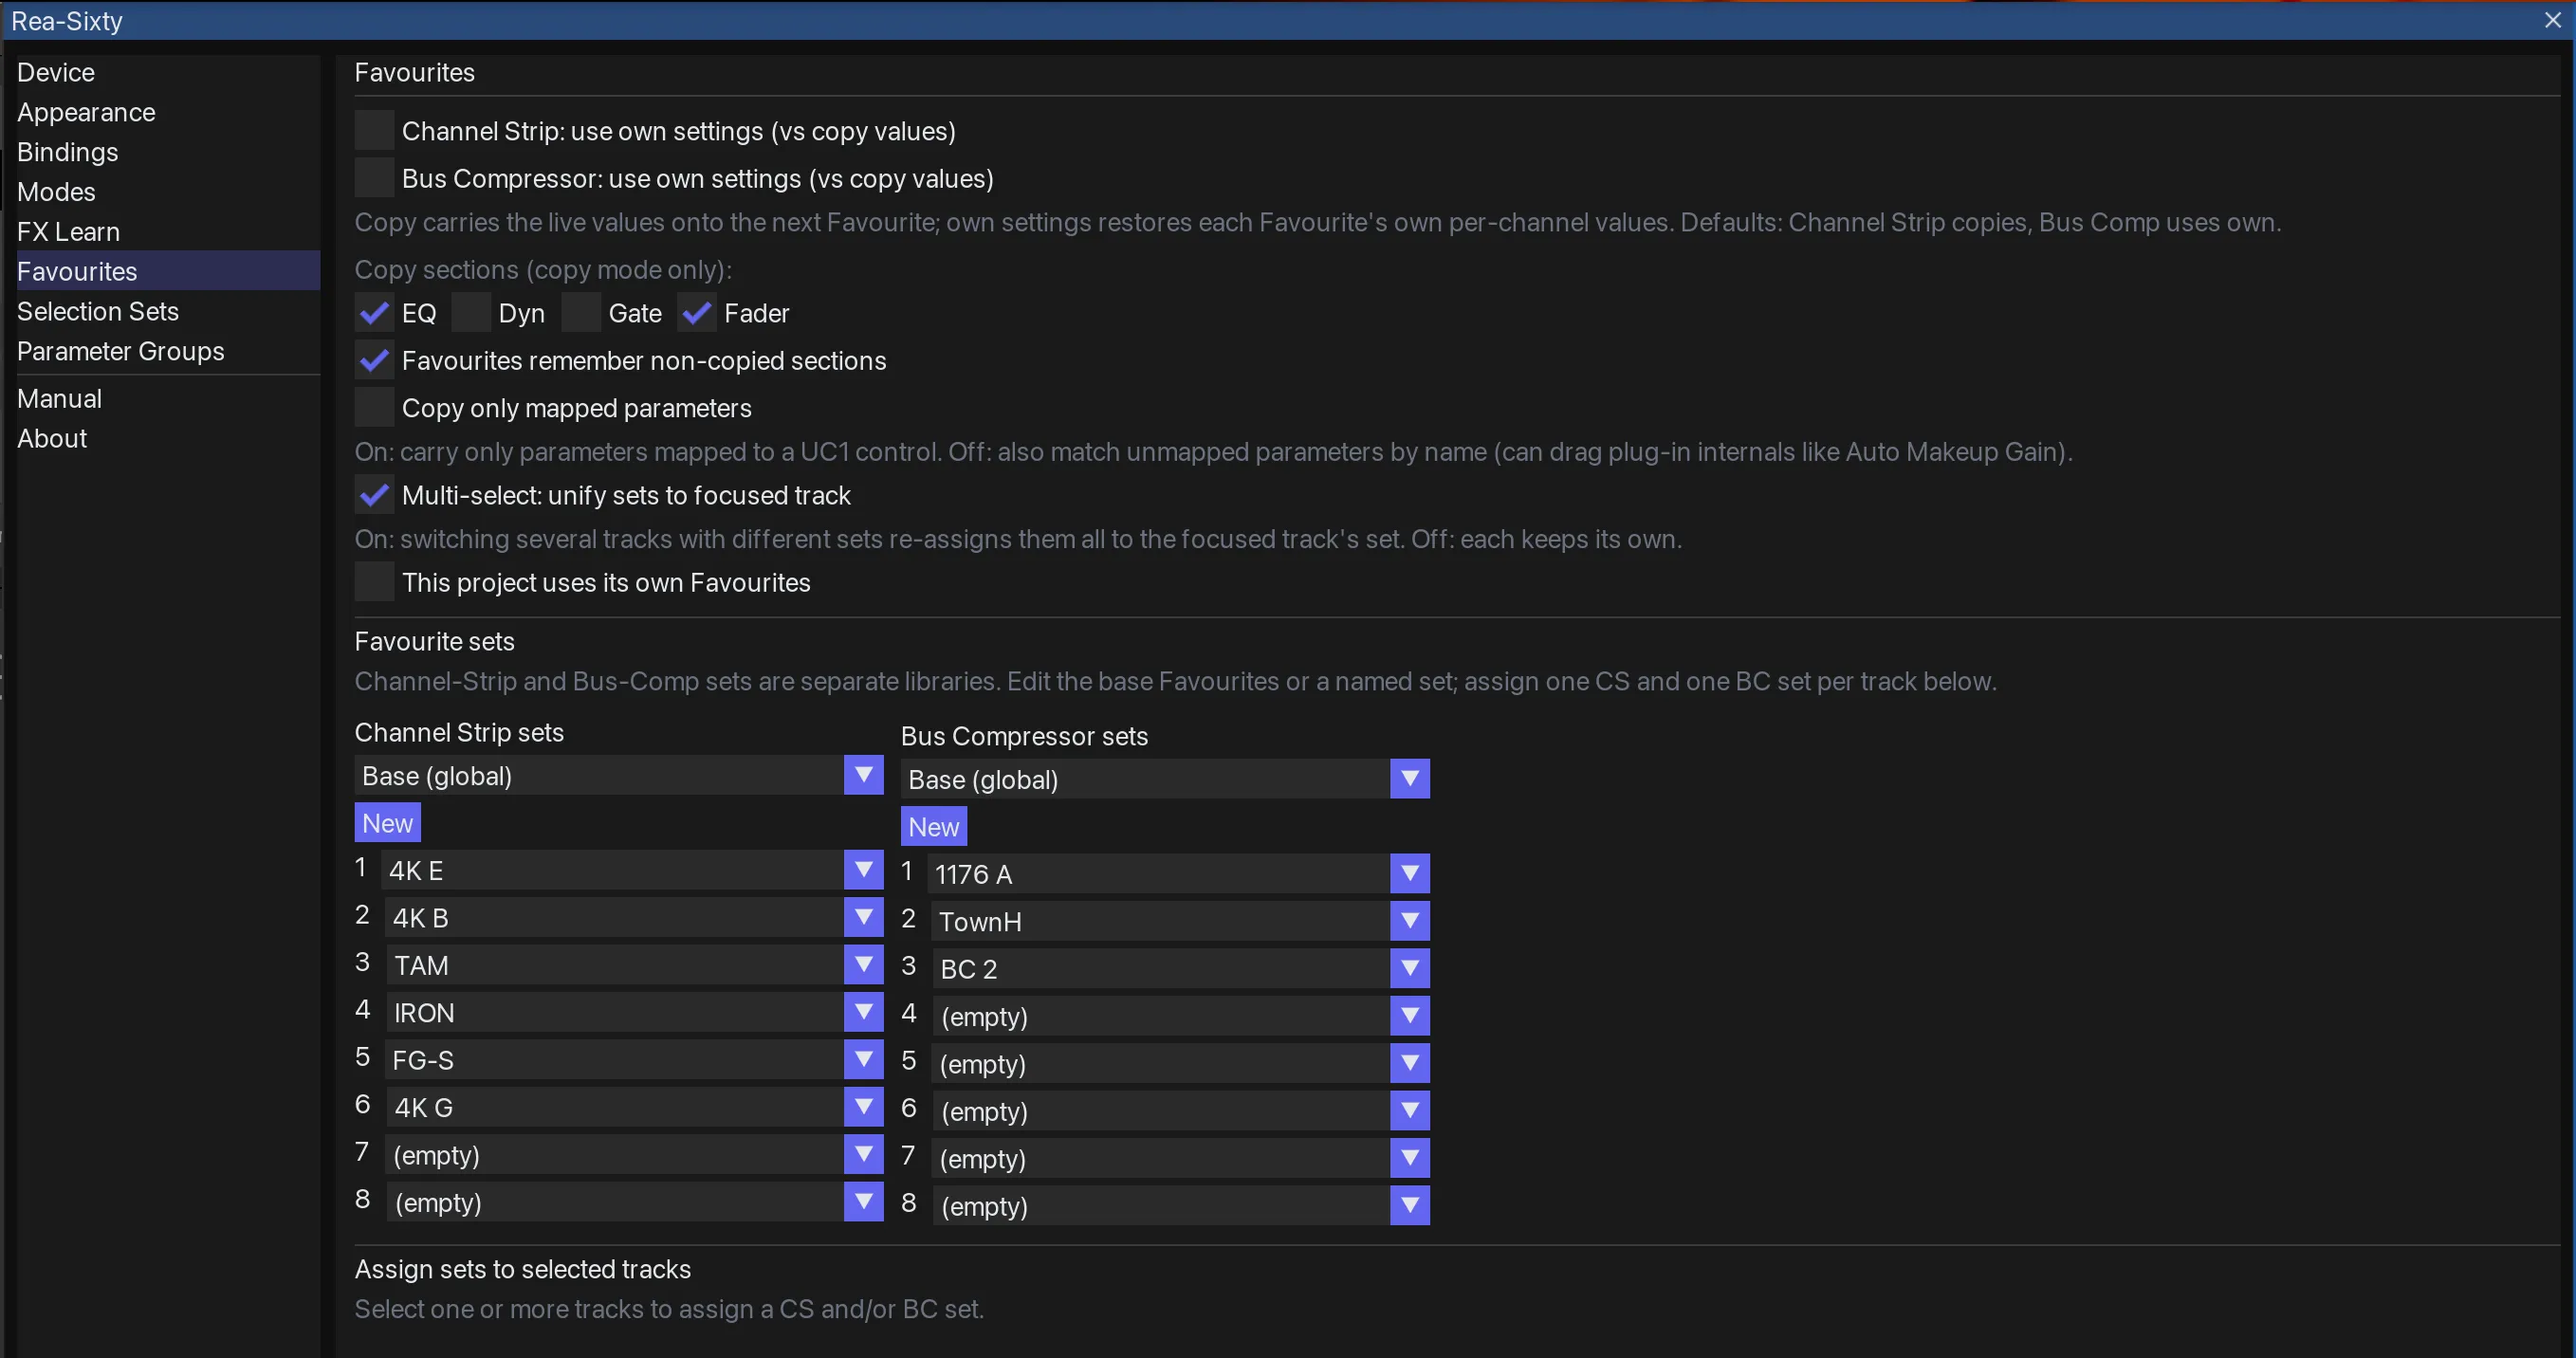
Favourites pane — the Channel Strip and Bus Compressor sets are stored and switched separately.
Swap the active Channel-Strip or Bus-Compressor plug-in on a track for a different one in place, carrying the values of every shared control across. Use it to audition the same EQ / dynamics moves through different emulations (SSL 4K E / G / B, API, bx, a JSFX strip…) without re-dialling anything.
Two domains
Channel Strip and Bus Compressor favourites are entirely separate: eight slots each, their own set libraries, their own preferences. A track can carry one of each.
Most actions come in three flavours — an explicit CS one, an explicit BC one, and a Focused Domain one that follows whichever of the two you are working on at the time. Bind the Focused Domain versions if you want one button that does the right thing on both; bind the explicit ones if you want a button that always means Channel Strip.
Requirement — the plug-ins must be mapped
Favourite switching works through the UC1 / SSL-Link control map: it finds the active Channel Strip on a track, and transfers values, by the shared control each parameter is mapped to (the same control you would map in FX Learn). So every channel strip you switch between must be recognised by Rea-Sixty:
- The built-in maps (SSL CS 2, 4K B / E / G, Harrison 32Classic, BC 2, 360 Link and 360 Link Bus Compressor) work out of the box, nothing to set up.
- Any other strip (API, bx, a JSFX strip…) needs a Channel-Strip FX-Learn map with its controls assigned to the UC1 pots / buttons (Settings → FX Learn, or learn from the Learn-HUD). That map is what tells Rea-Sixty which parameter shares each control.
Without a map: a track whose active plug-in isn’t a recognised Channel Strip gets the favourite inserted at the end of its chain, arriving on its own defaults — only Copy to Favourite declines on such a track. Value transfer to or from an unmapped favourite carries nothing unless Copy only mapped parameters is off, and then only by parameter name, so map your favourites for reliable, value-accurate switching.
Setting favourites
Settings → Favourites is the main place. Each domain has eight numbered slots, and each slot is a searchable dropdown over your mapped plug-ins. One plug-in occupies one slot — putting it in a new slot moves it out of the old one.
Two shortcuts exist for favouriting whatever is in front of you:
- Settings → FX Learn, with the plug-in’s editor open: a CS Favourite: or BC Favourite: dropdown assigns it to a slot.
- Learn-HUD, from its menu — favourite the live plug-in directly.
Both of those edit the base bank, not a named set.
Sets, and the Base bank
Eight slots is not many once you work across genres, so favourites can be grouped into named sets — a full bank of eight, saved under a name. Drums might want one set of strips, vocals another.
In Settings → Favourites the set library is split into two columns, Channel Strip sets and Bus Compressor sets, because the libraries are separate. New creates a set, Dup copies the one you are looking at, Del removes it. A set can be renamed in the field beside those buttons.
Sets are assigned per track, under Assign sets to selected tracks: select tracks, then pick a CS set and a BC set for them. Each track can hold one of each, independently.
A track with no set assigned uses the Base bank — the fallback everything starts on. Base is normally global and shared by every project. Ticking This project uses its own Favourites gives the current project its own base bank instead, seeded from the global one, so a project can carry a specific selection without disturbing your usual setup. The dropdown label tells you which you are editing: Base (global) or Base (this project).
When a track is assigned a set, that set is the whole story: an empty slot in it stays empty rather than falling back to Base.
Set libraries and the global base bank are stored with Rea-Sixty and shared by all projects. Per-track assignments, the per-project bank, and the remembered values of each favourite live in the project file.
Copy values, or own settings
There are two ways a swap can behave, and it is worth understanding the difference because it is the heart of the feature.
Copy values carries the live settings from the outgoing plug-in onto the incoming one. You keep the sound you have and change the flavour of the box producing it.
Own settings does the opposite: each favourite remembers what it was last set to on that channel, and switching restores that. The plug-in comes back as you left it.
The two domains default differently, and deliberately so:
| Domain | Default | Toggle in Settings → Favourites |
|---|---|---|
| Channel Strip | Copy values | Channel Strip: use own settings (vs copy values) |
| Bus Compressor | Own settings | Bus Compressor: use own settings (vs copy values) |
Carrying live EQ and dynamics onto the next strip is usually what you want; a bus compressor is more often a thing with its own character you return to. Both are toggleable, from Settings or from a bound action — CS Favourite Copy/Own, BC Favourite Copy/Own, or the domain-following Favourite Copy/Own (Focused Domain).
The setting governs Switch and Cycle. Copy to Favourite N, below, always copies — that is its purpose.
Switching, copying, cycling
Three things you can do with a favourite, each available for CS, for BC, and for the focused domain:
- Switch to CS Favourite 1 … 8 — replace the active plug-in with favourite N. The button lights when the focused plug-in already is that favourite.
- Copy to CS Favourite 1 … 8 — the A/B, described below.
- CS Favourite Cycle — step through the favourites. Bound to an encoder it steps per detent; there is also Encoder Mode → CS Cycle (Favourites) to give a channel encoder that job outright.
Cycling starts from wherever the track already sits: if its plug-in is favourite 3, the next detent goes to 4. If its plug-in is not a favourite at all, the first forward step lands on the first favourite. Empty slots are skipped, and whether it wraps at the ends follows the global cycle-wrap setting.
A track with no plug-in in that domain gets the favourite inserted instead of being passed over; only Copy declines. The swap preserves the old plug-in’s bypass state, and if its window was open the new one opens the same way.
Copy to Favourite N — the A/B
Switch replaces the plug-in. Copy does not: it inserts favourite N directly below the current one, carries the settings onto it, and bypasses the original.
You end up with both strips on the track, same settings, one active — so you can flip between them by toggling bypass, and keep the original to go back to. Copy always carries values, whatever the copy/own setting says.
Which sections carry
On the Channel Strip you can restrict what a swap carries. Settings → Favourites, under Copy sections (copy mode only): — four checkboxes, all on by default:
| Box | Covers |
|---|---|
EQ | The EQ bands, and the filters, which ride with the EQ on an SSL strip |
Dyn | Compressor and the sidechain listen |
Gate | Gate and expander |
Fader | The strip’s fader level |
Anything outside those — input trim, polarity — always carries. The mask applies to Switch, Cycle and Copy alike. The Bus Compressor has no mask; it is a single block of eight controls with nothing to divide.
Favourites remember non-copied sections (on by default) keeps the parts you did not carry. Switch away with Gate unticked and back again, and the gate returns as it was rather than as the plug-in’s default. This also covers parameters that are unique to a plug-in and have no equivalent anywhere else — the odd character control that only one emulation has — which are remembered per favourite and restored when you come back to it.
Value transfer
Each control carries its value to the matching control on the new plug-in, matched by the shared SSL-Link control (the same control you would map in FX-Learn) — never by guessing:
- Numeric values (gains, frequencies, Q, threshold, ratio, time) transfer by engineering value: the search lands the new plug-in on the value whose display matches the source, exactly when achievable. Hz↔kHz and s↔ms scale differences are reconciled automatically; dB / ratio are never rescaled.
- Same-family swaps (e.g. SSL → SSL) stay bit-exact.
- Discrete states / buttons (Bell/Shelf, In/Out, Gate/Expander…) transfer by meaning: identical label first, else the active/inactive sense (In/On/Engaged/Expander ↔ Out/Off/Bypass/Gate), else the same state position — so a toggle lands correctly even when the two plug-ins label or order it differently.
- A control the new plug-in lacks is remembered, so the value survives a round-trip through a simpler strip and is restored when you cycle back.
- The SSL routing order and the EXT FUNCS carry too — the EQ / filter / dynamics arrangement and the free function assignments follow the swap, matched by what each control is, so they survive a move between different strips whose internals are numbered differently.
- A filter parked fully open lands on the destination’s own “out” position where it has one, rather than arriving as a real 20 kHz.
- ReaEQ states a band’s width in octaves, the other strips state Q. The width travels as Q and is converted into and out of ReaEQ, so an SSL Q of 1.5 lands on ReaEQ as about 0.94 octaves.
Copy only mapped parameters (Settings → Favourites, on by default) decides how far the matching goes. On, only parameters mapped to a control carry. Off, Rea-Sixty also matches unmapped parameters by name — which can be useful for an unmapped strip, but can also drag across things you did not mean, such as an auto-makeup-gain control that happens to be named like a makeup gain.
If a value genuinely can’t be represented (a frequency far outside the target’s range), the control is left at its default rather than slammed to a rail.
Several tracks at once
Switch, Copy and Cycle act on every selected track, in a single undo step — or on the surface-focused track when nothing is selected.
When the selected tracks carry different sets, Multi-select: unify sets to focused track (on by default) re-assigns them all to the focused track’s set so they end up consistent. Turn it off and each track keeps its own set, switching within it.
On the surface
CS Favourites and BC Favourites are dynamic bank kinds — pick one for any soft-key bank and its eight keys are that domain’s favourites, resolved live. They used to be two static factory banks; those were removed on 2026-09-02 because a snapshot went stale and a kind does not. The key labels show each favourite’s plug-in short name — resolved through the focused track’s assigned set — falling back to CS Fav N when a slot is empty.
Cycling on the UC1 shows the same previous / current / next carousel the FX and Instance cycles use, headed with the track name, so you can see what you are stepping into. At the ends of a non-wrapping cycle it still shows, sitting on the current favourite.
Solo / Mute modifier modes
The UF8 strip Solo / Cut buttons and the UC1 Solo / Cut buttons normally toggle the track’s solo or mute. Hold a modifier on your computer keyboard while pressing the button to invoke REAPER’s other solo / mute modes instead — the same modes you get from right-clicking a track’s solo or mute button in REAPER.
The modifier follows REAPER’s own convention: on macOS the Command key (⌘) is the “Ctrl” role (what REAPER’s solo / mute menus show); on Windows it is Ctrl. Option/Alt and Shift are the same on both. Windows AltGr counts as Alt.
| Hold while pressing Solo | Action |
|---|---|
| (nothing) | Solo in place (normal) |
| Alt | Solo, ignoring routing |
| Cmd / Ctrl | Unsolo all tracks |
| Cmd / Ctrl + Alt | Exclusive solo (this track only) |
| Cmd / Ctrl + Shift | Toggle solo defeat |
| Hold while pressing Cut / Mute | Action |
|---|---|
| (nothing) | Mute (normal) |
| Alt | Mute all other tracks |
| Cmd / Ctrl | Unmute all tracks |
| Cmd / Ctrl + Alt | Exclusive mute (this track only) |
Without a modifier the buttons behave exactly as before. In routing or Plug-in modes — where Solo / Cut already act on a send or a plug-in parameter — the modifiers do not apply; they only affect the plain track solo / mute.
Send and Receive views
A routing view repurposes the eight UF8 strips so they drive sends or receives instead of tracks. This is a UF8 feature; the UC1 has no routing view.
Two layouts
There are two ways to spread routing across the strips, and they are opposites.
“8 sends of focused track” puts the focused track’s send list across the eight strips — strip 1 is its first send, strip 2 its second, and so on. Use this to ride one track’s sends.
“Send N ↦ all tracks” keeps every strip on its own banked track and shows that track’s send number N. Send 3 ↦ all tracks gives you send slot 3 of each of the eight banked tracks. Use this to ride one bus across the whole bank.
Receives work the same way in both layouts.
Turning a view on
Routing views are surface functions bound to hardware buttons — they are not in REAPER’s Action list, so they cannot be triggered from a keyboard shortcut.
Every routing function is a toggle: pressing the active one again turns it off. Each binding also chooses which control owns the route — the faders or the V-Pots. In the binding editor this is the Flip checkbox.
Factory defaults:
| Control | Function |
|---|---|
SEND / PLUGIN 1..8 | Send N ↦ all tracks on the faders |
Shift + SEND / PLUGIN 1..8 | Receive N ↦ all tracks on the faders |
Long-press FLIP | 8 sends of focused track on the V-Pots |
Shift + long-press FLIP | 8 receives of focused track on the V-Pots |
CHANNEL | Home — clears every routing toggle and returns the strips to track volume and pan |
Because faders and V-Pots hold their routing independently, a send view and a receive view can be live at the same time on different controls — sends on the faders while receives sit on the V-Pots, for instance. Two routing modes cannot share one control. When both are active, the fader’s route wins for Solo, Cut and the scribble text; the V-Pot’s route drives the colour bar.
The view follows the focused track live.
What the controls do
| Control | With the route on the faders | With the route on the V-Pots |
|---|---|---|
| Fader | Send/receive volume; with FLIP, pan | Track volume, as normal |
| V-Pot | Send/receive pan (regardless of the PAN button); with FLIP, volume | Send/receive volume; pan while PAN is engaged |
| V-Pot push | Centre the send pan; with FLIP, reset volume to 0 dB | Reset volume to 0 dB, or centre pan when PAN is engaged |
| Solo | Solo this send (see below) | Solo this send |
| Cut | Mute this send or receive | Mute this send or receive |
| Sel | Selects the banked track, not the send | Same |
Sel is deliberately not routing-aware — it still selects the track sitting on that strip, so you can change focus without leaving the view.
On the scribble strips the upper line shows the route’s name — the destination track for a send, the source track for a receive, abbreviated to fit. With the route on the faders, the value line shows the send’s pan; with it on the V-Pots the line shows the route’s name instead, so the strip still says what it is. The colour bar takes the colour of the other end of the route, so a strip’s colour tells you where the signal is going, not where it came from.
Paging a long send list
In the “of focused track” layouts, BANK ← / BANK → page the send list by eight instead of scrolling tracks. A track with twenty sends pages through them eight at a time; the window clamps so the last send never scrolls past the right-hand strip. The single-step bank bindings page by one.
In the ”↦ all tracks” layouts the strips are tracks, so BANK ← / BANK → scroll tracks exactly as they normally do.
The page resets to the start when you press Home, when you switch routing mode, and whenever the focused track changes. Nothing on the surface indicates which page you are on, so if a long send list looks wrong, press Home and start again.
Hardware outputs
In a Send view, the track’s hardware outputs share the slot list with its track sends, in the same order REAPER’s mixer send list shows them. Each has its own fader and pan, and is named after the output channel your audio device reports — for example Analog 1 / Analog 2. Long names are abbreviated to fit the scribble strip.
Hardware outputs have no far-end track, so those strips do not take a routed colour.
Receives have no hardware-output equivalent; a Receive view lists receives only.
Empty slots
REAPER lets a send list contain gaps. An empty slot shows as a completely blank strip — no name, no value, colour bar off, V-Pot ring off, and the motor fader parked at the bottom so a gap is obvious at a glance. Buttons and faders on a blank strip do nothing.
Strips past the end of a short list are blank in the same way: a track with four sends fills strips 1–4 and blanks 5–8.
Solo and Cut on a send
Cut toggles the send’s or receive’s own mute.
Solo is an exclusive un-mute: it un-mutes the send you pressed and mutes every other one in the list. In a Send view that includes the hardware outputs; in a Receive view it stays within the receives. Pressing it again un-mutes everything.
This discards whatever mute pattern you had before — the same as the solo button on a console. If you had three sends deliberately muted, soloing and un-soloing leaves all of them open.
While any routing view is active the Solo LEDs stay dark, so there is no lit button telling you a send is soloed. The visible cue is the other strips’ Cut LEDs coming on. Leaving the view restores the LEDs to the tracks’ real solo states.
Writing automation
Moving a fader in a routing view writes the send’s volume — and its pan under FLIP — through the same path REAPER uses when you drag the control with the mouse. Whether the move is recorded is therefore REAPER’s decision and follows the track’s automation mode, exactly as it would on screen. Releasing the fader ends the edit.
Two limits are worth knowing:
- The V-Pot writes pan automation, but V-Pot volume changes the level without recording. If you want an automated send-level move, use the fader.
- A send whose level is already automated reads its written value only after you have touched its fader once in the session. Before that the strip shows and parks at the underlying trim level. Touch the fader and it corrects itself.
If you add or delete a send on a track that already has send automation, a fader move may change the level without recording it.
REC + RME (TotalReaper) integration
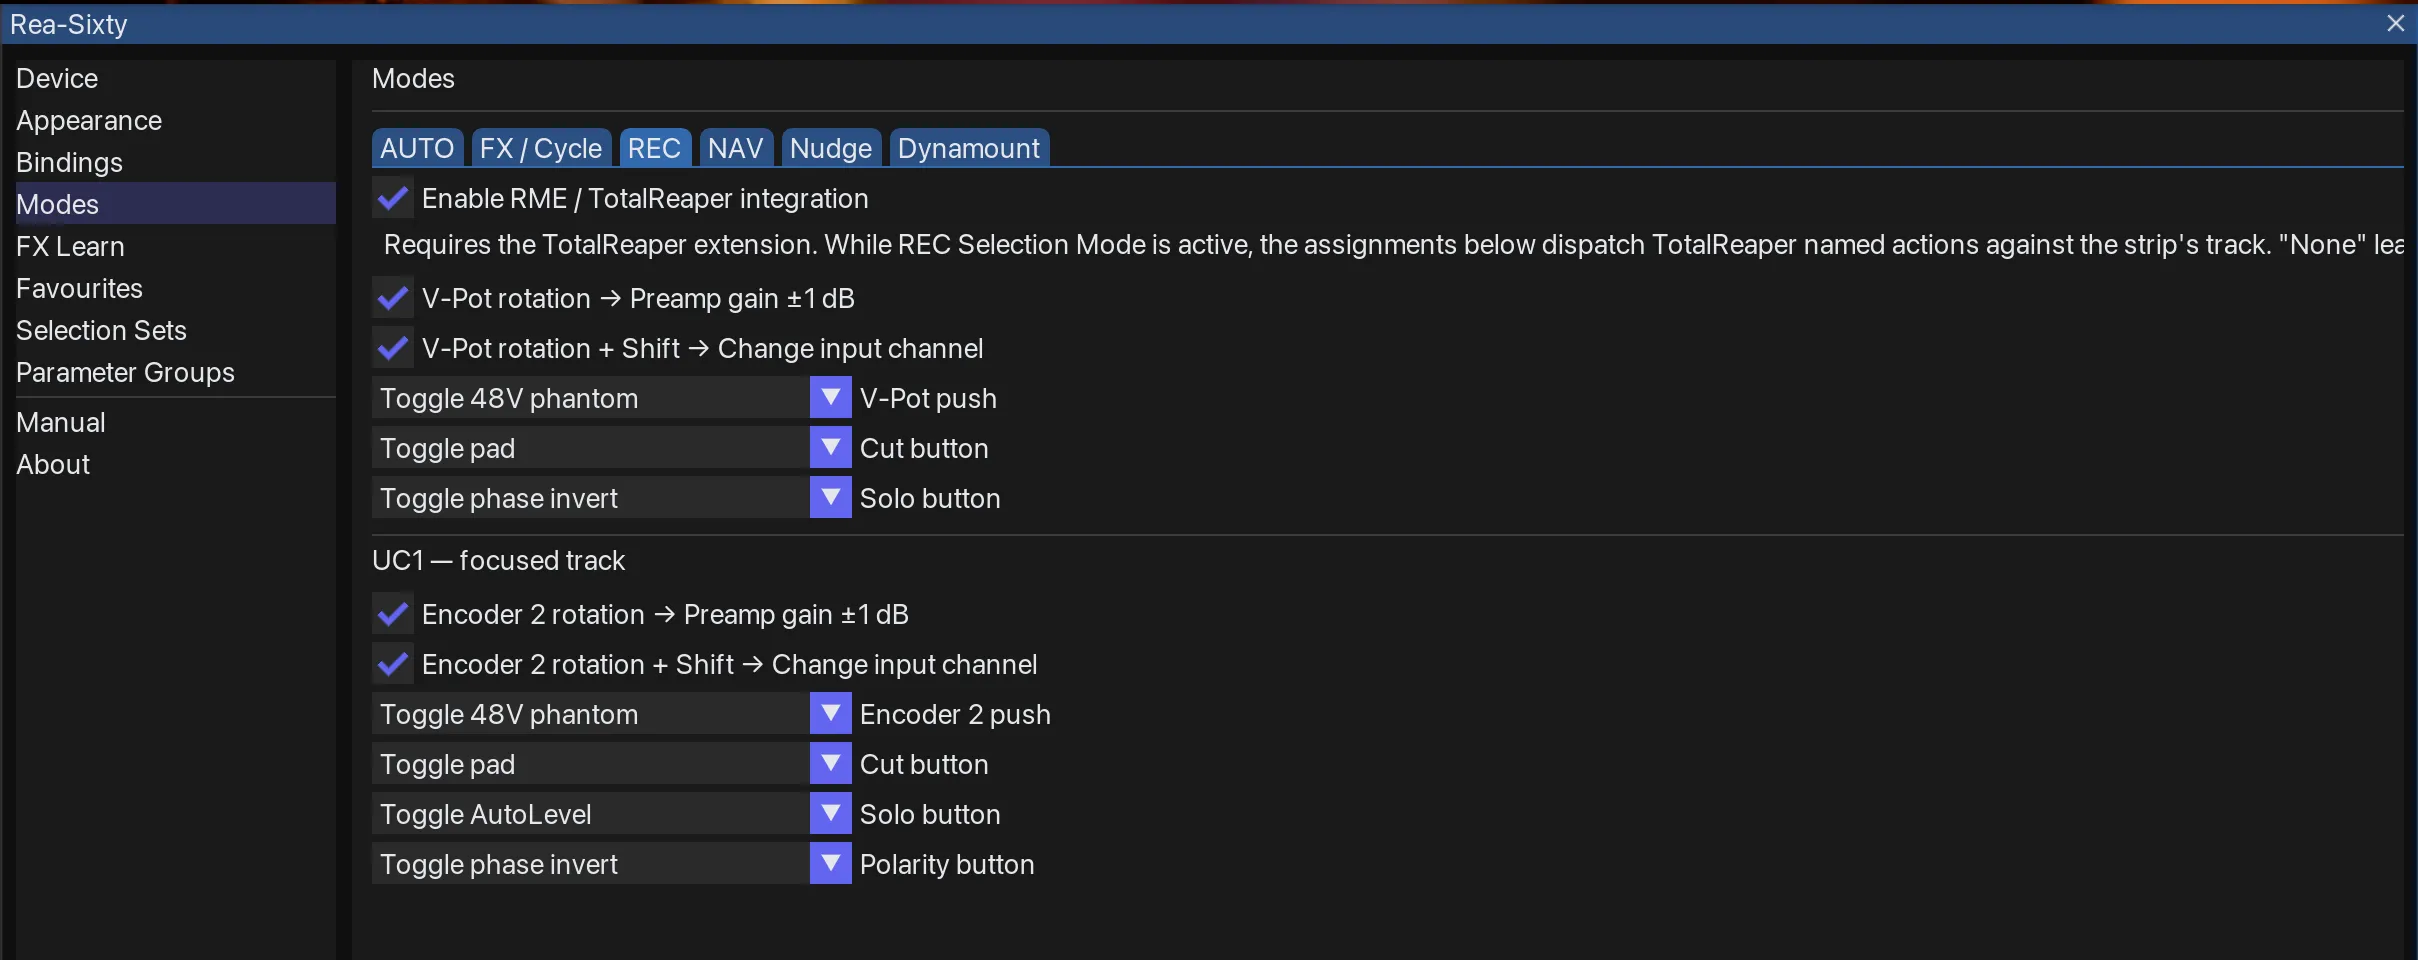
Modes → REC — mapping the RME preamp controls (gain, 48 V, pad, phase) onto UF8 and UC1.
Requires the TotalReaper extension (separate ReaPack package, same repository as Rea-Sixty) and an RME interface supporting TotalMix FX 2.1 Global OSC. Settings → Modes → REC says whether it was detected and offers a button to fetch it through ReaPack when it is not.
Master switch: Settings → Modes → REC → “Enable RME / TotalReaper integration”.
What has to be in place first
Three things stand between a knob on the surface and a preamp in the interface. Rea-Sixty runs a TotalReaper action, TotalReaper talks to TotalMix over the network, and TotalMix drives the hardware. Each part has to be set up, and none of them tells the other two when it is not.
TotalMix FX 2.1 or later, with Global OSC. Global OSC is the protocol everything here rests on and it arrived with 2.1. RME’s ordinary downloads page still lists 2.03 at the time of writing; 2.1 is a public preview, announced at rme-audio.de/totalmix-fx-beta.html, and the build itself sits in the forum thread that page points at.
Switch OSC on in TotalMix. Under Settings, OSC, set Compatibility Mode to Global OSC. Then switch Enable OSC Control on under Options.
Tick “Receive to hidden channels” under Settings, OSC, Details. This is the setting that wastes an evening: with it off, TotalMix quietly ignores anything addressed to a channel that is not in the layout you happen to be looking at, so the integration seems completely dead while every message is in fact arriving. Some TotalMix versions ship with it switched off.
The ports are 7001 and 7002. TotalMix receives on 7001 and answers on 7002, which is what TotalReaper expects out of the box. Change them in TotalMix and you have to set the same two numbers in TotalReaper’s settings window, where they take effect without a restart. Both are ordinary network traffic on your own machine, so a firewall that filters local traffic will stop the integration cold. Rea-Sixty listens on neither: it only asks TotalReaper to act.
TotalReaper 0.2.2 or later. Point a track at a different input on an older version and the gain, 48V, pad and phase you read on the surface keep describing the input you left, until something on the new one moves. Settings, Modes, REC says whether TotalReaper was found and offers a button that fetches it through ReaPack.
A quick check that the chain is alive, before you go looking at Rea-Sixty: select a track recording from a mic input, run TotalReaper’s own 48V action from the action list, and watch the strip in TotalMix. If that does nothing, the problem is behind TotalReaper, not in front of it.
The three surfaces have separate assignments in that tab, so you can opt one in without the others. What follows describes the UF8 strips; the UC1 uses Encoder 2, Cut, Solo and Polarity on the focused track, and the UF1 uses the V-Pot above the fader, Cut and Solo on the channel its fader side is showing.
When on AND REC / REC+MON selection mode is active:
- V-Pot rotation → preamp gain ±1 dB (configurable per
V-Pot rotation → Preamp gain ±1 dBtoggle) - V-Pot rotation + Shift → input channel reassignment (configurable per
V-Pot rotation + Shift → Change input channeltoggle) - V-Pot push → action of choice (
None/ 48V / Pad / Phase invert / AutoLevel) - Cut button → action of choice (same enum)
- Solo button → action of choice
- Polarity (if mapped) → action of choice (UC1 only — the UF8 half offers V-Pot push, Cut and Solo)
The channel-strip type cell shows the input channel name (“Mic 1”, “Line 3”) instead of the CS variant label, and the V-Pot readout bar shows the preamp gain instead of pan, since that is what the knob above it is turning. Full scale is +75 dB, which is as far as RME pres usually go.
Hardware inputs only — MIDI / multichannel inputs leave the original label intact.
If TotalReaper isn’t installed the keys keep their normal behaviour, because a missing action falls through to the old solo and mute. The gain knob is the exception: with the gain toggle on, the rotation is consumed and sent to an action that is not there, so the pot moves nothing at all rather than falling back to pan.
The UF1 reads out exactly as a UF8 strip does, down to the same zones: flags on the left of the value line, gain on the right, the readout bar on the gain, and the type cell naming the input. A track TotalReaper has not reported anything about keeps its usual readout instead. Cut and Solo light from the TotalMix state they switch rather than from the track’s mute and solo.
With the UF1 in Extender mode this all keeps working on the channel the fader side shows, in a send view as well: a send has no preamp, so the preamp actions take that side’s Cut and Solo while the mode is engaged.
DynaMount mode
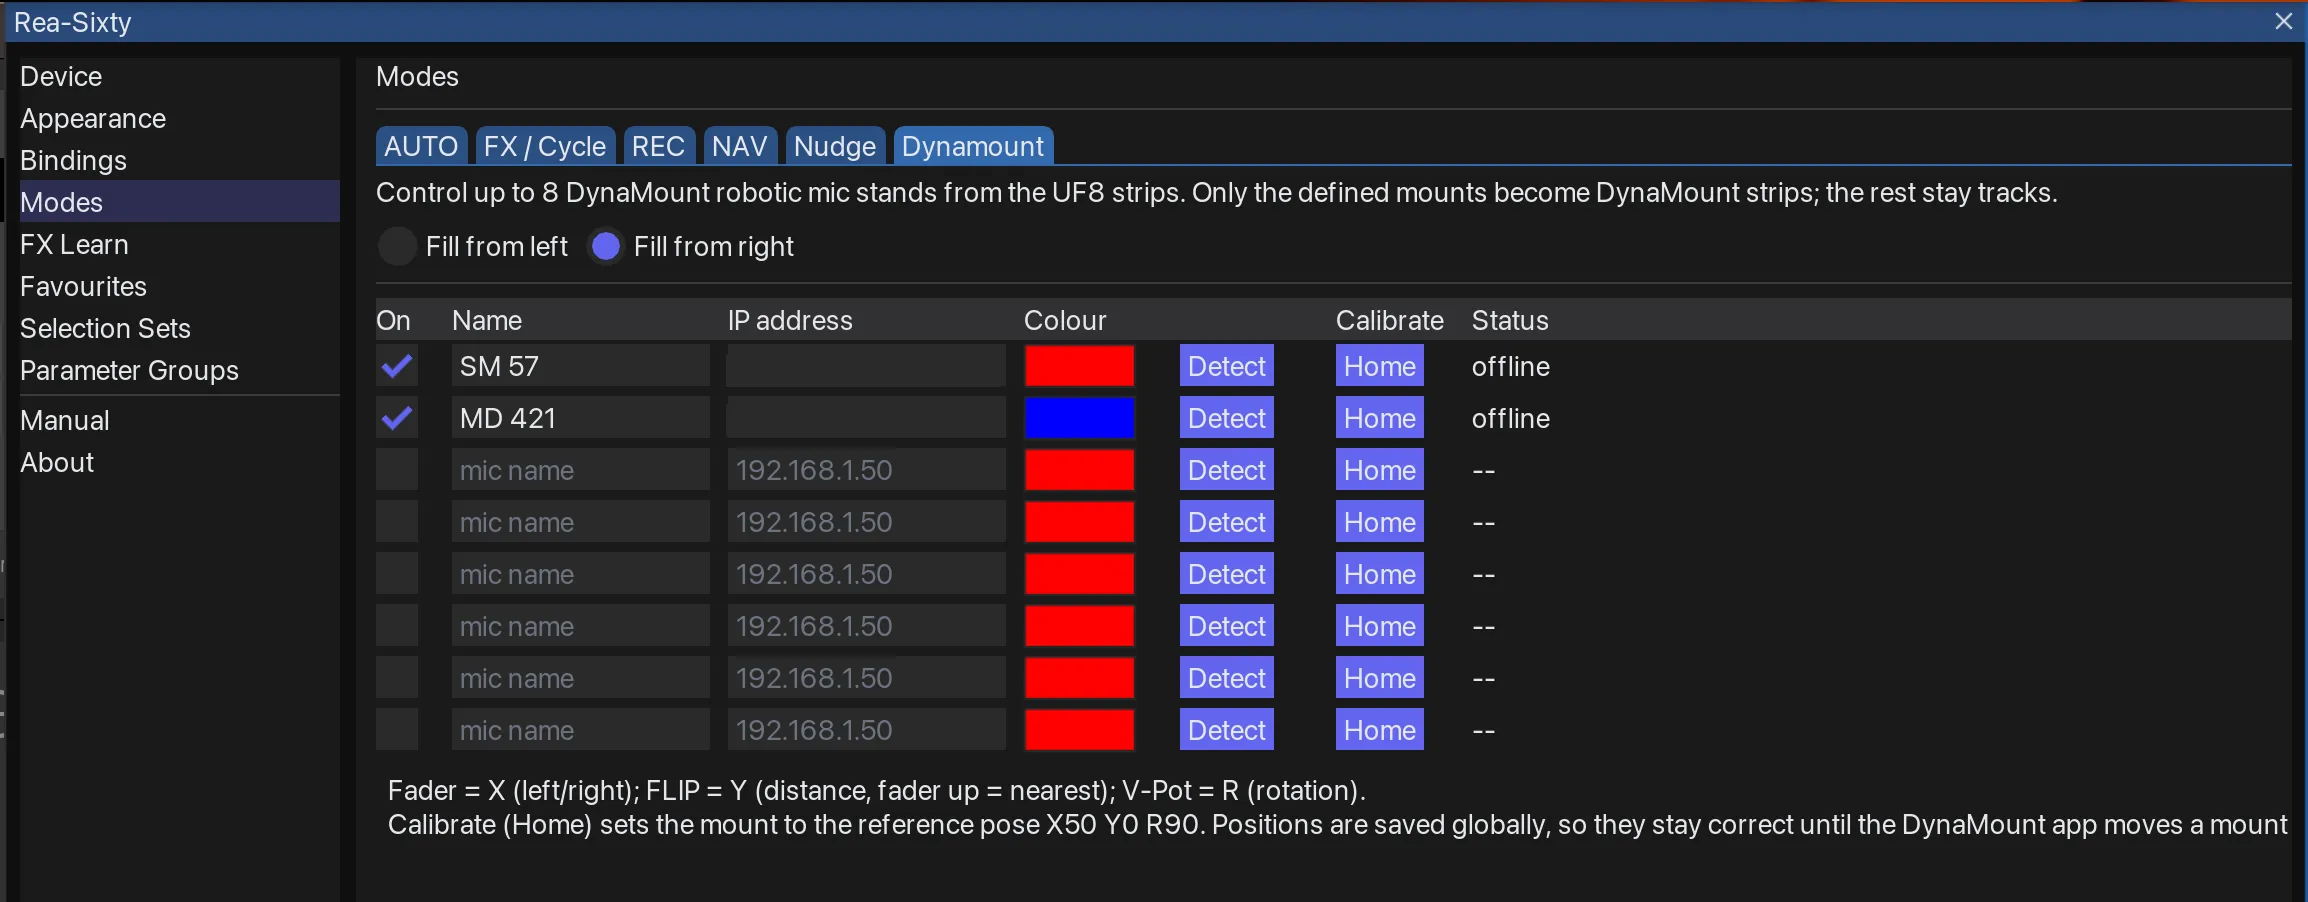
Modes → Dynamount — up to eight robotic mic stands; only the defined mounts become DynaMount strips.
DynaMount makes robotic microphone stands. In DynaMount mode the UF8 strips drive up to eight of them over your network — move a mic from the control room, with the fader.
Setting the mounts up
Settings → Modes → Dynamount. Each of the eight rows is one stand:
| Column | What it is |
|---|---|
| On | Include this mount. Only enabled mounts take a strip. |
| Name | Shown on the scribble strip |
| IP address | The mount’s address on your network — you type it; there is no discovery |
| Colour | The strip’s colour bar |
| Detect | Check whether that address answers |
| Calibrate | The Home button (below) |
| Status | Gen1, Gen2, offline, or -- when the row is off |
Fill from left / Fill from right decides which end of the surface the mounts occupy.
Engaging the mode
Bind Selection Mode → DynaMount to a button; it toggles like every other Selection Mode. There is no switch in Settings — the Dynamount tab configures the stands, it does not turn the mode on.
With no mounts enabled the mode does nothing at all, and every strip stays a track.
Enabled mounts pin to one end of the surface and carry no track. The other strips remain ordinary track strips and keep the project order: two mounts mean six track strips, and the bank buttons reach the rest of the session as usual.
Driving a mount
| Control | Axis |
|---|---|
| Fader | X — left and right |
| Fader with FLIP | Y — distance, fader up = nearest |
| V-Pot | R — rotation, 0–180° |
The fader sends when you let go, not while you move it: the readout follows your hand, the stand moves once on release. The V-Pot behaves similarly — the number changes per detent, but the mount only turns about a second after you stop.
The scribble strip shows the mount’s name (or MOUNT if you have not named it), DYNA in the type zone, and the live position as X, Y and R. The digit is the mount’s row number in Settings, not the strip number. A mount that is not answering has OFF appended to its value line.
Solo, Cut and Sel have no function on a mount strip and their LEDs stay dark.
Home
Home — the button under Calibrate — drives the mount to the reference pose X50 Y0 R90: centred, nearest, straight ahead. It also resets Rea-Sixty’s idea of where the stand is.
This matters because the protocol is one-way: the stands report no position, so Rea-Sixty knows only what it last told them. Positions are remembered globally and restored on the next launch without re-driving the motors, on the assumption that nothing moved in between. If you move a stand with the DynaMount app, by hand, or after a power cut, the two disagree — press Home and they match again.
Home is a normal move command, so the stand travels to that pose; it is not a hardware homing or self-calibration routine.
Connection
Rea-Sixty talks to the stands over plain HTTP on your local network, at the addresses you enter. Motor speed is fixed.
Detect is a reachability check for an address you have already typed, not a search of the network. On an address with nothing at the other end it can take around six seconds to give up and report offline.
Once a mount has been found offline, Rea-Sixty stops trying it. Faders and V-Pots keep moving the numbers on screen, but the stand will not follow, and the value line shows OFF. Press Detect again after fixing the network — or edit the address, or restart REAPER. It will not recover on its own.
Every enabled mount is probed once when REAPER starts, so Status is filled in before you open Settings.
Only first-generation stands can be driven. A newer stand is detected and reports
Gen2in Status, but Rea-Sixty cannot move it — motion is implemented for the Gen1 HTTP protocol only.
Hue mode
Philips Hue lamps on the strips. In Hue mode the UF8 faders are brightness, the V-Pots are colour, and the UF1 puts one lamp on its channel screen. Scenes go on any key you like, and the room can go red while you record.
Connecting the bridge
Settings → Modes → Hue.
- Find bridge asks Philips where your bridge is. That needs an internet connection; if there is none, or the bridge is on a network the lookup cannot see, type the address into the IP field yourself.
- Press Pair (press link button), then walk over and press the round button on top of the bridge. You have thirty seconds. The status line counts down.
- Refresh lights + scenes re-reads everything. Rea-Sixty does that by itself every second while it is connected, and re-reads rooms and zones on every tenth pass, so you only need this after adding a lamp.
- Forget drops the address and the key. Pairing again is the only way back.
The status line reads green when everything is talking, amber while it is pairing or reading, and red when the bridge stopped answering. A bridge that drops off is retried every ten seconds on its own.
About the certificate. The Hue bridge only speaks over an encrypted connection, and it signs that connection itself rather than with a certificate your computer already trusts. Rea-Sixty therefore does not check the certificate for your bridge, and for your bridge only. Instead it remembers the bridge’s own ID the first time it connects and compares it every time it reconnects: if something else answers at that address, Hue mode goes offline and says so rather than talking to it.
Setting the lamps up
Eight rows, one per strip:
| Column | What it is |
|---|---|
| On | Include this lamp. Only enabled rows take a strip. |
| Label | Shown on the scribble strip, eight characters |
| Target | A single lamp, or a whole room or zone |
| Kind | lamp or zone, filled in for you |
| Bar | The strip’s colour bar when the lamp is off |
| Rec light | Include this row in the recording light |
| State | What the lamp is doing right now |
Fill from left / Fill from right decides which end of the surface the lamps occupy, exactly as in DynaMount mode.
A room or zone appears in the list only if it has lamps in it. An empty room cannot be dimmed, so there is nothing to offer.
Why the Kind column is there. A single lamp accepts about ten changes a second. A whole room accepts about one, because the bridge sends a room change out as a broadcast over its radio network, and that is far more expensive. Rea-Sixty holds to those limits: a lamp on a fader feels immediate, a room feels like it is following you. That is the bridge, not the surface.
Engaging the mode
Bind Selection Mode → Hue to a button. It toggles like every other Selection Mode, and there is no switch in Settings: the Hue tab configures the lamps, it does not turn the mode on.
With no lamps enabled the mode does nothing and every strip stays a track. Enabled lamps pin to one end of the surface, and the tracks keep their order on the strips that are left: three lamps mean five track strips, and the bank buttons reach the rest of the session as usual.
Driving a lamp from the UF8
| Control | What it does |
|---|---|
| Fader | Brightness. At the very bottom the lamp switches off. |
| V-Pot | Hue by default |
| V-Pot with FLIP | Saturation by default |
| V-Pot press | Switches between colour and white by default |
| CUT | Lamp on and off |
| SOLO | This lamp stays on, every other Hue strip goes dark |
| SEL | Makes this the lamp on the UF1 screen |
The three V-Pot roles are set under Controls in the Hue tab. You can put colour temperature on either of them, which is what a room of white-only lamps wants.
The scribble strip shows the label, LAMP or ZONE in the type zone, the row number as the digit, brightness in the fader readout, and the full state in the value line. A lamp the bridge cannot reach reads OFFLINE.
The colour bar shows what the lamp is actually showing. When the lamp is off the bar falls back to the configured Bar colour rather than keeping the lamp’s last one.
The bottom of the fader is off, not one percent. The bridge treats a brightness of zero as the dimmest setting it can manage, not as darkness, so switching a lamp off is a separate instruction. Rea-Sixty sends it when the fader reaches the last one percent of its travel. If you would rather the fader never switched anything off, turn off bottom of travel switches the lamp off under Controls.
Driving a lamp from the UF1
Bind UF1 Mode: Hue to any key on any surface. The UF1 then shows one lamp: whichever one you last pressed SEL on, or turn the CHANNEL encoder to walk through them.
| Control | What it does |
|---|---|
| Fader | Brightness |
| V-Pot 1 | Hue |
| V-Pot 2 | Saturation |
| V-Pot 3 | Colour temperature |
| CHANNEL encoder | Picks the lamp |
| V-Pot 1 press | Switches between colour and white |
| CUT | Lamp on and off |
| SOLO | Light solo |
The UF1’s three colour pots are fixed: three axes on three knobs needs no setting. The fourth is blank, because there is no fourth thing for it to be.
The lamp itself is on the CHANNEL encoder, where “which channel am I on” already lives.
You leave the mode with the key you came in on: UF1 Mode: Hue is a toggle.
Scenes
Eight slots under Scenes in the Hue tab. Each one points at a scene on your bridge, with a short label for the display and a colour for the key LED.
There are two ways to reach them.
One key per scene. Bind Hue: recall scene with parameter 1 to 8 to any key on any surface. It always recalls statically; for a scene that keeps moving, bind Hue: start scene dynamically instead.
All eight at once. Set a soft-key bank’s type to Hue Scenes: on the UF8 that is the bank’s Dynamic setting under Settings, Bindings; on the UF1 the same setting on one of its ten soft-key banks. The bank then shows the eight slots in order, each key wearing its slot’s LED colour and lighting while the bridge reports that scene as the one showing. Push recalls, long press starts it moving, the same pair the two actions offer. On the UF1 the bank names itself HUE on the time field, and a recall flashes the scene’s name there.
Both routes read the same eight slots, so there is one list to keep.
Two more actions come with it:
- Hue: all lamps off switches off every enabled lamp at once.
- Hue: recording light on / off arms or disarms the recording light without opening Settings, and lights up while it is armed.
Recording light
The classic red light, only real. Under Recording light:
- Applies to is either the rows you ticked under Rec light in the lamp table, or a whole room or zone. The two are separate on purpose: the lamp you ride on a fader is rarely the one that should go red.
- While recording is either a colour or a scene. A colour uses the brightness beside it and lands on whatever Applies to names. A scene carries its own lights, colours and brightness, so the colour and brightness controls go away while one is picked, and Applies to no longer decides which lamps change. It recalls statically; a recording light that keeps moving is one nobody trusts.
Set the restore to a scene as well and nothing is read from the bridge at all — the light is one request and the way back is another, which is as fast as this gets. The snapshot below only exists for put the lights back the way they were, so it is taken only when that is what you asked for. It does widen to every lamp when the light is a scene, because a scene can reach any of them and a lamp that was not saved is one that never comes back. Test holds it on so you can walk into the room and look at it; press it again to release.
- When it stops either puts the lamps back exactly the way they were, or recalls a scene of your choosing.
Only recording touches the lights. Play and stop leave them alone. If they did not, every scene you recalled by hand would be wiped the moment you pressed the space bar.
The state of every affected lamp is read just before the light goes red and written back afterwards, lamp by lamp, so a room whose lamps sat on different colours comes back the way it was rather than flattened to one.
Hue mode does not have to be engaged for this. The recording light works whether the strips are showing lamps or tracks.
Marker cues
Name a marker hue:Relax and the scene called Relax is recalled when the playhead passes it.
The prefix is yours to change, and the transition time is how long the room takes to arrive. Under the settings is a live list of every matching marker in the project, with the scene each one resolves to, or a red note if there is no scene by that name. Check it before the take rather than during it.
Cues fire only while the transport is rolling, and only forwards. Dragging the cursor back past three cues fires nothing, and a stopped edit cursor fires nothing at all: the marker names a moment in the take, not a place on the ruler.
What this does not do
Rea-Sixty talks to the bridge the ordinary way, which is fast enough for a fader and a scene but not for music. There is no meter-driven lighting and no lamp that flickers with the kick drum. That needs the streaming connection Philips built for televisions and games, which needs a piece of encryption software Rea-Sixty deliberately does not ship.
OBS
Recording, chapter marks and scene switching from the surface, so a take starts and ends with a key instead of a trip to the keyboard.
Connecting
Settings → Modes → OBS.
In OBS, open Tools → WebSocket Server Settings and switch the server on. Note the port and the password it shows you. Then, in Rea-Sixty: tick Talk to OBS, put in the host (127.0.0.1 when OBS runs on the same computer), the port, and the password. The dot goes green when the two are talking, amber while it is trying, red when OBS stopped answering. A link that drops is retried every few seconds on its own.
If you switch authentication off in OBS, leave the password field empty.
The password is stored the way every other setting is, in clear text in REAPER’s settings file, and it is kept apart from the rest so a shared setup does not carry it.
The actions
- OBS: start / stop recording — the lamp follows what OBS reports, not what the key asked for. Stop the recording in OBS itself and the lamp goes out on its own.
- OBS: pause / resume recording — the file stays one file.
- OBS: chapter mark in the recording — drops a chapter mark so the take is findable in the edit. OBS numbers them. Chapter marks want one of the Hybrid formats; on anything else OBS refuses and the status line says so.
- OBS: switch to scene — pick the scene by name in the editor’s drop-down, which lists what OBS is showing right now, or type a name if OBS is not running yet. The number above it still works and is what older bindings use, but a number counts positions, and positions move the moment you reorder the scene list in OBS. A name does not.
Scenes on eight keys
Give a soft-key bank the dynamic kind OBS Scenes. The keys then read your scene names, live, and the one on air is lit. Pressing one switches. More than eight scenes means the first eight are on the keys; the surface has eight and OBS has no notion of a page.
Marker cues
Name a marker obs: Wide and OBS switches to the scene called Wide when the playhead passes it. The name flashes on the UF1’s time field as it happens.
Same rules as the Hue cues, and for the same reason: forwards only, and only while the transport rolls. Dragging back past three cues fires nothing.
What this does not do
Streaming, the replay buffer, the virtual camera and muting single sources are not wired. The link is there, so they are a small job each, but nothing is bound to them today.
Stream Deck and Companion
Rea-Sixty carries a small server — the bridge — that external control apps talk to. Two clients use it: an official Stream Deck plugin, and a community Bitfocus Companion module. Both let you fire any Rea-Sixty action from a button and read live meters back.
Neither is part of the ReaPack package.
The Stream Deck plugin
Download com.reasixty.companion.streamDeckPlugin from the Assets of any release and double-click it — the Stream Deck app installs it. There is nothing else to install and nothing to configure; no Node, no separate server. You need the Stream Deck app 6.5 or newer.
The tiles then appear in the Stream Deck action list under Rea-Sixty Companion. Drag one onto a key.
Nine tile types:
| Tile | What it fires |
|---|---|
| Favourite | Switch and cycle CS / BC favourites |
| Layer | Select binding layer 1 / 2 / 3 |
| Hardware Mode | Surface-wide toggles — Flip, Home, Settings, mirrors, overlays, learn |
| Navigation | Bank and page navigation, zoom |
| Plug-in | FX windows, chain, close-all, bypass, offline |
| Selection Set | Recall selection sets |
| Surface Target | What the surface drives — Selection and Encoder modes, sends, Parameter Groups, soft-key banks, SSL |
| Any Rea-Sixty Action | Any built-in at all, or a raw REAPER command |
| Meter | A live readout rather than a button (below) |
Each tile’s action list is pulled live from the running extension, so it always matches your installed version rather than a list baked into the plugin. The consequence is that the list is empty until REAPER is up — the property panel then reads “Rea-Sixty not connected — start REAPER with the extension.”
Keys ship blank: no image, no title. Set a Title, or tick Show track to mirror the selected track’s name.
The Meter tile shows five sources — Peak, Gain Reduction, Gain Reduction — Bus Comp, Peak + GR, and Peak + GR (Bus Comp). Gain Reduction reads the mapped channel strip, or else the first plug-in on the track that reports it, so any compressor works; the Bus Comp variants target the mapped SSL Bus Compressor.
Point it at the Selected track, the Master track, a fixed Track number… or a Track name…. The rest of the options are presentation: Track name and Track colour to show them, Name position (Bottom or Top — top reads better on an angled deck), Wrap name for a second line, and Font size (Small / Normal / Large / Extra large).
Smart abbrev. is on by default and shortens long track names intelligently. Note that it overrides the global Track-name mode rather than following it: with the box ticked you get smart abbreviation even if the surface itself is set to plain truncation, and unticking it shows the full, unshortened name.
A meter tile can also fire an action when pressed — see On press (optional).
The bridge
The bridge listens on port 49900, on loopback only — so out of the box, only the machine running REAPER can reach it.
To let Companion on another machine connect, open it to the network by running this once in REAPER’s ReaScript console and restarting REAPER:
reaper.SetExtState("rea_sixty", "sd_bridge_bind", "lan", true)The port can be moved the same way with sd_bridge_port. Both settings are read once when the extension loads, so a restart is required either way.
The bridge has no authentication. In LAN mode anyone who can reach the port can drive REAPER. Only open it on a network you trust.
Two limitations of the Stream Deck plugin are worth knowing before you plan a setup:
- It always connects to 127.0.0.1 on port 49900. There is no host or port setting. So the Stream Deck plugin works on the machine running REAPER only — the LAN option above is useful for Companion, not for it.
- Moving the port with
sd_bridge_porttherefore disconnects the Stream Deck plugin permanently. Only change the port if Companion is your only client, or if something else on the machine already occupies 49900.
If the port cannot be claimed at all, the bridge fails quietly and everything else keeps working. The log still reads StreamDeck bridge listening, so keys that never connect are the only sign.
The Companion module
Community module, provided as-is. It is not officially supported, and it is not a one-to-one port of the Stream Deck plugin: Companion styles buttons through feedbacks rather than pre-made tiles, and some conveniences — metering a track by name, for one — are not implemented. The source is in the repository for anyone who wants to extend it.
It needs Bitfocus Companion 4.x and is installed as a developer module: run npm install inside companion/, then point Companion’s Developer modules path at the directory containing that folder and restart the launcher. Rea-Sixty then appears under Connections → Add connection.
Do not point the developer path at a symlink. Companion runs developer modules under Node’s permission model, which refuses to read through one. The connection dies at startup with nothing but
Error: Restart forcedin the log — the real reason only appears at debug log level. Use a real directory.
The connection is configured with a REAPER host and Bridge port, plus which tracks to meter: the selected track, the master, and a comma-separated list of track numbers. Out of the box only the selected track is metered, and each metered track is polled about fifteen times a second — so list only what you need.
It provides an action for any Rea-Sixty built-in (the list again pulled live), plus REAPER commands by numeric ID or by action string. Feedbacks cover the active binding layer, flip state, a meter-over-threshold test with a configurable dB threshold, and a graphical meter bar. Variables expose the connection state, selected track name and number, active layer, flip, and per-track peak and gain-reduction values. Presets ship grouped by category, with a Meters group and a Status group.
If the keys go dead
Both clients reconnect by themselves roughly every one and a half seconds, so starting REAPER after the Stream Deck app is fine — the keys come to life on their own, and nothing needs reinstalling.
While the bridge is unreachable, Stream Deck meter keys show a dim dash and no REAPER rather than freezing on their last reading, and any track name shown on a key clears. In Companion the meter bars drop back to the button’s own style. That display is the diagnosis: REAPER is closed, the extension is not loaded, or something else has taken the port.
Master track
The REAPER Master bus isn’t a normal track — it’s excluded from banking and has no track number. Rea-Sixty surfaces it in four places. A Channel Strip on the Master is treated exactly like one on any track, SSL Strip Mode included, and its scribble reads MASTER.
On the UC1
- Bus Compressor on the Master — a BC plug-in inserted on the Master always shows in the UC1’s Bus Comp context, sitting at the far left of the BC carousel (the Master is “track 0”). It also becomes the default BC anchor, ahead of any BC on a regular track, until you pick another. This is always on; it does not depend on the Show Master as Track 0 toggle.
- Show Master as Track 0 on UC1 (Settings → Behaviour → Master track) — with this on, rotating the CHANNEL encoder left past track 1 lands on the Master, so the channel-strip section drives the Master bus. Rotate right to return to track 1. UC1-only.
- Out-Gain → Master fader — when the UC1 is focused on the Master and there is no Channel Strip on it, the Out-Gain pot automatically drives REAPER’s Master fader (readout reads Mst Vol). No toggle needed — if there’s no CS Fader-Level parameter to ride, the pot falls back to master volume. (With a CS on the Master, Out-Gain rides the CS Fader Level as usual; the global Toggle UC1 Out-Gain (Mapped ↔ REAPER Fader) action still forces track volume on any track.)
On the UF8
Two bindable actions pin the Master onto a physical UF8 strip — fader, V-Pot (pan), Solo/Cut/Sel LEDs, colour bar and the MASTER scribble all follow the Master bus:
- Pin Master to UF8 Strip 1
- Pin Master to UF8 Strip 8
Each is a toggle (press again to un-pin; pinning the other strip switches directly). Both are bindable from the Bindings picker (category Master) and exposed as REAPER actions Rea-Sixty: Pin Master to UF8 Strip 1 / 8 for the keyboard / toolbar — handy on the UC1, which has no spare buttons.
The Pinned Master combo (Settings → Behaviour → Master track) chooses the layout:
- Replace strip (default) — the pinned strip becomes the Master and hides the track that was banked there.
- Shift banking — the regular tracks bank over the remaining 7 strips so none is hidden; the bank step and clamp drop to 7 while a pin is live.
The pin is a normal-mode feature: it steps aside automatically when a Selection Set, AUTO selection mode, a Send/Receive routing mode, or UF8 Plug-in Mode is active (all of which repurpose the strips), and resumes when you leave them. The Master wins over a TCP-pinned track on the same strip. The pin is not persisted across REAPER restarts.
Selection Sets
Active set as a track filter
When a slot is active, the visible track list is filtered to the slot’s tracks. Filter is ANDed with Folder Mode / Show Only Selected so they compose naturally.
Group slots
A Group slot tracks REAPER’s track-group membership in real time. Add a track to group N in REAPER → it appears in the surface; remove it → it disappears, without a re-recall.
Auto-mode interaction
Selection-Set Auto-Mode (Settings → Modes → AUTO) is a single global value: None (off) or one of REAPER’s six automation modes. When a selset is active in AUTO sel mode + the dropdown is non-off, recalling the slot arms its tracks to that mode. Leaving the slot OR leaving AUTO sel mode reverts those tracks to Trim/Read.
Persistence
Project-scoped Snapshot + Group slots are saved into the project’s RPP chunk via REAPER’s project-config hook (lines SELSET_<N>_DATA "..."). Global-scoped slots ride REAPER’s global ExtState (reaper-extstate.ini). The per-slot global/project flag itself, plus the Selection-Set Auto-Mode value, also live in global ExtState.
With several projects open in tabs, each tab keeps its own project-scoped slots and its own active slot: a new tab starts without them, and switching back brings the set and its filter back.
Focus Set
A ninth, ad-hoc set living alongside the 8 numbered slots — no Settings UI, no slot name, just actions you bind to hardware. Unlike the slot Selsets (which filter the visible list), the Focus Set is a pin source: its members stick to the leftmost strips and the rest of the tracks keep banking past them — nothing is hidden. Useful for keeping a working set (“the 6 drum mics + 2 talkbacks”) permanently under your hands while you still scroll the rest of the session.
- Focus Set: add selected tracks — add every REAPER-selected track to the set and turn pinning on.
- Focus Set: remove selected tracks — remove every REAPER-selected track.
- Focus Set: pin (toggle) — toggle pinning on / off. It coexists with an active slot in one direction only: pinning while a slot is up is fine, but recalling a numbered slot drops the pin.
- Focus Set: clear — empty the set in one shot.
- Focus Set: toggle selected tracks — flip membership of the selected tracks: members leave, the rest join.
- Focus Set: replace with selection — replace the set contents with the current selection.
- Encoder: scroll Focus Set members (encoder) — step REAPER track selection through the set in project order.
Clear, toggle selected and replace also have REAPER-action equivalents (REASIXTY_FOCUS_CLEAR / _TOGGLE_SELECTED / _SET_FROM_SELECTION), and the pin toggle has REASIXTY_FOCUS_RECALL, for a keyboard shortcut or toolbar button. The older REASIXTY_FOCUS_PIN_FOCUSED still works and does the same as add selected tracks.
Collisions. Focus pins, REAPER TCP pins (B_TCPPIN) and a Master pin compose left to right: the Master strip (when Master is pinned to strip 1 in Shift mode), then the pinned tracks (TCP and Focus), then the banked rest. With Master pinned to strip 8, Master sits at the right end. Focus pins work in both TCP and MCP surface-mirror modes; TCP pins only in TCP mode, and only while REAPER is honouring them (the Override/unpin and Show/hide all pinned tracks in TCP actions stand the TCP pins down — Focus pins are unaffected).
Auto-mode. A dedicated Focus-Set Auto-Mode dropdown (Settings → Modes → AUTO) arms members to a chosen automation mode when pinned in AUTO sel mode — decoupled from the slot Selset auto-mode. Members are exempt from the Auto-hide Trim/Read filter, so a pinned member stays visible even when unarmed.
Persists per-project (saved into the RPP via the same project-config hook the numbered slots use), and each open project tab keeps its own set and pin.
Parameter Groups
Eight slots + a per-slot member list of REAPER tracks. Every member of every active group receives the same parameter edit when you twist a UF8 V-Pot or a UC1 pot. A fader broadcasts only when it is driving a plug-in parameter: ordinary track volume is deliberately left alone, so a group never moves levels you did not mean to move.
Slot management UI in Settings → Parameter Groups. Each slot:
- Name
- Member tracks (Add Selected, Clear), plus one Remove Selected Tracks from All Groups button below the table
Each slot has its own Active checkbox, and several can be active at once — an edit fans out to every member of every active slot.
Temp-group mode: when Multi-Select acts as temporary Parameter Group is on and no slot is active, the selected tracks are the group, as long as two or more are selected.
Which edits travel — and onto which tracks:
- SSL Channel Strip / Bus Comp: the edit follows the surface control, so it lands on the matching control even when members run a different variant of the plug-in (e.g. one track on Channel Strip 2, another on 4K E). A learned plug-in copies the same parameter to members whose plug-in matches the same learned map.
- Any other plug-in — no mapping or FX-Learn required: the edit copies to members that host the exact same plug-in. Tweak a knob (on the hardware or with the mouse on the plug-in GUI) and every member track with an identical plug-in follows along. Members without that plug-in are silently skipped.
This deliberately does not copy across different plug-ins: the same internal value rarely means the same thing on another plug-in, so only identical plug-ins mirror.
Storage: each track’s member-of-which-slots state is a bitmask in P_EXT (P_EXT:reasixty:pg_mask). Slot names and active flags ride in the project file; the global JSON holds only the multi-select toggle.
Mapping Exchange
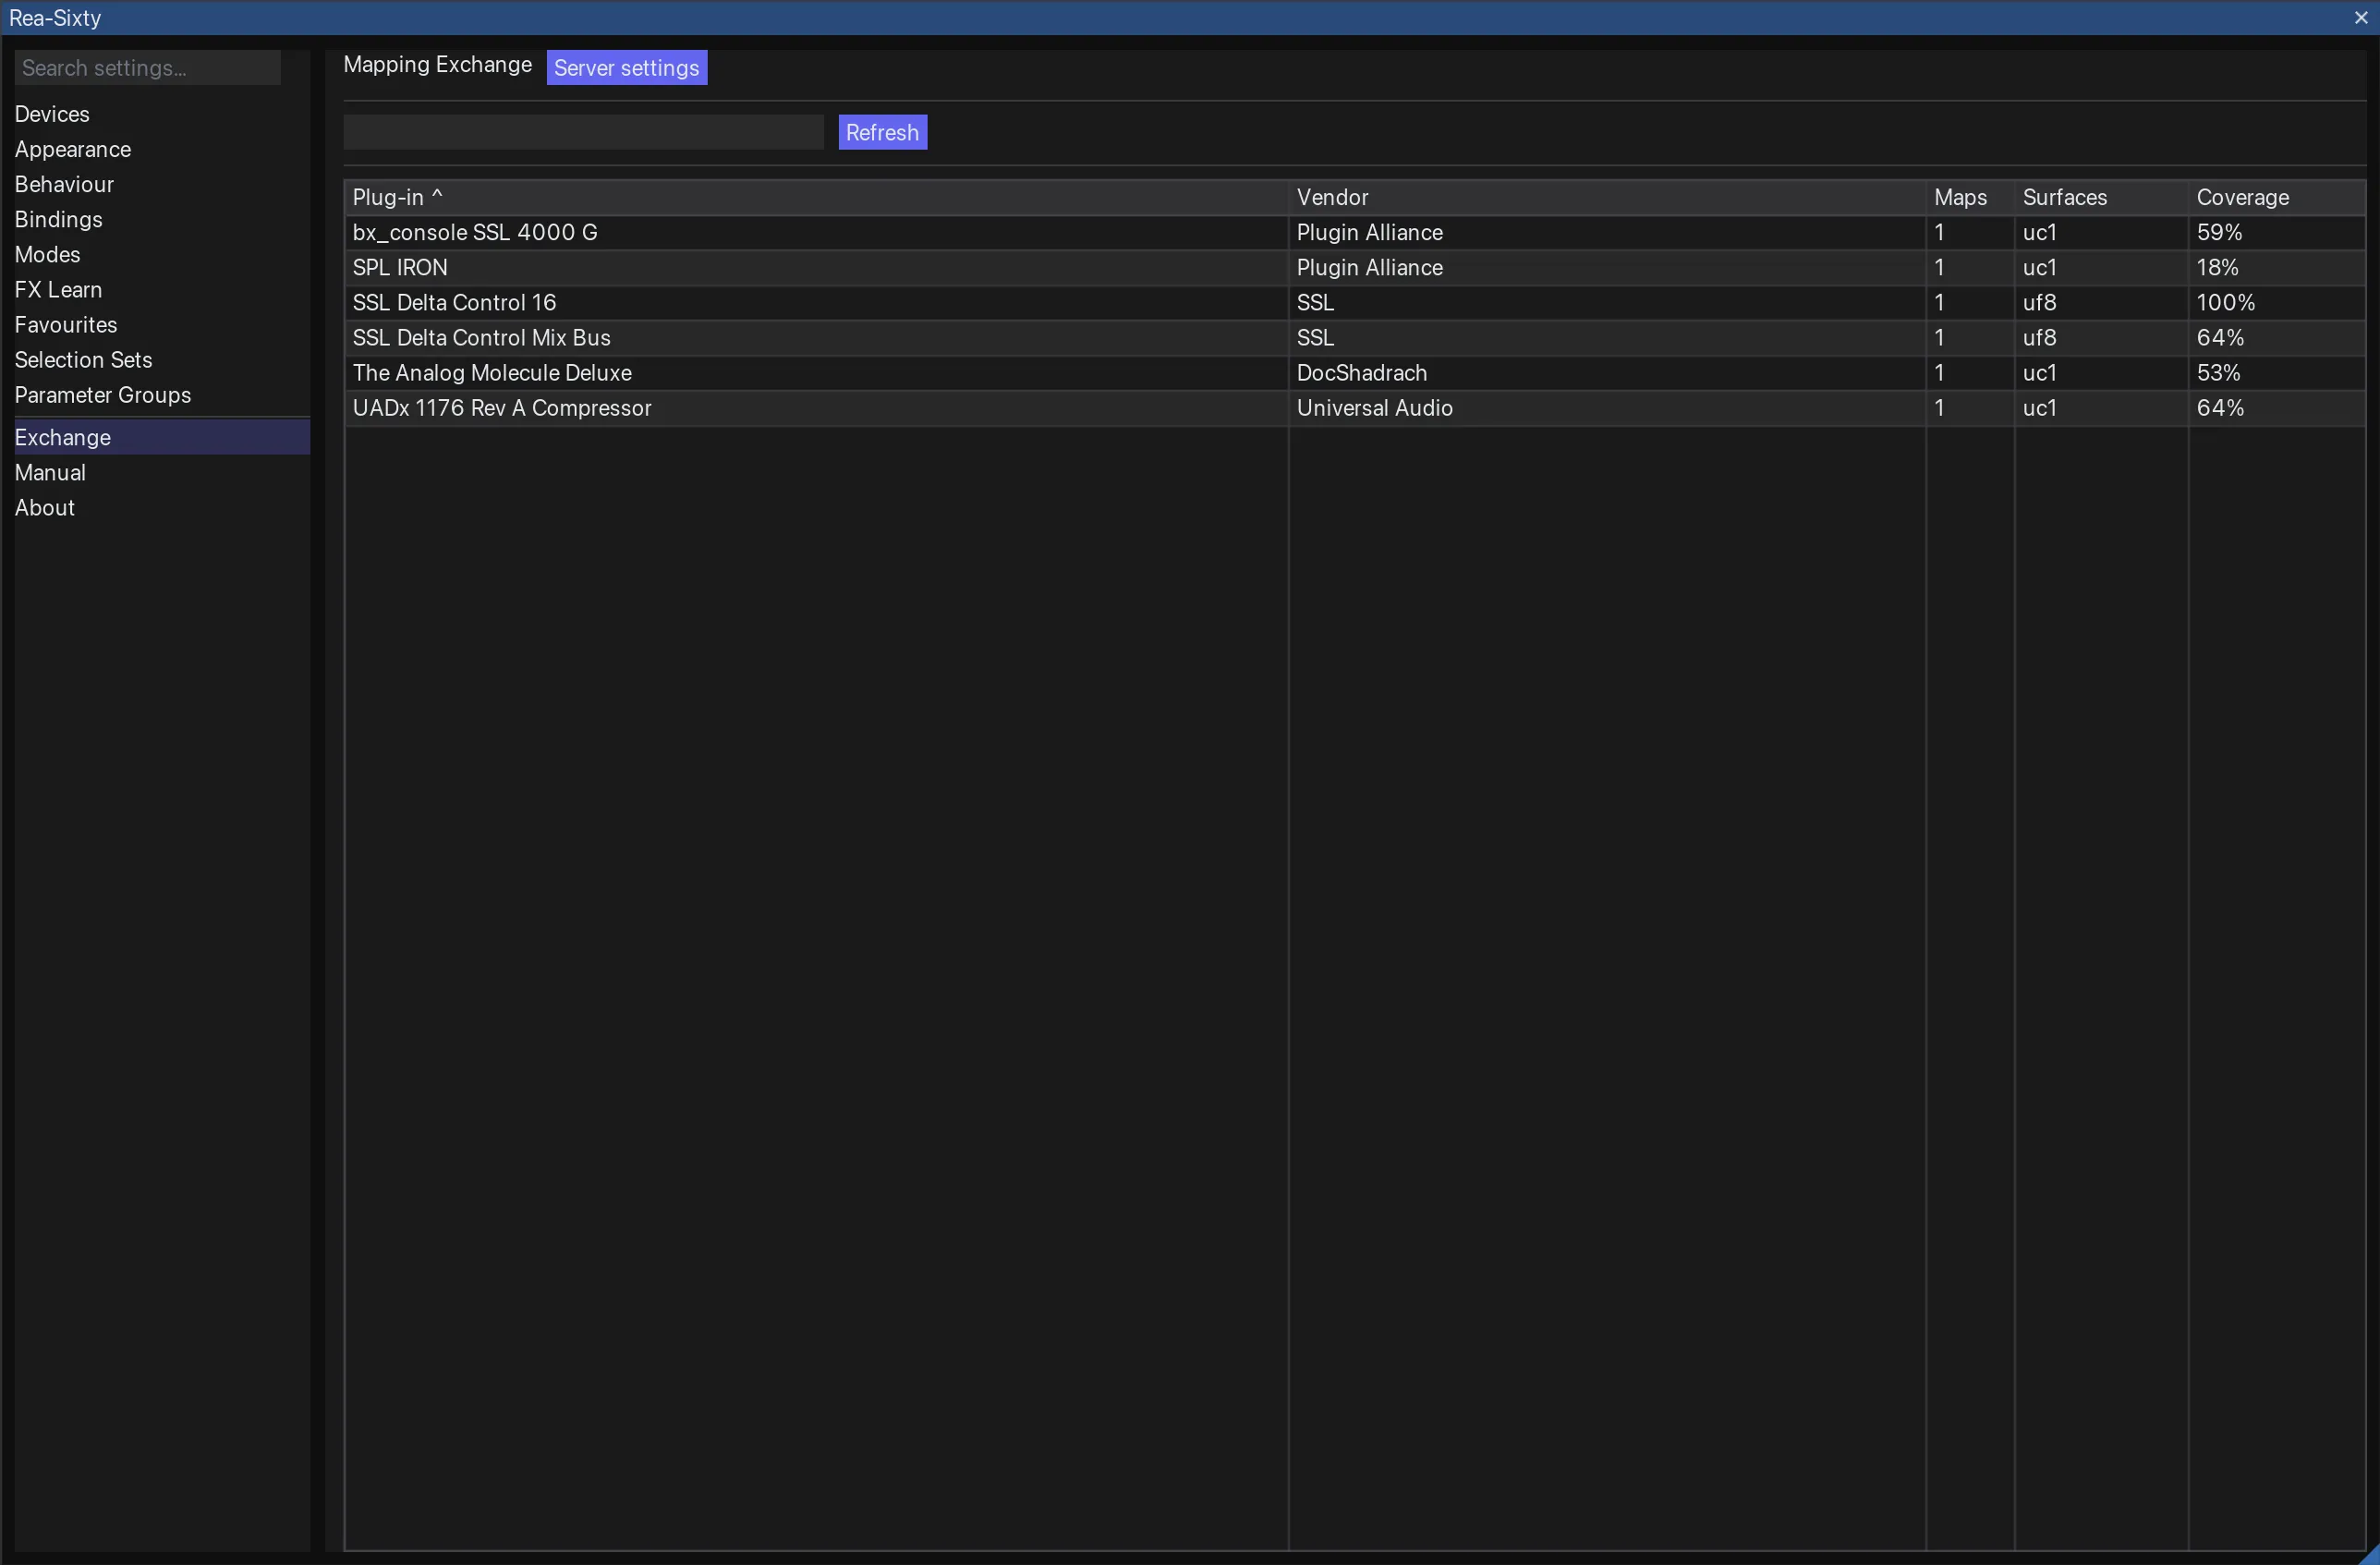
The Mapping Exchange — plug-ins other people have already taught Rea-Sixty, with the surface each map targets and how much of it the map fills.
A shared library of plug-in maps, reachable from Settings → Exchange. If someone has already taught Rea-Sixty a plug-in you own, you can pull their map instead of learning it again.
Browsing
The landing table lists every plug-in the exchange knows:
| Column | Meaning |
|---|---|
| Plug-in | The plug-in name |
| Vendor | Its maker |
| Maps | How many maps exist for it |
| Surfaces | Which surfaces those maps target (uc1, uf8, uf1) |
| Coverage | How much of the plug-in the best map controls, as a percentage of its parameters |
Pick a plug-in and you get its maps, one row each, with the author, the surface, the coverage and a Works column — whether other people report the map working. Open a map and you see exactly what it does before you take it: a Control / Parameter table, an Also mapped list for parameters with no fixed control, the Modifier layers if the author used any, and the EXT FUNCS list for the UC1’s hidden menu.
Taking a map
If you already have a map for that plug-in, Rea-Sixty asks rather than overwriting: Replace mine or Keep mine. Nothing is replaced silently.
Publishing
Server settings holds the server address and a device token. The token is what lets you upload; getting one is a browser round-trip you start from that pane. Without a token you can browse and download. Publishing, and confirming that a map works for you, need it.
Bindings
The Bindings tab renders the UF8, UC1 and UF1 hardware as schematics. Every button / knob / fader is editable.
Per-binding fields
- Action type: None (disabled) / REAPER Action / Keyboard macro / Native Action (Built-in) / MIDI Command
- Action name (Native + REAPER Action) / MIDI message (MIDI Command)
- Modifier: None / Shift / Cmd / Ctrl. There are four, and no combinations.
- Behavior: Toggle / Press, where the action can be on or off, plus an Enable long-press switch
- LED override: colour + brightness
Modifier system
The three modifier-key actions (Modifier: Shift / Fine (double-click latches), Modifier: Cmd, Modifier: Ctrl) shift every other button’s binding to that modifier slot while held. Modifier keys themselves are bindable to any physical button. Set the key’s Behavior to Toggle and one press turns the modifier on, the next turns it off.
Double-clicking Shift (= the SSL FINE key) latches it on. Press once more to unlatch.
A button carries four short-press slots, four long-press and four double-press, one per modifier — twelve in all, and none of them a combination.
Long-press
A long-press binding fires after the long-press threshold elapses. The short-press binding fires on release if the threshold wasn’t reached. A button can have both bindings.
Toggle / Press
- Toggle: each press switches the action on or off.
- Press: the action is on while you hold the key and off when you let go. Nothing repeats while you hold it.
- An action that fires once (next track, zoom, a marker) or picks one of several modes (automation Read, a jog mode) has no choice to make: it fires once per press.
- Long-press (when enabled): fires once when the long-press threshold elapses. Enabling it makes the short action wait for the release.
LED override
Every bound button can override its LED colour and brightness, independent of the action’s natural state.
REAPER Action picker
Pick any action from REAPER’s Action List by name or command ID. Supports filtering and ReaScript loading (Load ReaScript button drops a .lua file into the catalog).
Named commands (the ones starting with an underscore) are resolved by name rather than by number, so ReaScripts stay bound when REAPER re-numbers its action list.
MIDI Command bindings
Emit a MIDI message from any button, from any soft-key slot on the UF8 and the UF1, and from any step of an action chain. Four message types: Note On, Note Off, Control Change and Program Change. You set the channel (1 to 16) and the two data bytes, which mean note number and velocity, CC number and value, or a program number, where the second byte is not sent at all.
The message goes to one of REAPER’s own MIDI output devices, picked by name in the editor, or to every one of them at once if you leave the picker on (all enabled outputs). The target is therefore whatever REAPER already talks to, and there is nothing to patch or route afterwards. A device that is currently unplugged still appears, marked (offline), so a binding is not silently lost when you open the editor without that hardware connected.
Because a slot is a chain, one key can send several messages with a gap between them. That is how a unit which wants a bank select before its program change gets both from one press.
If the bound device is no longer in REAPER’s output list, unplugged or renamed, the press does nothing and the reason is written to rea_sixty.log.
Operational modes (track filters)
Folder Mode
Toggle: Toggle Folder Mode (parents only) action. When on, only top-level (depth-0) tracks are visible on the surface. Folder children appear only when “spilled” — long-press a folder parent’s SEL button to toggle that parent’s spill.
Nested folders (ancestor-chain spill). Long-pressing a folder at any depth spills that folder; the ancestor chain stays in the spill set as well, so the intermediate hierarchy remains visible. Collapsing an ancestor (re-long-pressing it) hides its subtree but keeps the descendants’ spill state in memory, so re-spilling that ancestor restores the previous drill-down without having to long-press each level again. Toggling Folder Mode off and on again keeps the spilled folders as they were. They are saved with the project, one set per project tab.
VCA Mode and VCA spill
A VCA in REAPER is a track grouping: a track that is VCA lead in a group moves the volume of every track that is VCA follow in the same group (Track Grouping Parameters). All 128 groups of REAPER 7.23 and later count; older REAPER versions have 64.
VCA spill. In VCA Mode, long-press SEL on a VCA lead. Outside VCA Mode, use VCA Spill (selected track). The lead moves to strip 1 and stays there, its followers take the strips after it, in track order, and bank as usual. Nothing else is on the surface while the spill is on; Folder Mode, Selection Sets, Show Only Selected and the AUTO filter rest until it ends. The lead’s value line reads VCA Lead with Spill on the right.
- A follower that is itself a VCA lead reads VCA Lead. Long-press its
SELto go one level deeper; the leads line up on the left, outermost first. During a spill long-pressSELmoves through the levels whether VCA Mode is on or not. - Long-press the deepest lead to go back one level, a lead in between to go back to its level, and the outermost lead to leave the spill.
- Leaving returns to the bank you were on before the spill. Switching project tabs, or the lead disappearing, ends the spill too.
- In Folder Mode, a folder parent that is also a VCA lead spills as a folder. During a VCA spill, long-press
SELonly moves through the VCA levels. - Settings → Behaviour → Tracks → VCA spill shows hidden tracks (on by default) decides whether followers hidden in the TCP or Mixer come along.
- Only tracks set to VCA follow in one of the lead’s groups spill. Children of the lead’s folder that are not in the group stay out.
- Turning the V-Pot on a lead, or a UC1 pot writing to it, shows the real value for three seconds, as on a Folder Mode parent.
VCA Mode. Toggle: Toggle VCA Mode (top leads only) action. When on, the surface shows only the VCA leads that follow no other VCA, each reading VCA Lead. A lead that follows another lead is reached by spilling its parent.
Long-press SEL is a binding: its factory action is Spill (folder / VCA) on the UF8 and the UF1. Rebind it in Settings → Bindings and long-press SEL does something else; the spill stays available as the Spill (folder / VCA) action on any other key, where it acts on the selected track.
Actions. VCA Spill (selected track) does the long-press on the track selected in REAPER, in any mode, from any key, the UF1 or a keyboard shortcut. Leave VCA Spill leaves from any level. Both light while a spill is on. REAPER’s Action List has them too, as Rea-Sixty: VCA spill (selected track), Rea-Sixty: Leave VCA spill and Rea-Sixty: VCA Mode (top leads only) (toggle); Folder Mode is there as Rea-Sixty: Folder Mode (parents only) (toggle).
Show Only Selected
Toggle: Toggle Show Only Selected action. When on, only currently-selected tracks appear on the surface. Live filter — changing REAPER selection updates the surface within one timer tick.
Selection-Set filter
ANDs with Folder Mode / Show Only Selected. When a slot selset is active, only its tracks appear (further filtered by Folder Mode if also on). The Focus Set is not a filter — it is a pin source that coexists with the slot filter (see Selection Sets → Focus Set); it never hides tracks.
Visibility-follow filter
Settings → Behaviour → Tracks → “Surface mirrors: TCP / MCP” (default TCP) — the surface only shows tracks that are visible in the mirrored view, so anything REAPER hides in the TCP (or, in MCP mode, in the Mixer) drops off the surface. In TCP mode that covers the children of a folder collapsed to hidden (children collapsed to small stay); in MCP mode, the children of a folder collapsed in the Mixer. ANDs with all other filters.
Auto-hide Trim/Read
Settings → Modes → AUTO → “Show only tracks armed for automation writing (hide Trim / Read)” — within AUTO selection mode only, hides tracks whose automation mode is Off/Trim (0) or Read (1).
Troubleshooting
Try this first. If the surface was working and has stopped — dead faders, no scribble text, buttons ignored — run the REAPER action Rea-Sixty: Restart Rea-Sixty (re-open devices). It closes and re-opens the devices without the Preferences round-trip and clears most wedged states. Give it a keyboard shortcut; a hardware key is no use when the hardware is what stopped responding.
It re-opens the devices, not the extension, so it will not pick up a newly installed build — that still needs REAPER restarted.
Rea-Sixty does not appear in Preferences → Control/OSC/Web → Add
The dylib / dll / so didn’t load. Check:
- macOS Console for codesign / dyld errors.
- Windows Event Viewer → Application for module-load errors.
- Linux: start REAPER from a terminal and watch stderr.
Make sure the runtime libraries are in the same directory as reaper_rea-sixty.{dylib,dll,so} — for Windows this means %APPDATA%\REAPER\UserPlugins\, where the delay-load resolves them at first call.
Surface does not respond / “SSL360Core owns the device”
SSL 360° is running and has claimed the SSL vendor interface exclusively. Quit SSL 360° and restart REAPER.
Disconnect after sleep / wake or sustained idle (macOS)
Known issue: both UC1 and UF8 IN endpoints can fail within ~3 ms of each other on a sustained host-side USB stack condition. libusb_reset_device does not escape it. Physical replug (one or both devices) recovers. Diagnostic logs are rea_sixty_uc1_stale.log, rea_sixty_uf8_stale.log and rea_sixty_uf1_stale.log in the system temporary folder (see Diagnostics).
Track-colour wrong
- Confirm Settings → Appearance → Surface display → “SEL LED follows REAPER track colour” is on.
- The colour-bar quantiser is HSV polar — subtle RGB differences in REAPER’s colour picker can land on neighbouring palette slots. Pick a more saturated colour if the nearest palette slot looks wrong.
GR meter reads wrong on a third-party compressor
- Enable Settings → Devices → Metering → “GR meter source: Show any GR Data”.
- Confirm the compressor implements the PreSonus VST3 host-side
GainReduction_dBconfig-parm. Plug-ins that don’t expose this will not drive the meter regardless of settings.
Linux port resets / xhci_hcd disabled by hub (EMI?)
Plug UF8 and UC1 into separate PC USB ports. Daisy-chaining UC1 through UF8’s downstream port triggers xhci_hcd port cycling on Linux 6.17.
Settings window doesn’t appear
ReaImGui isn’t installed. Install it via ReaPack. Hardware control still works without it.
Diagnostics
Log files live in the system temporary folder — /tmp on macOS and Linux, %TEMP% on Windows. Settings → About → Logs shows the real path and has a button to open the folder.
rea_sixty_uc1_stale.log— UC1 device-handle diagnosticsrea_sixty_uf8_stale.log— UF8 device-handle diagnosticsrea_sixty_uf1_stale.log— UF1 device-handle diagnosticsrea_sixty.log— general log- macOS Console / Windows Event Viewer / Linux journal for in-process errors
Note that Console output in Settings → About → Logs is off by default, so REAPER’s Console stays quiet. The log files are written either way; turn the checkbox on if you want messages in the Console as well.
Vendor relationship
Not affiliated with Solid State Logic. SSL ACP Support replied to the project author on 2026-05-18 confirming “no objections to the public, open source project” but declined to share protocol documentation.
Protocol stays self-decoded; documented in docs/protocol-notes.md and adjacent capture notes in the repo.
No SSL binaries, firmware, or trademarks are redistributed. “SSL”, “UF8”, “UC1”, “UF1”, “360°” are property of Solid State Logic Ltd.